How to Add a Header to Your Website
A header is a crucial part of your website that typically includes your logo, navigation menu, contact info, and other key elements. It sets the tone for your site and provides easy access to important areas for your visitors.
With Kea Builder, adding a professional and customizable header is quick and seamless.
✅ Steps to Add a Header in Kea Builder
- 🟢 Step 1: Open the Layout Panel
From your Kea dashboard or page editor, click on the “Layout” tab in the top or side menu.
- 🧱 Step 2: Select the ‘Header’ Section
Click on the “Header” option to start building a new header layout.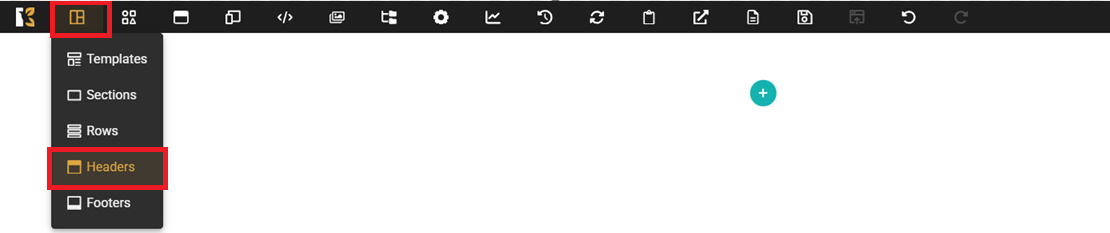
- ➕ Step 3: Click ‘Create’
Hit the “Create” button to open the header setup page.
- 🧩 Step 4: Create Header or Add Global Header
On the next screen, choose either:
“Create Header” – to apply the header to specific pages
“Add Global Header” – to apply the header site-wide across all pages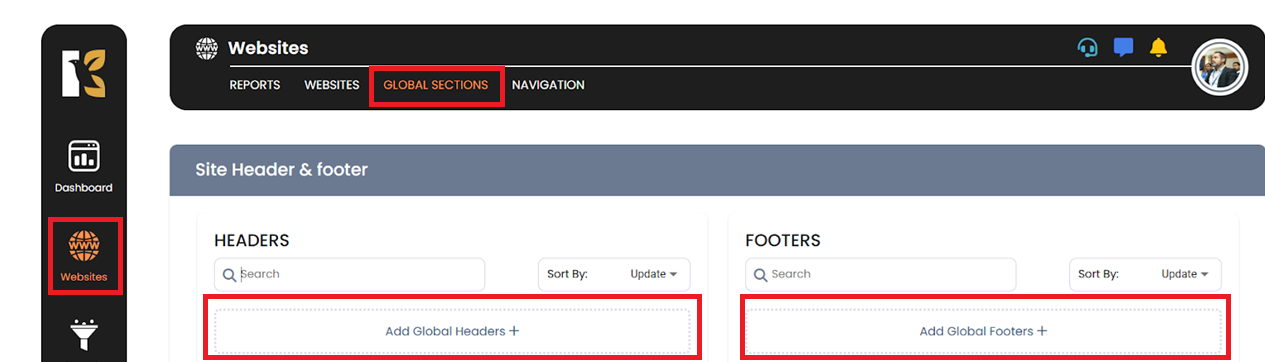
- 📝 Step 5: Name Your Header
Enter a name for your header so you can easily manage or reuse it later.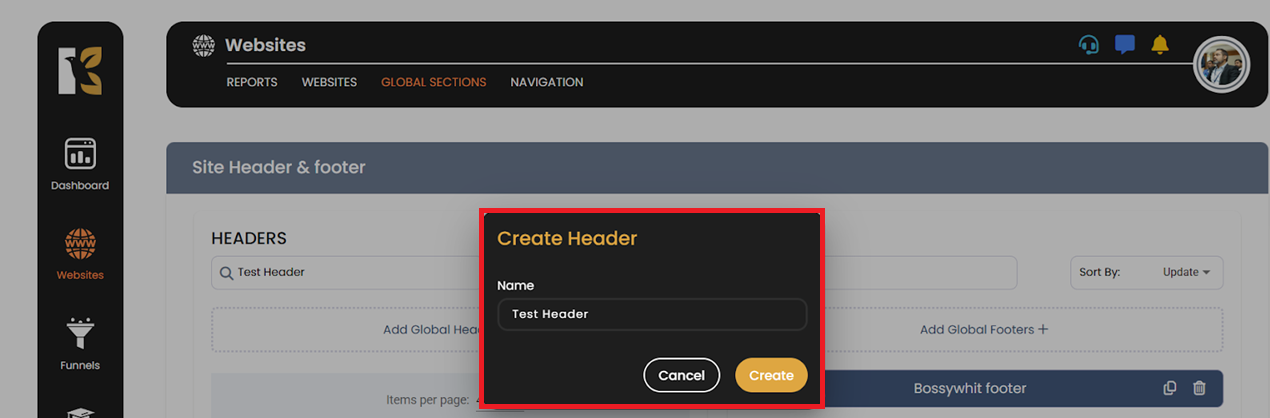
✏️ Customize Your Header
Now that your header is created, you can start designing:
- Add elements such as a logo, navigation links, buttons, or social icons.
- Style your header with background colors, fonts, and spacing.
- Make it responsive to ensure it looks perfect on all devices.
Headers help define your brand identity and guide users throughout your site. Kea Builder gives you full flexibility to create headers that are beautiful, functional, and consistent across your entire website.