How to Add a New User
Adding a new user to your account allows you to manage access, delegate tasks, and collaborate effectively within the platform. Whether you're adding a team member, a client, or an external collaborator, this guide walks you through the step-by-step process of adding a user to your account.
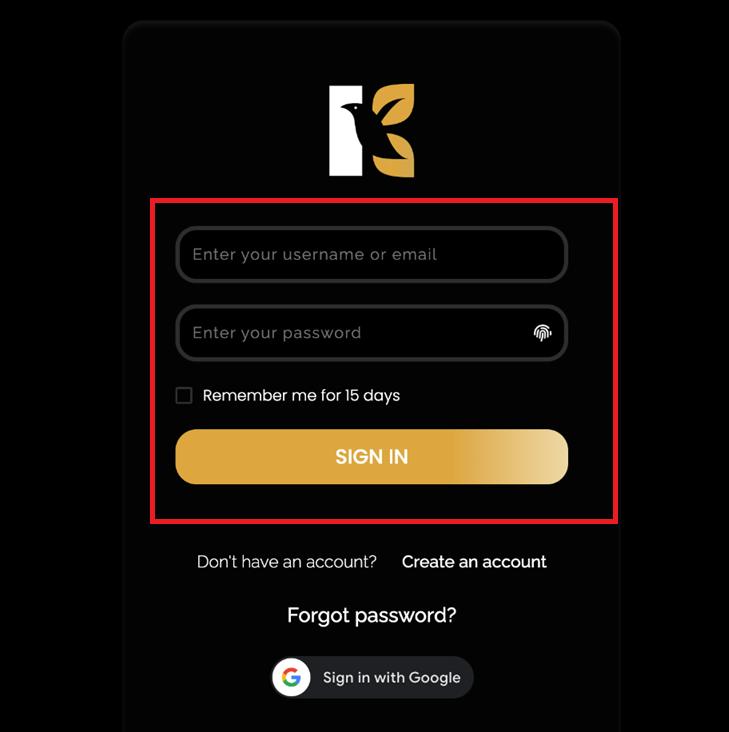
Step 1: Log In to Your Account
- Begin by logging in with your registered username/email and password.
- Upon successful login, you will land on the Main Dashboard — your central hub to manage account settings, users, and activities.
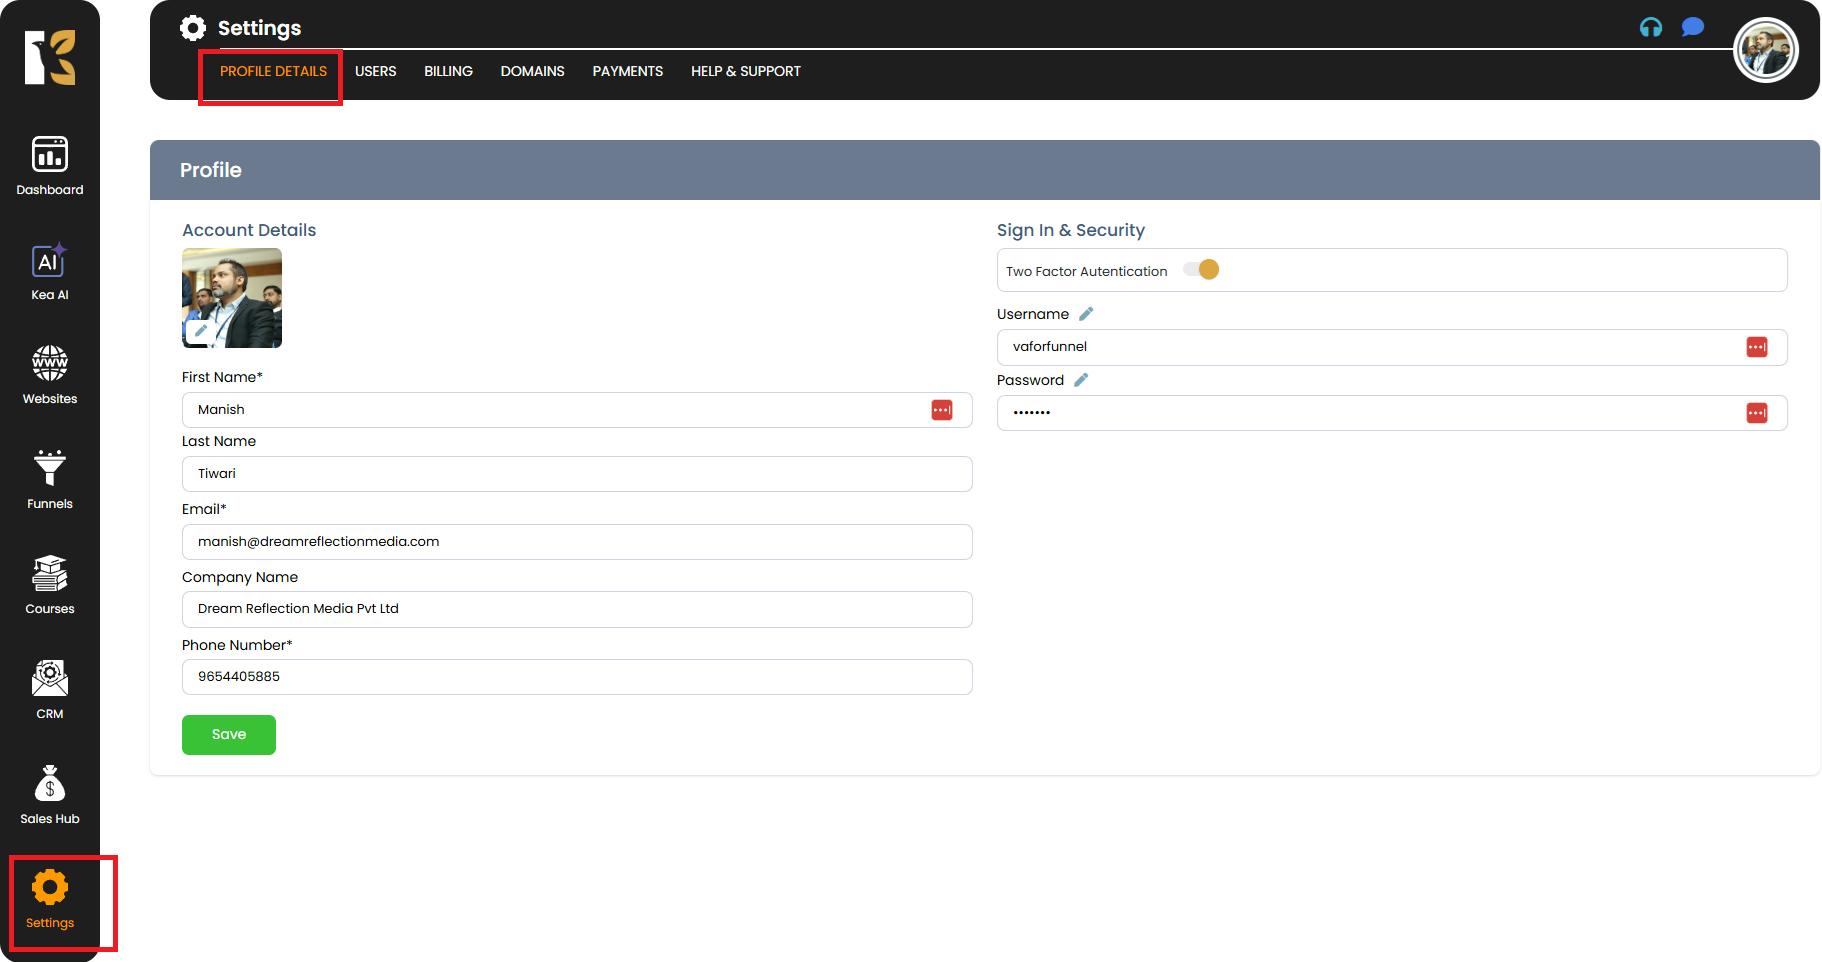
Step 2: Navigate to the Settings Panel
- On the vertical menu bar on the left-hand side of the dashboard, scroll down to locate the Settings option.
- Click on Settings to open the account management panel.
- By default, you will be redirected to the Profile Details section under Settings.
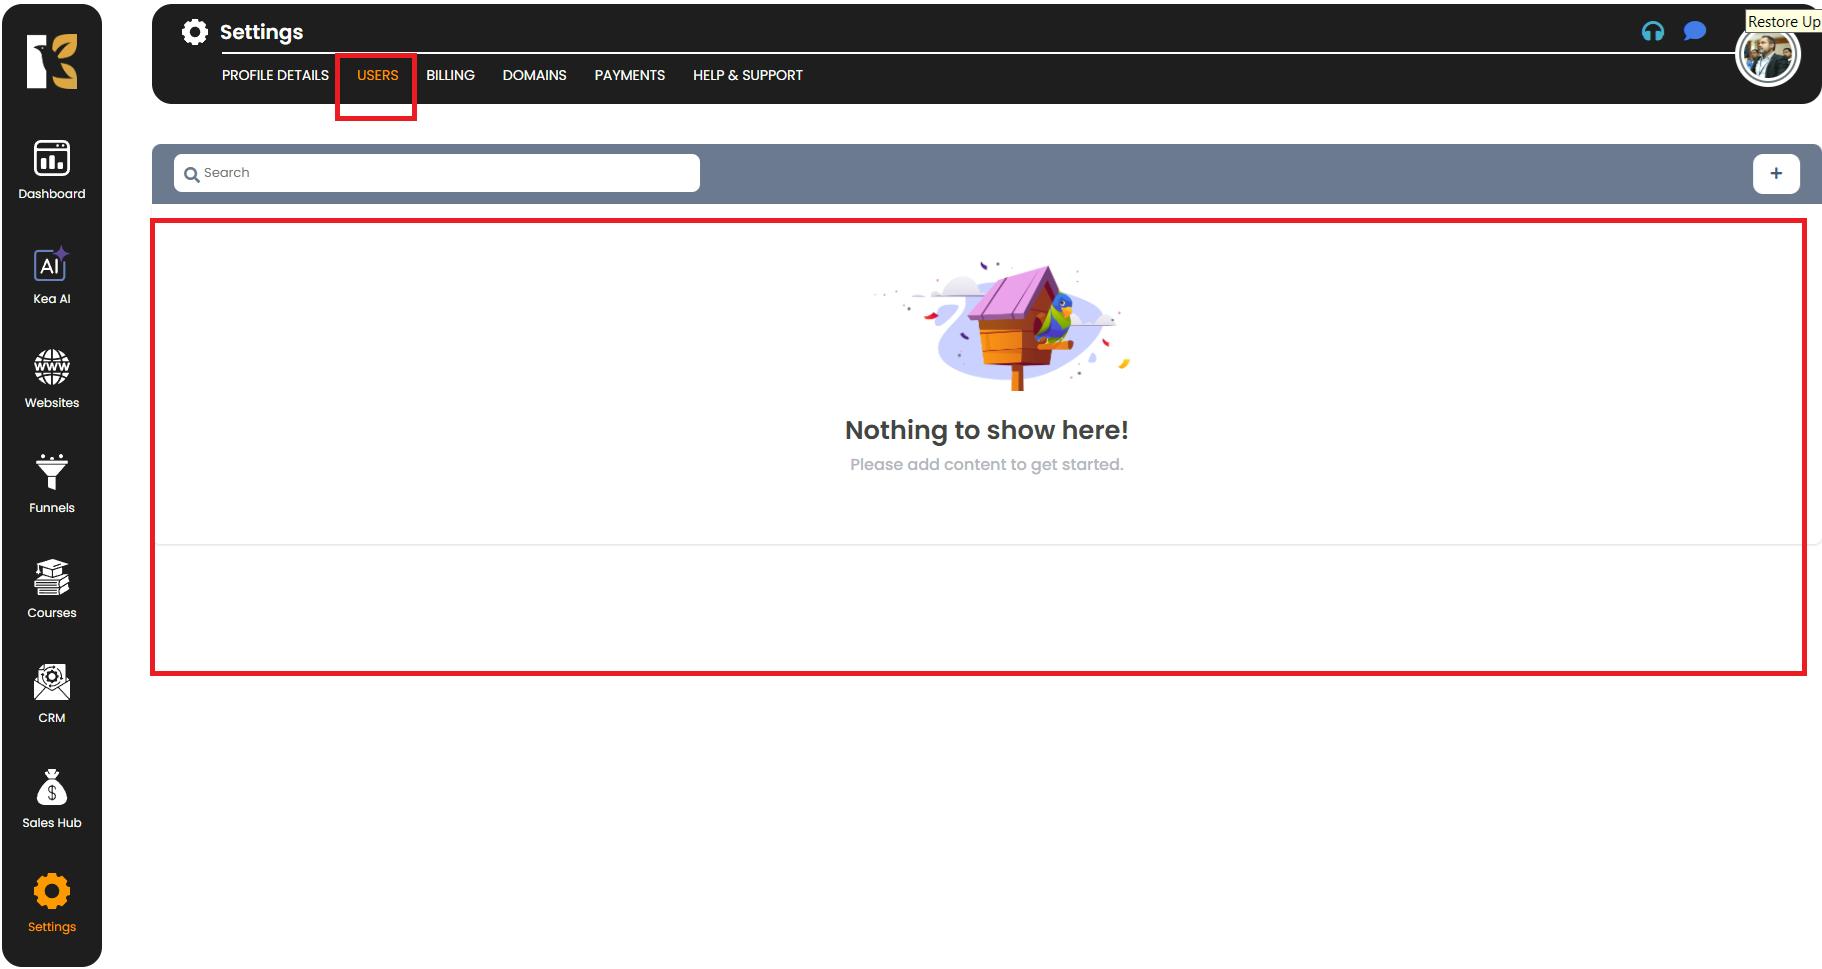
Step 3: Access the Users Section
- At the top menu within the Settings page, you’ll see multiple tabs.
- Find and click on the “Users” tab, which is located next to Profile Details.
- Here, you’ll be able to view the list of existing users associated with your account (if any).
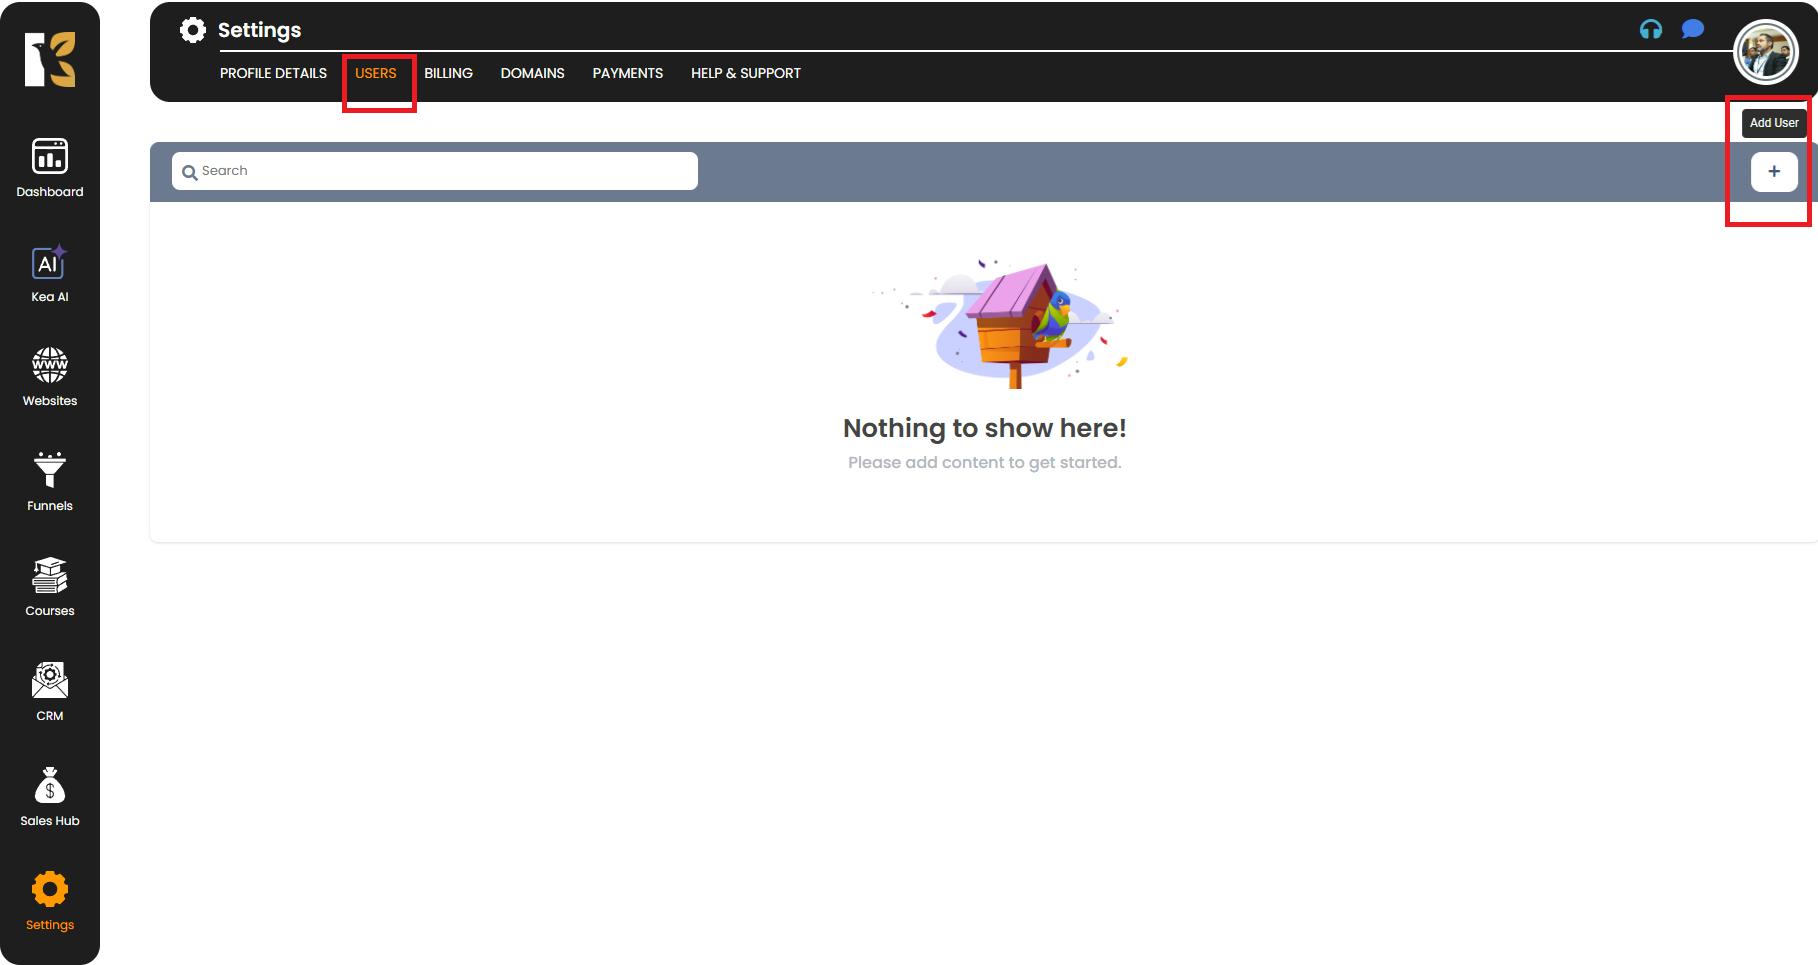
Step 4: Add a New User
- Just below the horizontal top menu, look for the “Add User” button marked with a “+” icon.
- Click on the “+” Add User button to open the New User form.
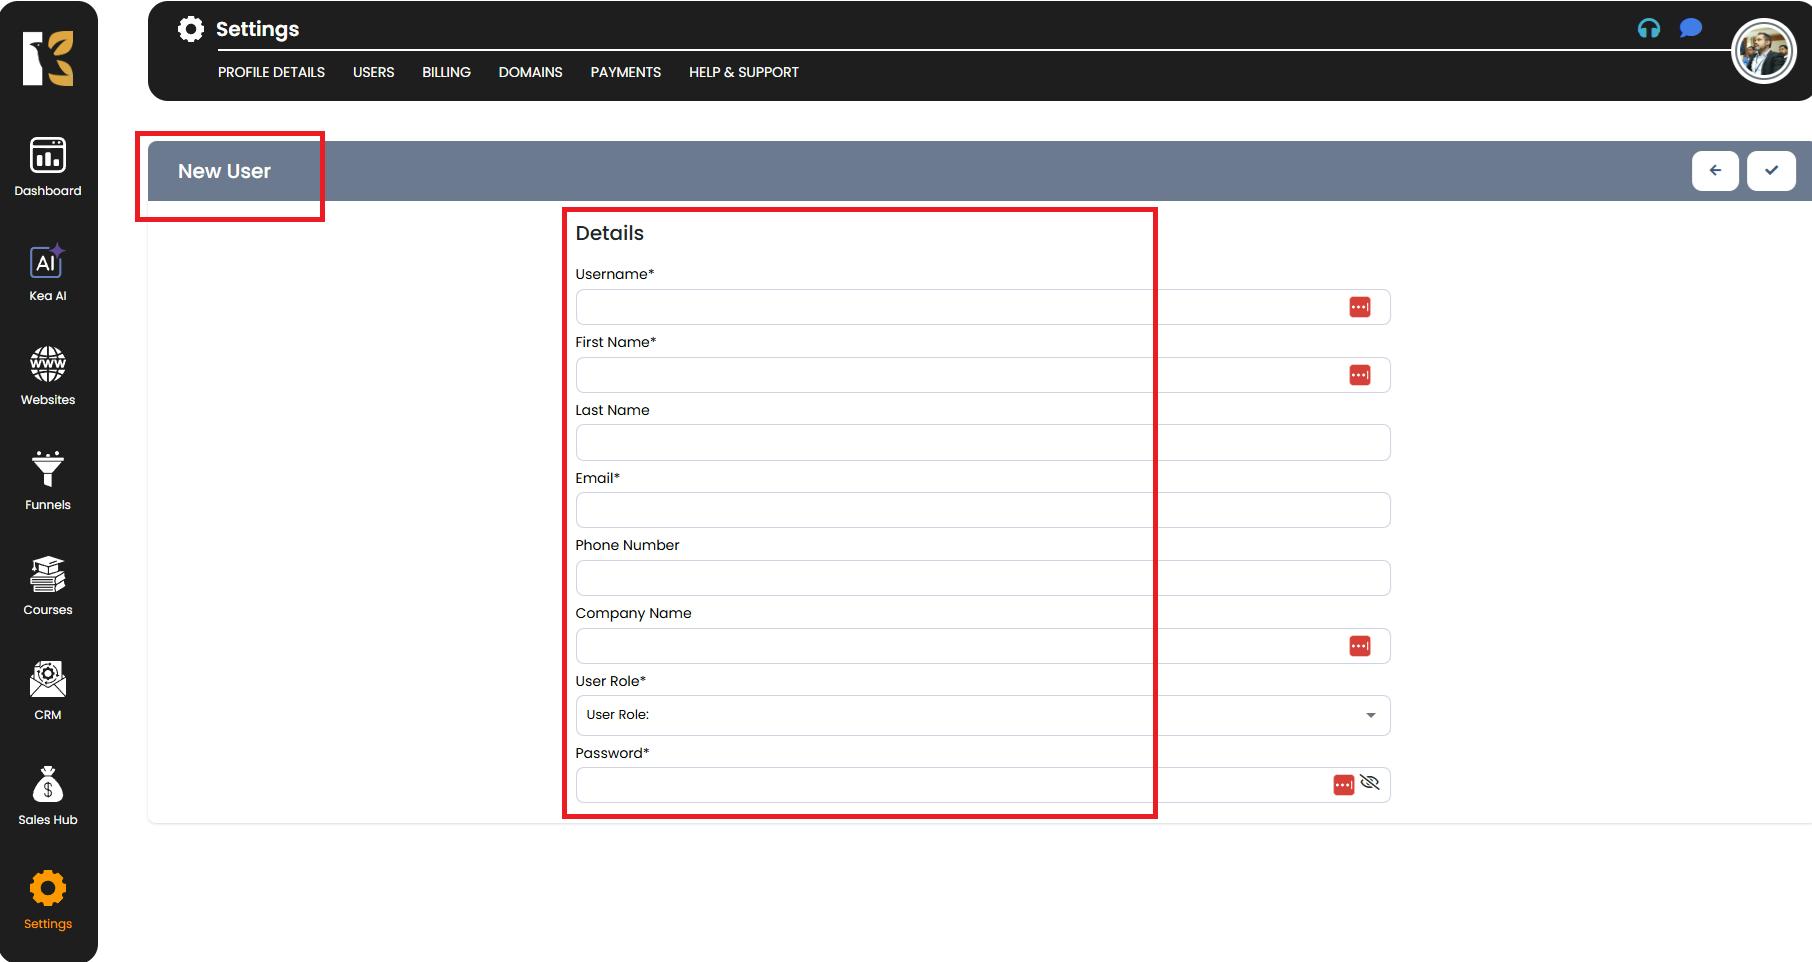
Step 5: Enter User Details
A New User page will open where you’ll be prompted to fill in the mandatory details for the user you want to add. These include:
- Username → Create a unique username for the user.
- First Name & Last Name → Enter the user’s full name.
- Email Address → Provide a valid email ID for account-related communications.
- Phone Number → Enter the user’s active contact number.
- Company Name → If applicable, specify the company the user belongs to.
- User Role → Assign an appropriate role (e.g., Admin, Manager, Editor, or Viewer) based on their level of access.
- Password → Set a secure password for the new user. You may share this with them so they can log in.
Pro Tip: Choose user roles carefully to ensure that each user only has the level of access they need.
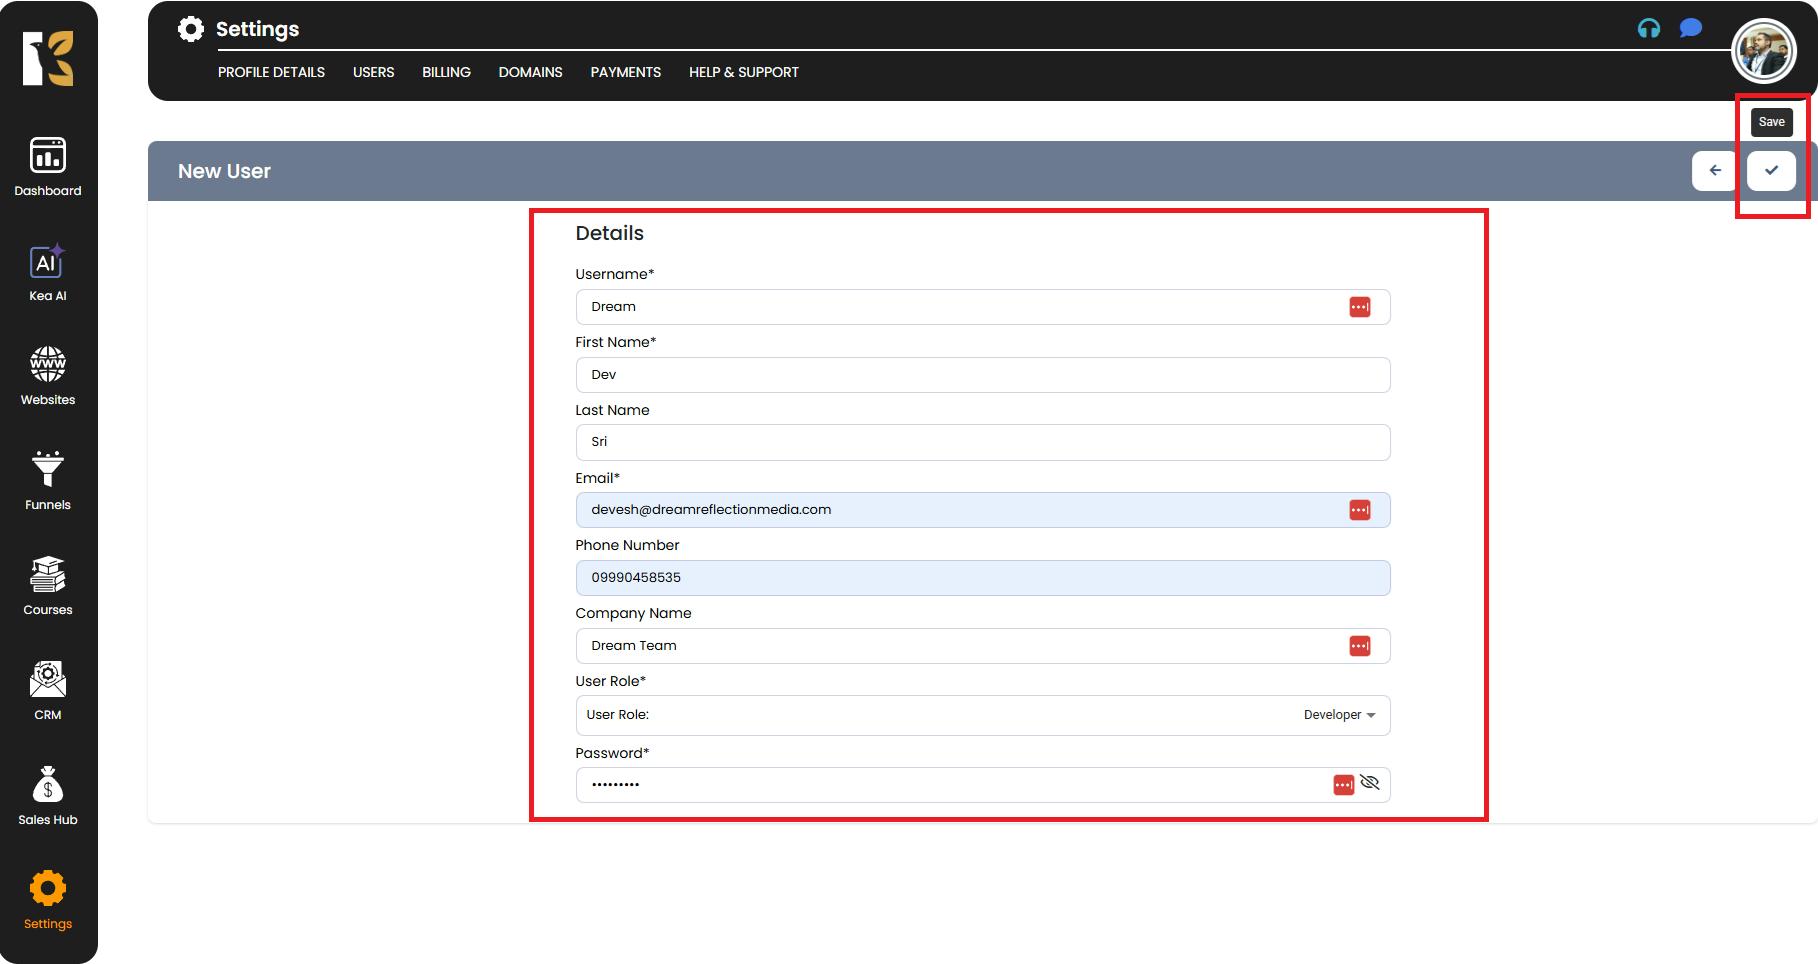
Step 6: Save the New User
- After entering all the required details, click on the Save button (represented by a tick icon at the top-right corner of the page).
- Once saved, the new user will be successfully added to your account.
Step 7: Verify the New User
- After saving, you’ll be redirected back to the Users Dashboard.
- Here, you can see the newly added user listed along with their details and assigned role.
- You can now manage their access, update their information, or remove them if needed.
Best Practices When Adding Users
- Use valid and active email addresses to ensure smooth communication.
- Assign roles wisely — avoid giving admin privileges unless absolutely necessary.
- Set strong passwords for better account security.
- Update user details regularly to keep your records accurate.
Conclusion
By following these steps, you can easily add new users to your account and manage their access levels effectively. This feature is especially useful for teams, collaborators, and clients, allowing everyone to work seamlessly within the platform.