How to Add Coupons in Sales Hub
Creating and managing coupons is a great way to attract new customers, encourage repeat purchases, and increase overall sales. In the Sales Hub, you can easily create customized coupons, set limitations, and manage their visibility. Follow the steps below to add a coupon successfully.
Step 1: Access the Coupons Section
First, navigate to the Sales Hub from your dashboard.
- On the left-hand navigation panel, click on the Coupons option.
- This section is where you can create, edit, and manage all your promotional coupons in one place.
Step 2: Open the Coupons Dashboard
Once you click on Coupons, you’ll be directed to the Coupons Dashboard.
- At the top of this dashboard, you’ll see all your existing coupons along with their details, such as coupon codes, types, start and end dates, and current status.
- This dashboard gives you full control to monitor your active, expired, and upcoming coupons.
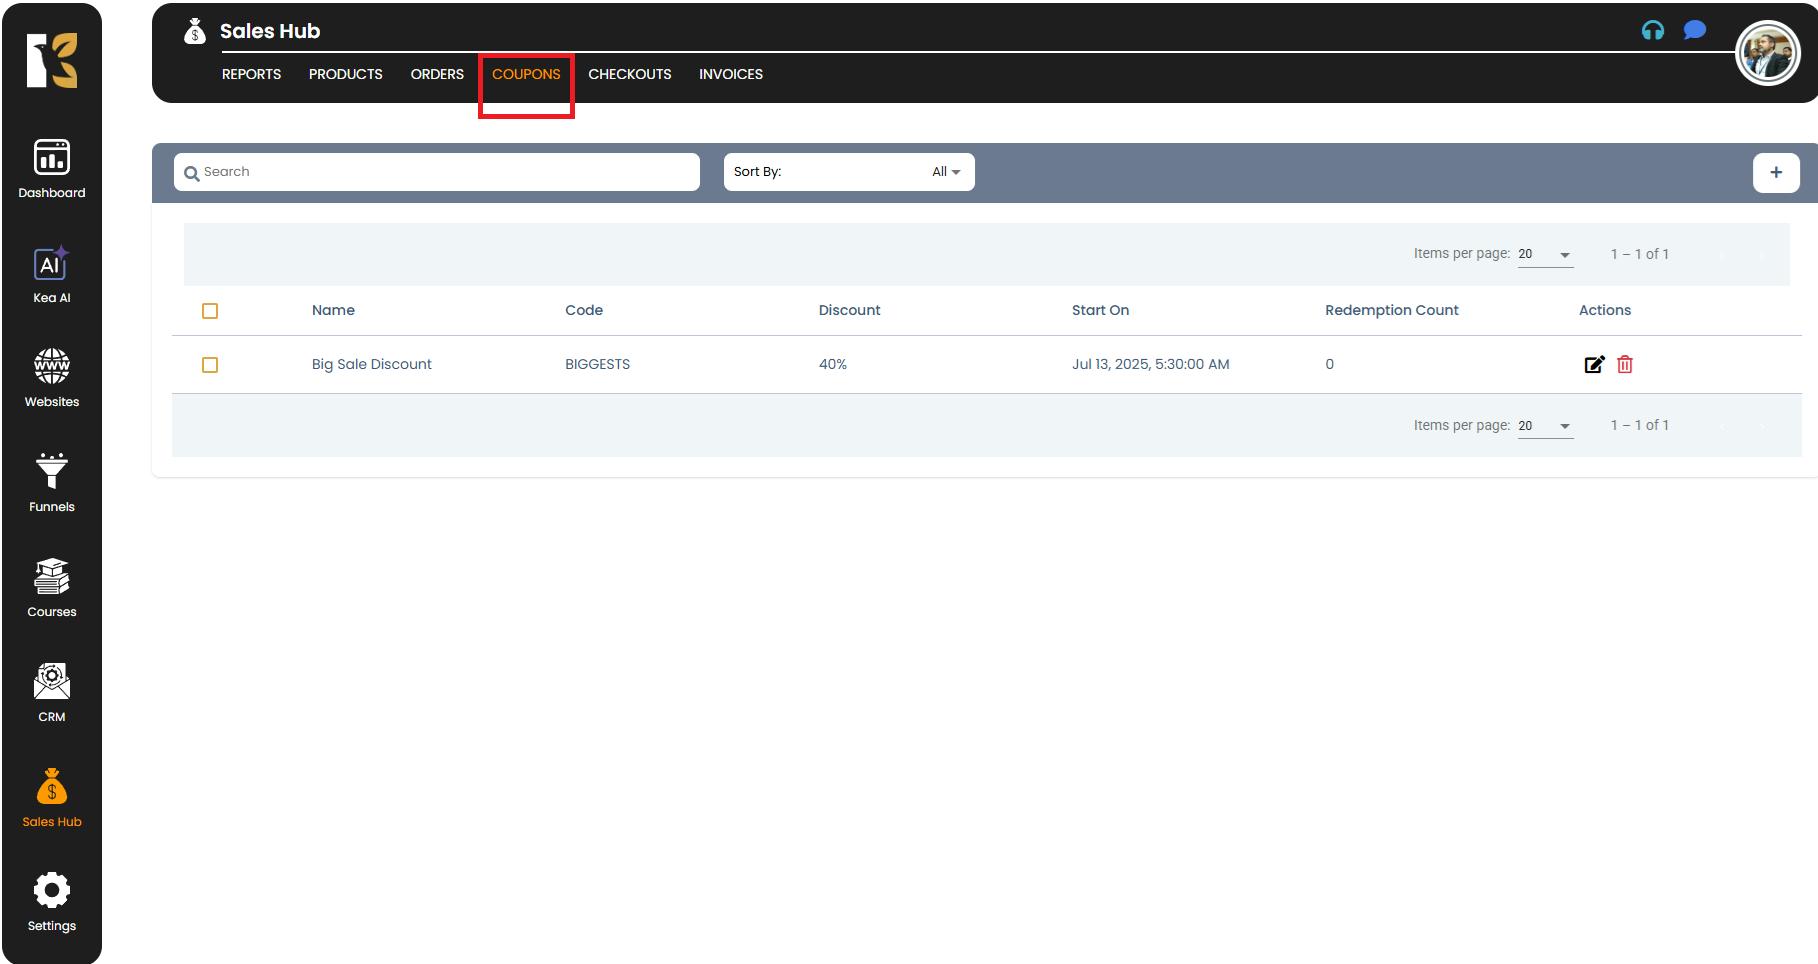
Step 3: Start Adding a New Coupon
To create a new coupon:
- Look just below the horizontal menu on the Coupons Dashboard.
- You’ll find a “+” (Add Coupon) button on the right-hand side.
- Click on it to open the Coupon Creation Page.

Step 4: Fill in the Coupon Details
On the Coupon Creation Page, you’ll need to enter specific information to set up your coupon:
- Coupon Name – Give your coupon a unique name so it’s easy to identify later. For example, “FESTIVE20” or “WELCOME10”.
- Coupon Code – This is the code customers will enter at checkout to redeem the discount.
- Coupon Type – Select the type of discount you want to offer, such as:
- Percentage Discount (e.g., 10% off)
- Fixed Amount Discount (e.g., $20 off)
- Free Shipping or other special offers
- Start Date & End Date – Define the time period during which the coupon will be valid. This ensures the coupon automatically expires after the specified date.
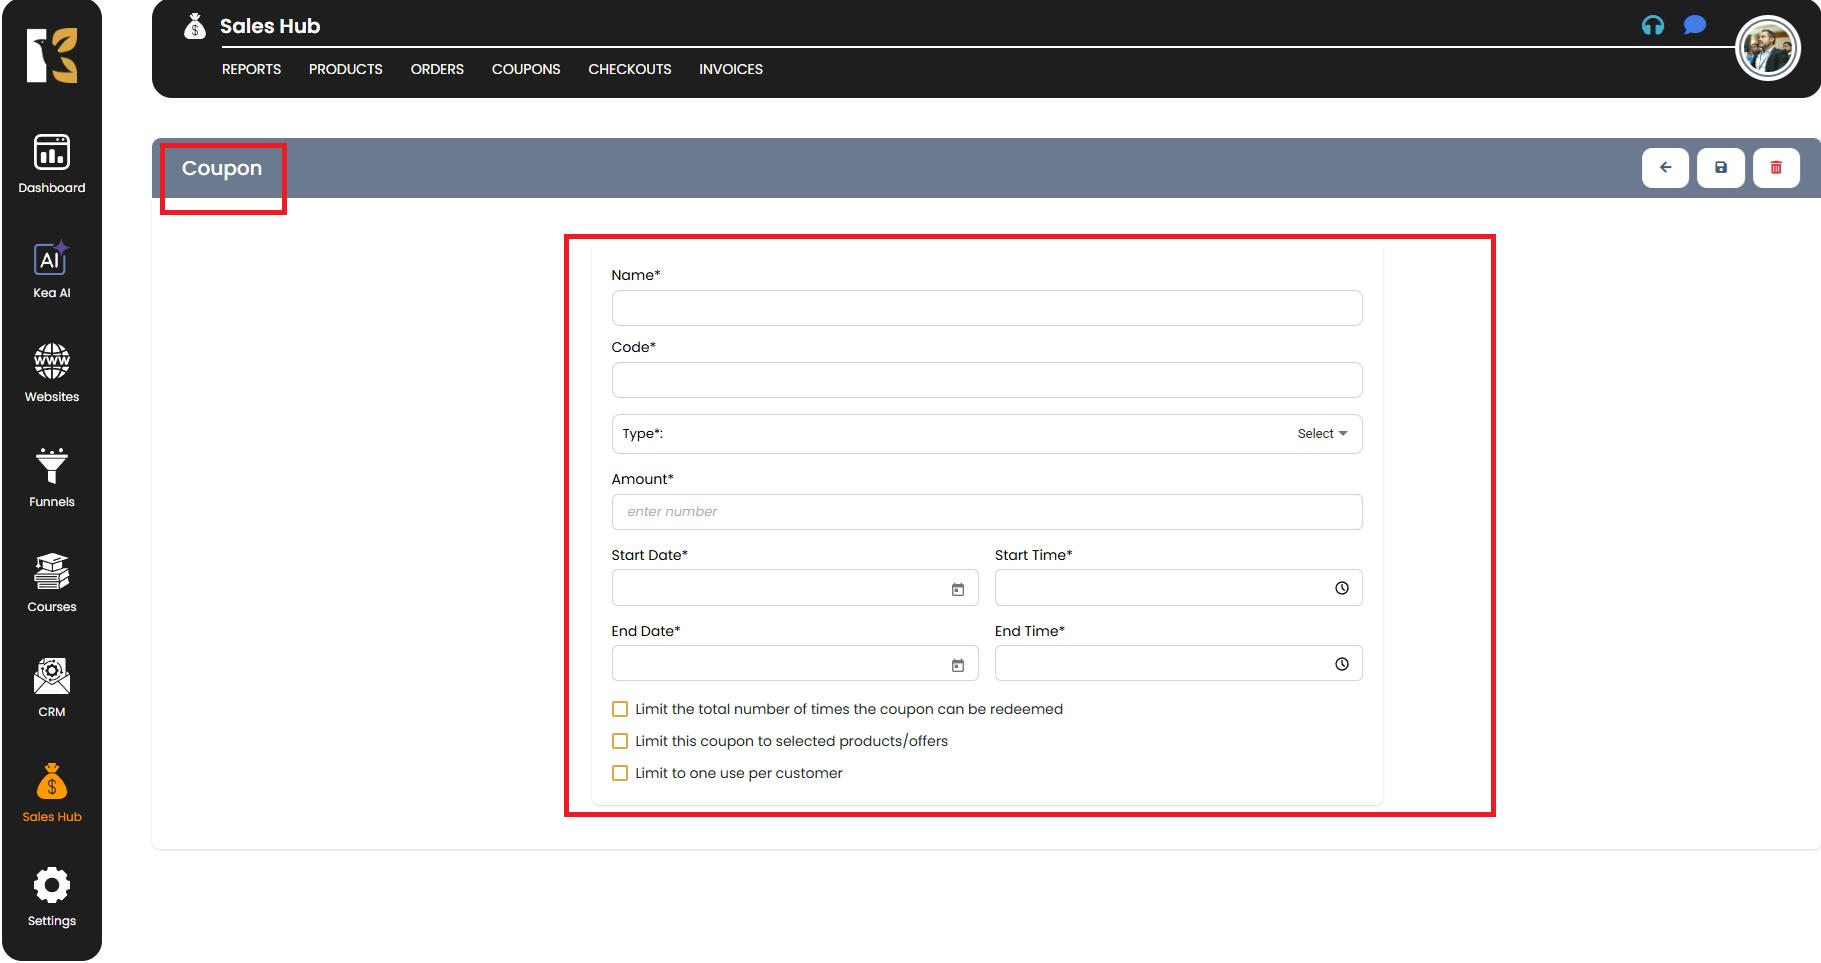
Step 5: Set Limitations and Restrictions (Optional but Recommended)
The Sales Hub allows you to control how, where, and how many times a coupon can be used:
- Redemption Limit – Set the maximum number of times the coupon can be used in total.
- Product-Specific Coupons – Restrict the coupon to only specific products or categories if you don’t want it to apply site-wide.
- Single-Use Coupons – Allow each customer to use the coupon only once, preventing misuse.

These limitations help you better manage your promotions and avoid unwanted losses.
Step 6: Save the Coupon
After filling out all the necessary details and applying any restrictions, click the Save button on the extreme right of the page.
- Once saved, your coupon will be successfully created.
- You’ll receive a confirmation, and the coupon will now be visible in your Coupons Dashboard.

Step 7: Manage Your Coupons
After creating a coupon, you can always manage it from the Coupons Dashboard:
- Edit – Make changes to the coupon details if needed.
- Deactivate – Temporarily pause a coupon without deleting it.
- Delete – Permanently remove a coupon from your system.
By managing your coupons efficiently, you can ensure better marketing control and provide a seamless experience for your customers.
Conclusion
The Coupons feature in Sales Hub gives you complete flexibility to create personalized offers that boost sales and improve customer retention. With the ability to set expiration dates, usage limits, and product-specific restrictions, you have total control over how your discounts are applied.