How to Check and Manage Your Site Details in Kea Builder
"Site Details" refer to the key configurations and metadata related to a website—such as its home page, domain, favicon, tracking codes, and more. Managing these details allows you to customize the identity and behavior of your site effortlessly.
📋 Steps to Access and Update Site Details
- 🟢 Step 1: Go to the Website Panel
Navigate to the “Website” option in the side menu bar.
- 🛠️ Step 2: Open Website Administration
The Website Administration dashboard will appear, displaying all your created websites.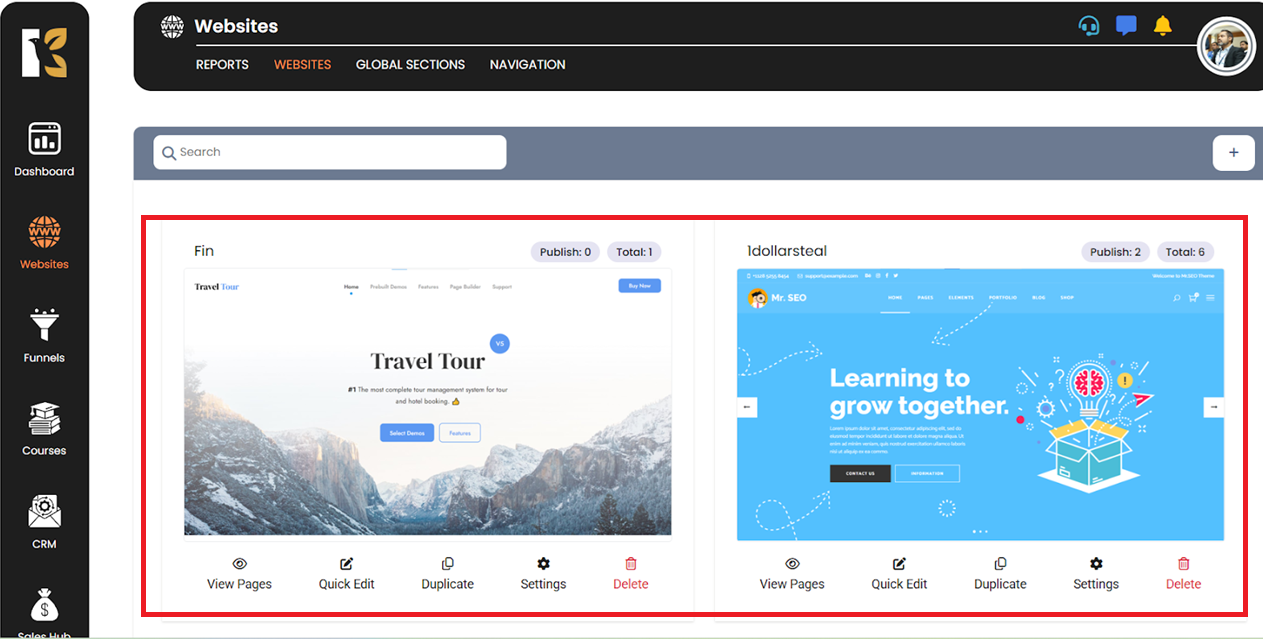
- 📄 Step 3: View Specific Site Details
Click on the “Settings” button for the specific website you want to manage.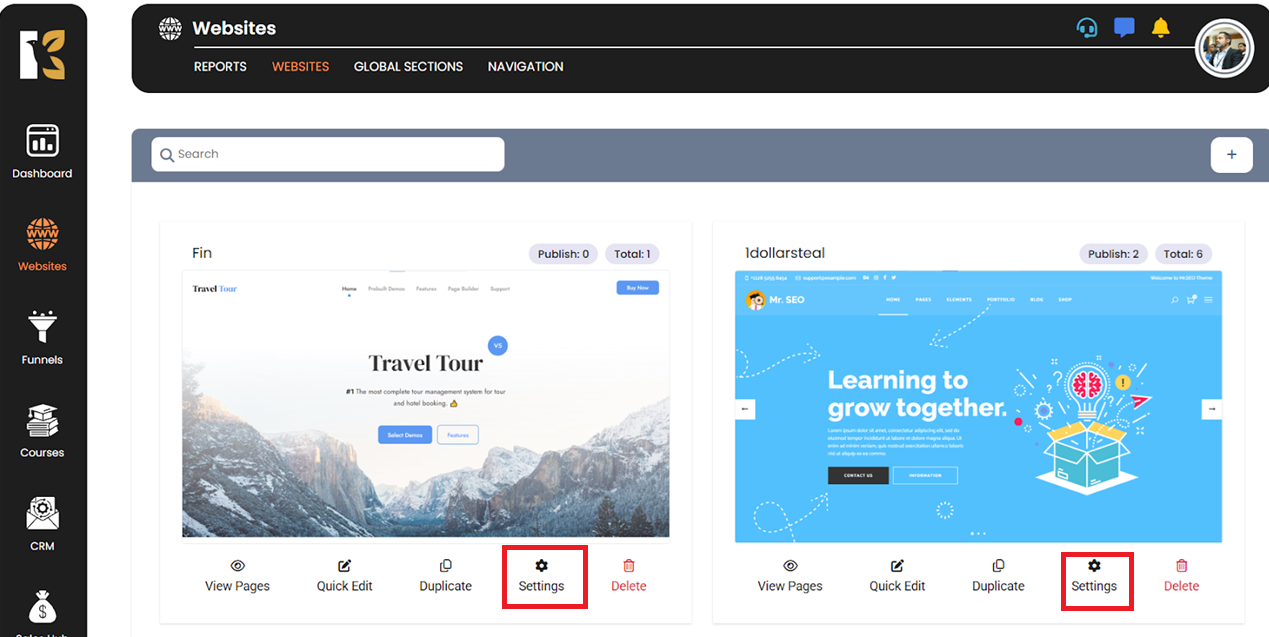
- 🔍 Step 4: The Site Details Panel Opens
You’ll now see a detailed configuration window where you can manage your website’s core settings.
⚙️ Customizing Site Details
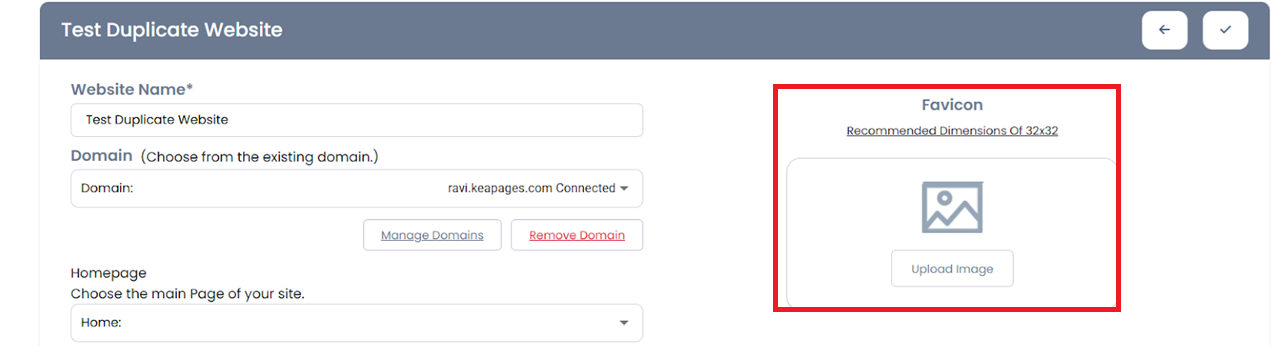
- 🏠 Home Page Setting: From the Home Page dropdown, select the page you want as the site’s default landing page.
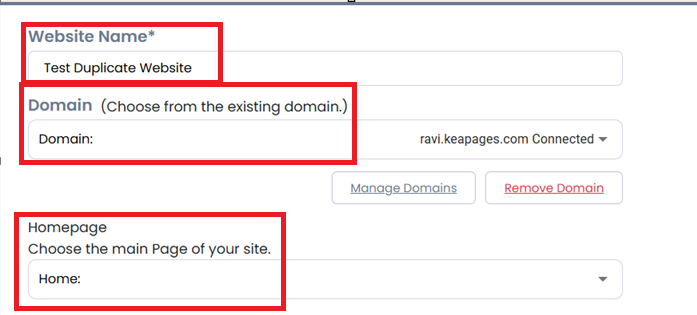
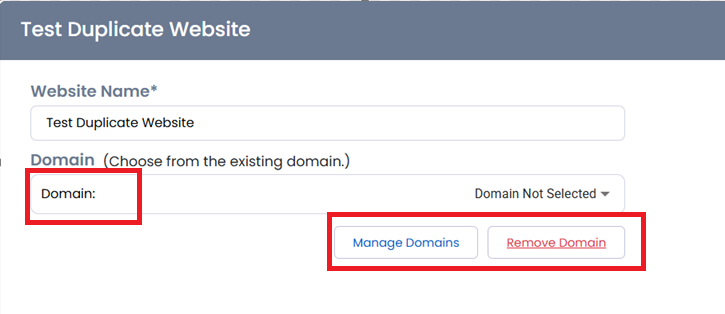
- 🌐 Domain Selection: Choose a domain from the existing list using the Domain dropdown.
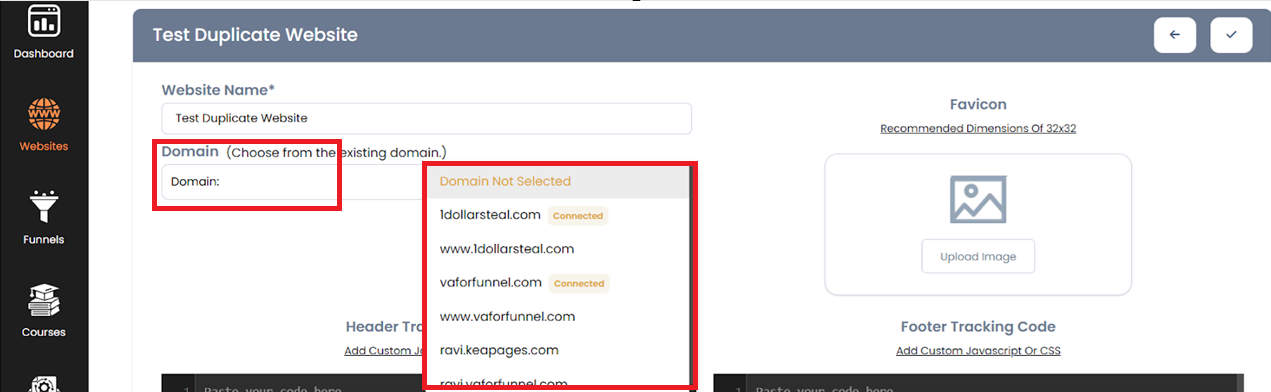
- 🔧 Manage Domain: Use the Manage Domain button to update or configure your connected domain settings.
- 🖼️ Upload Site Logo: Click on “Upload Image” under Logo to upload your site's logo.
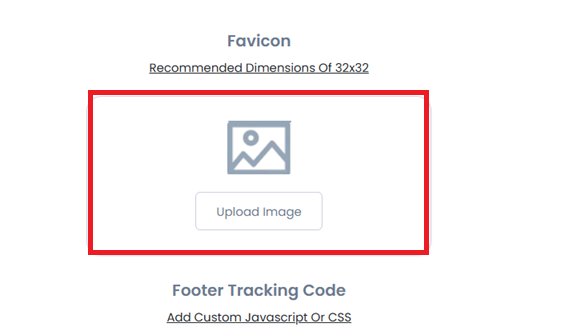
- 🌟 Add Favicon: Click on “Upload Image” under Favicon to upload a favicon for your website.
- 📥 Insert Header Tracking Code: Paste any tracking script (e.g., Google Analytics, Facebook Pixel) in the Header Tracking Code field.

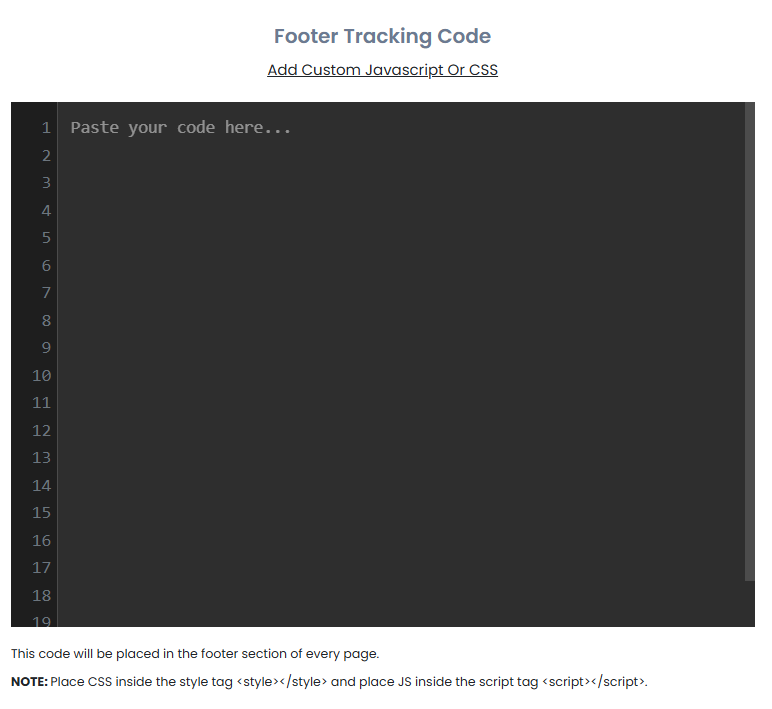
- 📥 Insert Footer Tracking Code: Similarly, add any required tracking or script code in the Footer Tracking Code field.
💾 Step 13: Save Your Changes
Once all updates are made, scroll to the bottom and click the “Save” button.

✅ That’s it!
You’ve successfully viewed and customized the details of your site using Kea Builder. Keeping your site details up to date ensures optimal branding, functionality, and tracking performance.