How to Create an Automation
Automation allows you to streamline repetitive tasks and maintain consistent engagement with your audience. Whether it's sending welcome emails or following up on user actions, this guide will walk you through creating your first automation in Kea.
🚀 Steps to Create an Automation
✅ Step 1: Open the CRM
Navigate to the side menu and click on the CRM option.
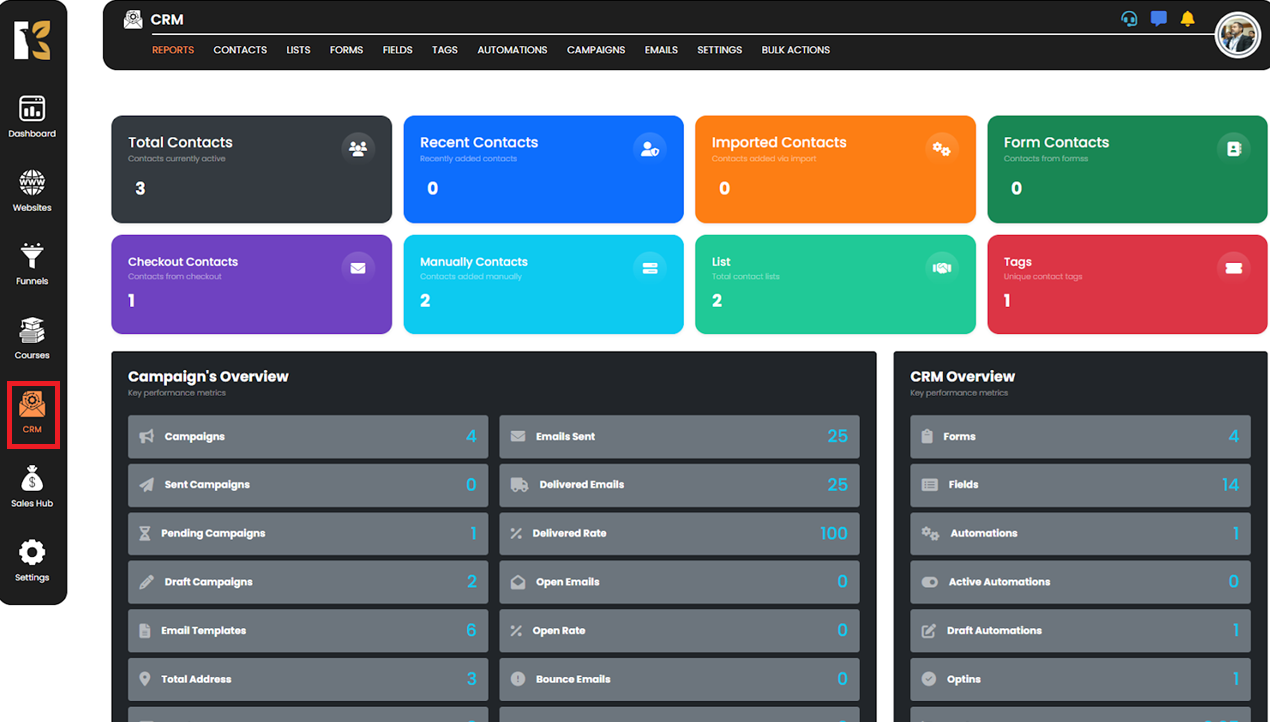
✅ Step 2: Access the CRM Panel
The CRM dashboard will load, displaying all CRM-related functionalities.
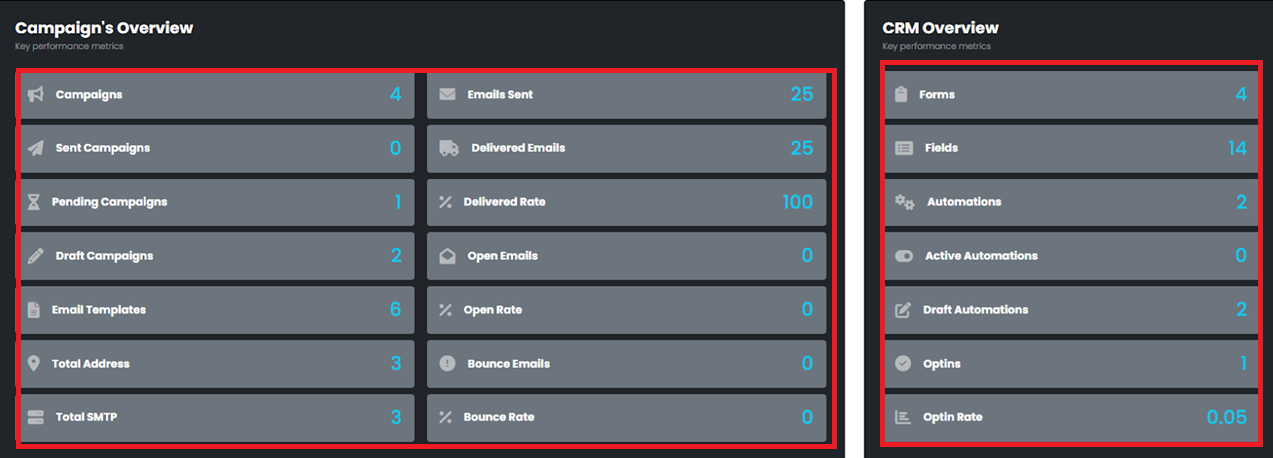
✅ Step 3: Navigate to Automations
Click on the Automation button from the options listed in the CRM panel.
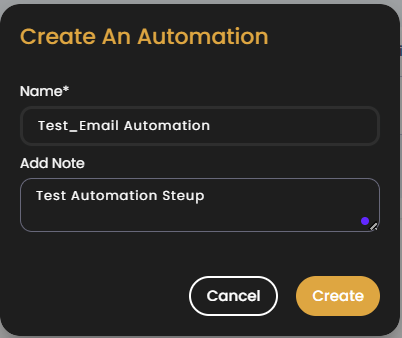
✅ Step 4: Create New Automation
Click on the “Create Automation” button at the top right.

✅ Step 5: Name Your Automation
A pop-up will appear. Enter a suitable name for your automation and click on Create.
✅ Step 6: Redirect to Builder
Once created, you will be redirected to the Automation Builder.

✅ Step 7: Build Your Workflow
Use the drag-and-drop builder to set up your triggers, conditions, and actions as needed. Don’t forget to save your automation once you're done.
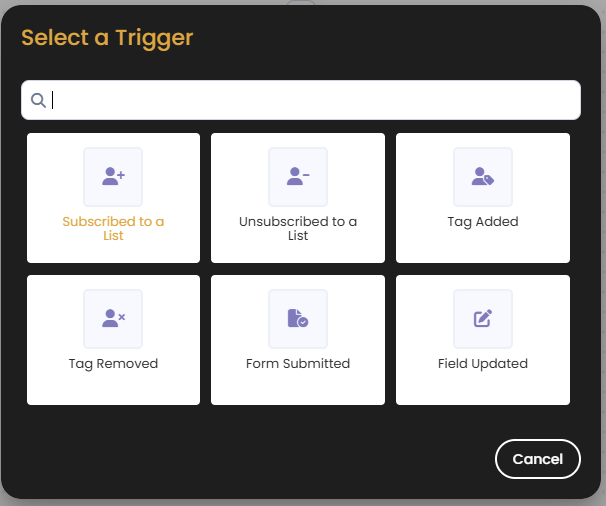
💡 Pro Tip:
Start with common triggers like form submissions or tag updates to initiate your automation workflows.