How to Add a Checkout Form in Sales Hub
Creating a checkout form in the Sales Hub allows you to seamlessly collect customer information and process payments. Whether you're selling a single product, offering subscriptions, or setting up bundled deals, checkout forms help you streamline the entire payment experience while keeping everything organized.
Here’s a complete step-by-step guide to add and customize a checkout form effectively:
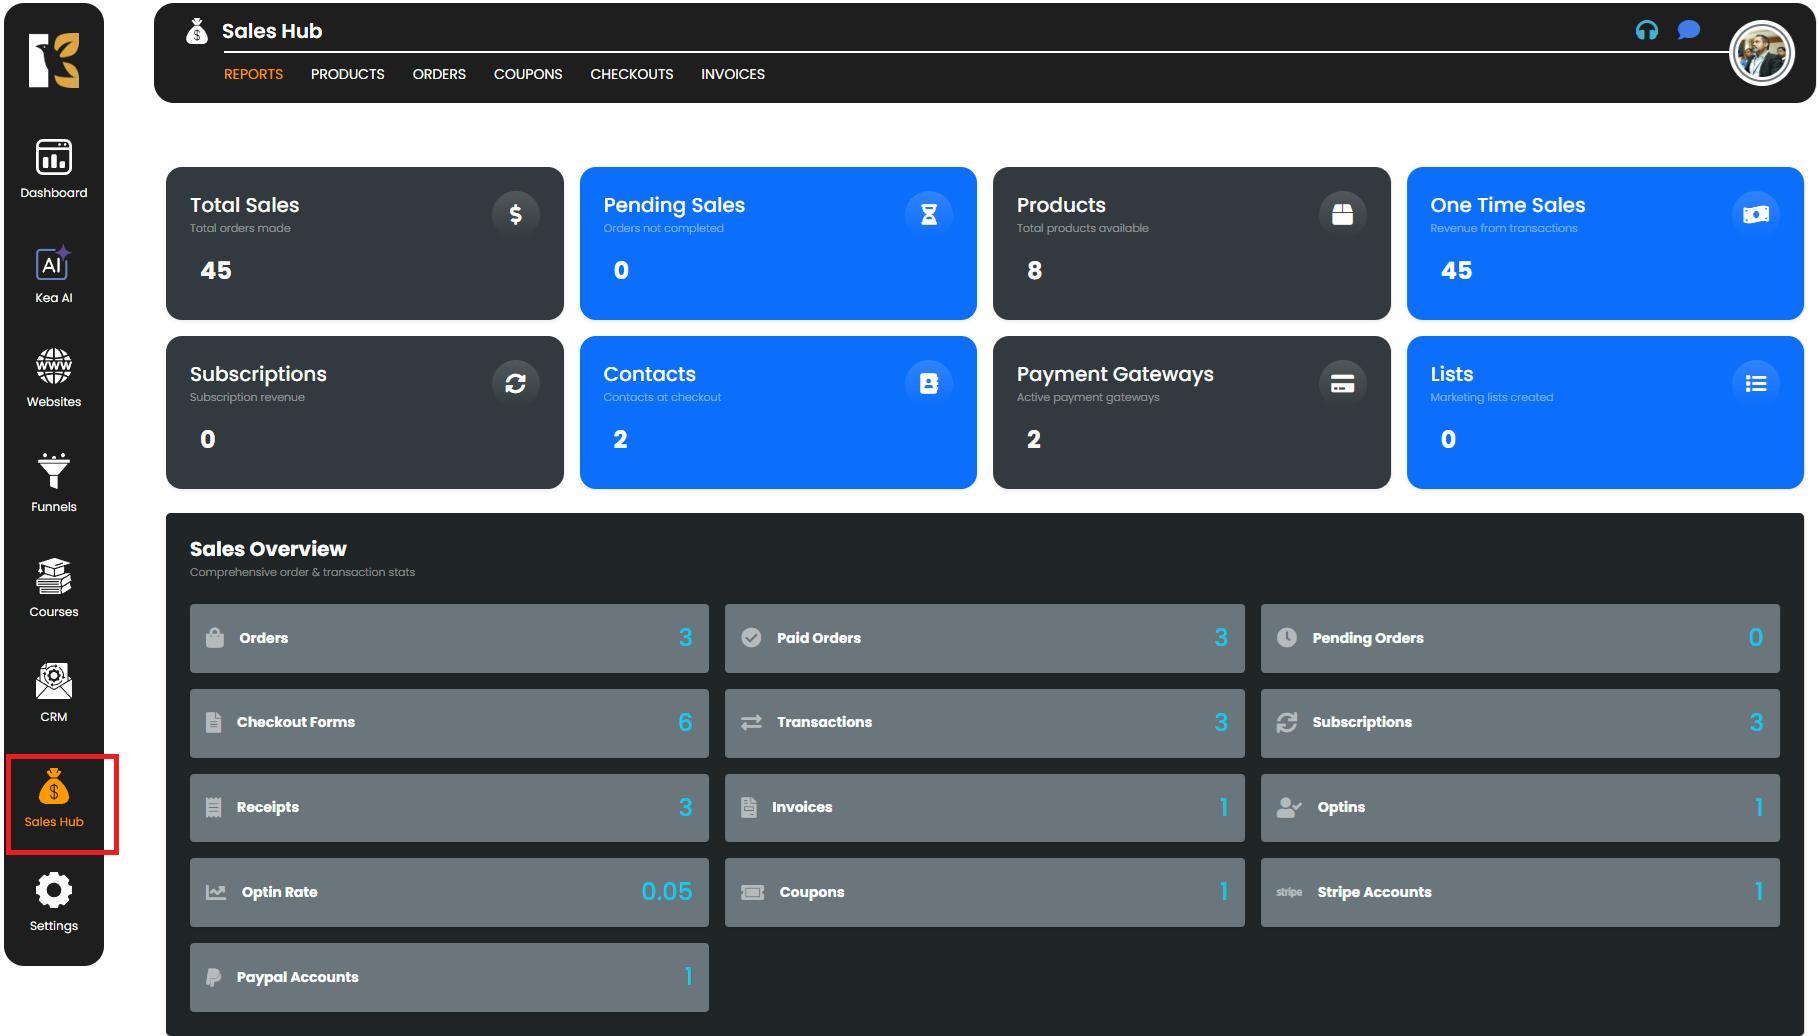
Step 1: Access the Checkout Section
- From your main dashboard, navigate to the Sales Hub.
- In the left-hand navigation menu, click on Checkouts.
- This will take you to the Checkouts Dashboard, where you can manage all your existing forms and create new ones.
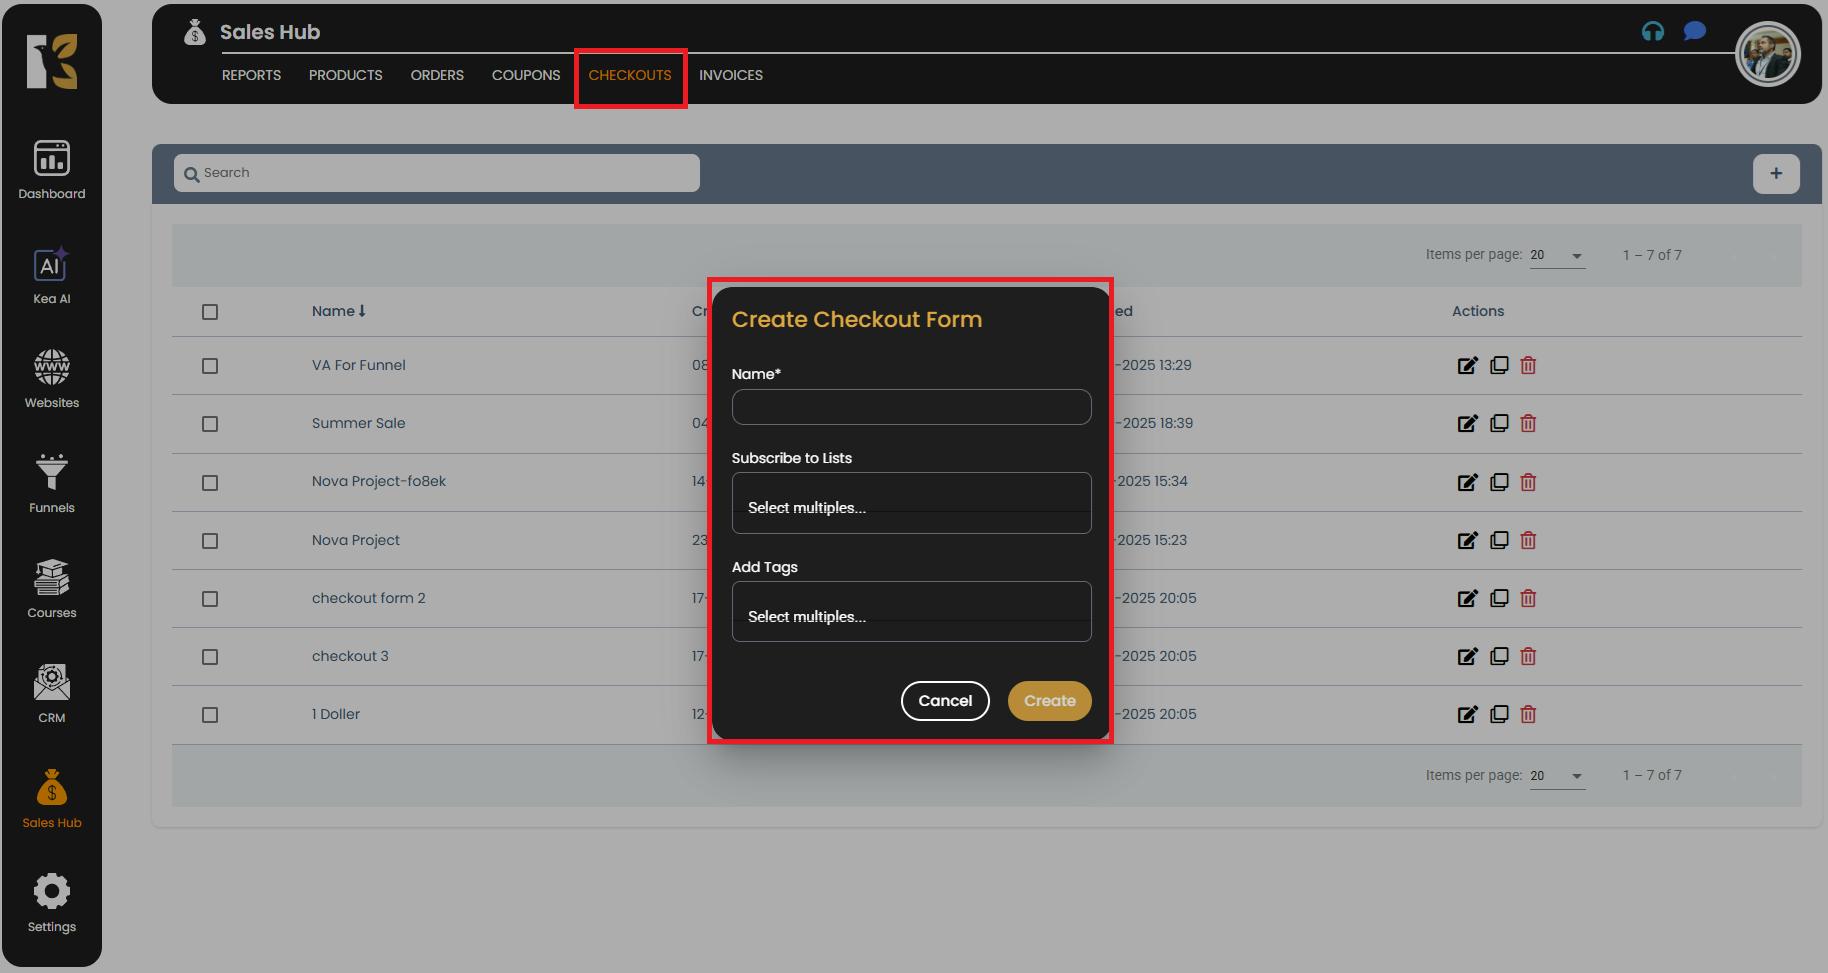
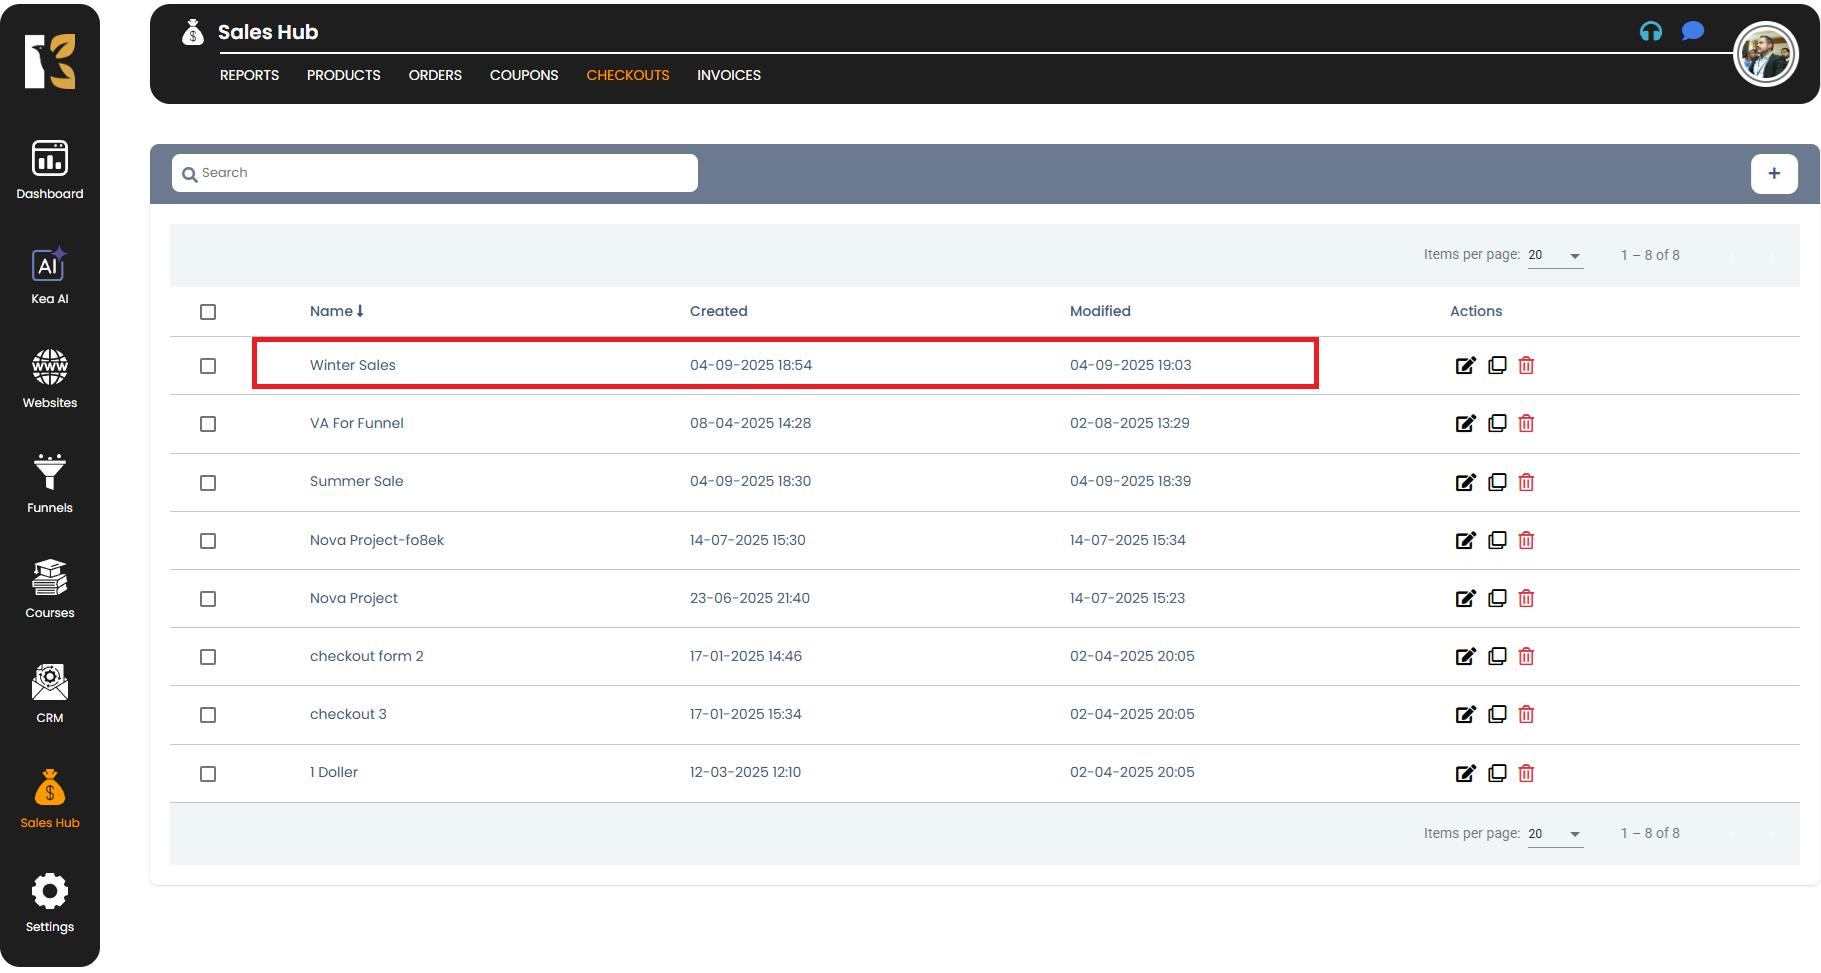
Step 2: Open the Checkout Dashboard
Once you’re on the Checkouts Dashboard, you’ll see an overview of all previously created checkout forms.
- If you haven’t created any checkout forms yet, the dashboard will appear empty.
- To create a new form, look for the “Add Checkout Form” (+) button just below the horizontal menu.

Step 3: Initiate a New Checkout Form
- Click on the “+ Add Checkout Form” button.
- A popup window will open where you can enter the basic details for your new form.
Here, you’ll be able to configure:
- Form Name → Give your checkout form a unique and descriptive name.
- Subscribe to List (Optional) → Automatically add customers who complete the form to a specific subscriber list.
- Add Tags (Optional) → Attach custom tags for better segmentation and tracking of customers.
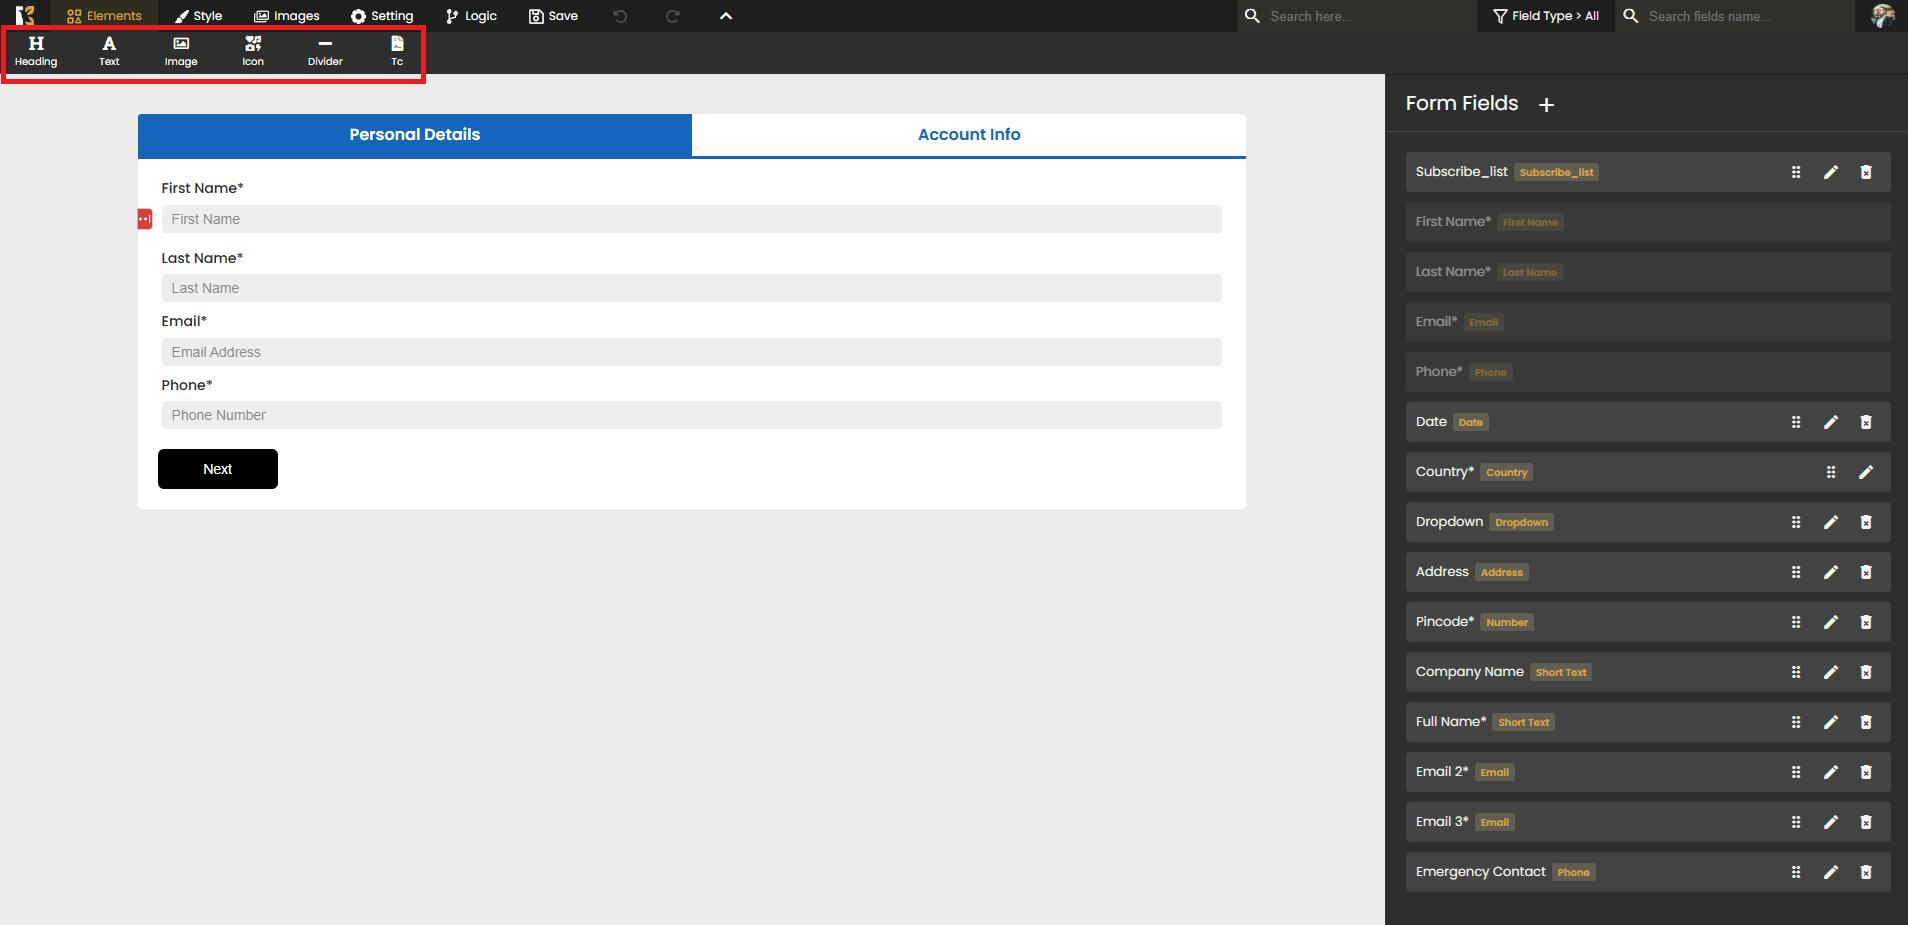
Step 4: Set Up the Form Fields
After entering the basic details, click on the Create button. You’ll be redirected to the Form Fields Page, where you can design and customize your checkout form.
Here, you can drag and drop the fields you want customers to fill out, such as:
- First Name
- Last Name
- Email Address
- Contact Number
- Date
- Country
- Company Name
- Address
- And many more, based on your business requirements.
Tip: Only add fields that are necessary to make the checkout process smooth and user-friendly.

Step 5: Customize the Form Design
Once you’ve added the required fields, you can enhance the look and feel of your checkout form:
- Style & Layout → Adjust spacing, borders, colors, and backgrounds.
- Add Images or Logos → Include your branding elements for a professional touch.
- Customize Elements → Modify the placement of fields and buttons for better user experience
- Add Logic & Conditions → Enable smart field behavior by showing or hiding certain fields based on user inputs.
This customization ensures your checkout form matches your brand and provides a seamless experience for your customers.
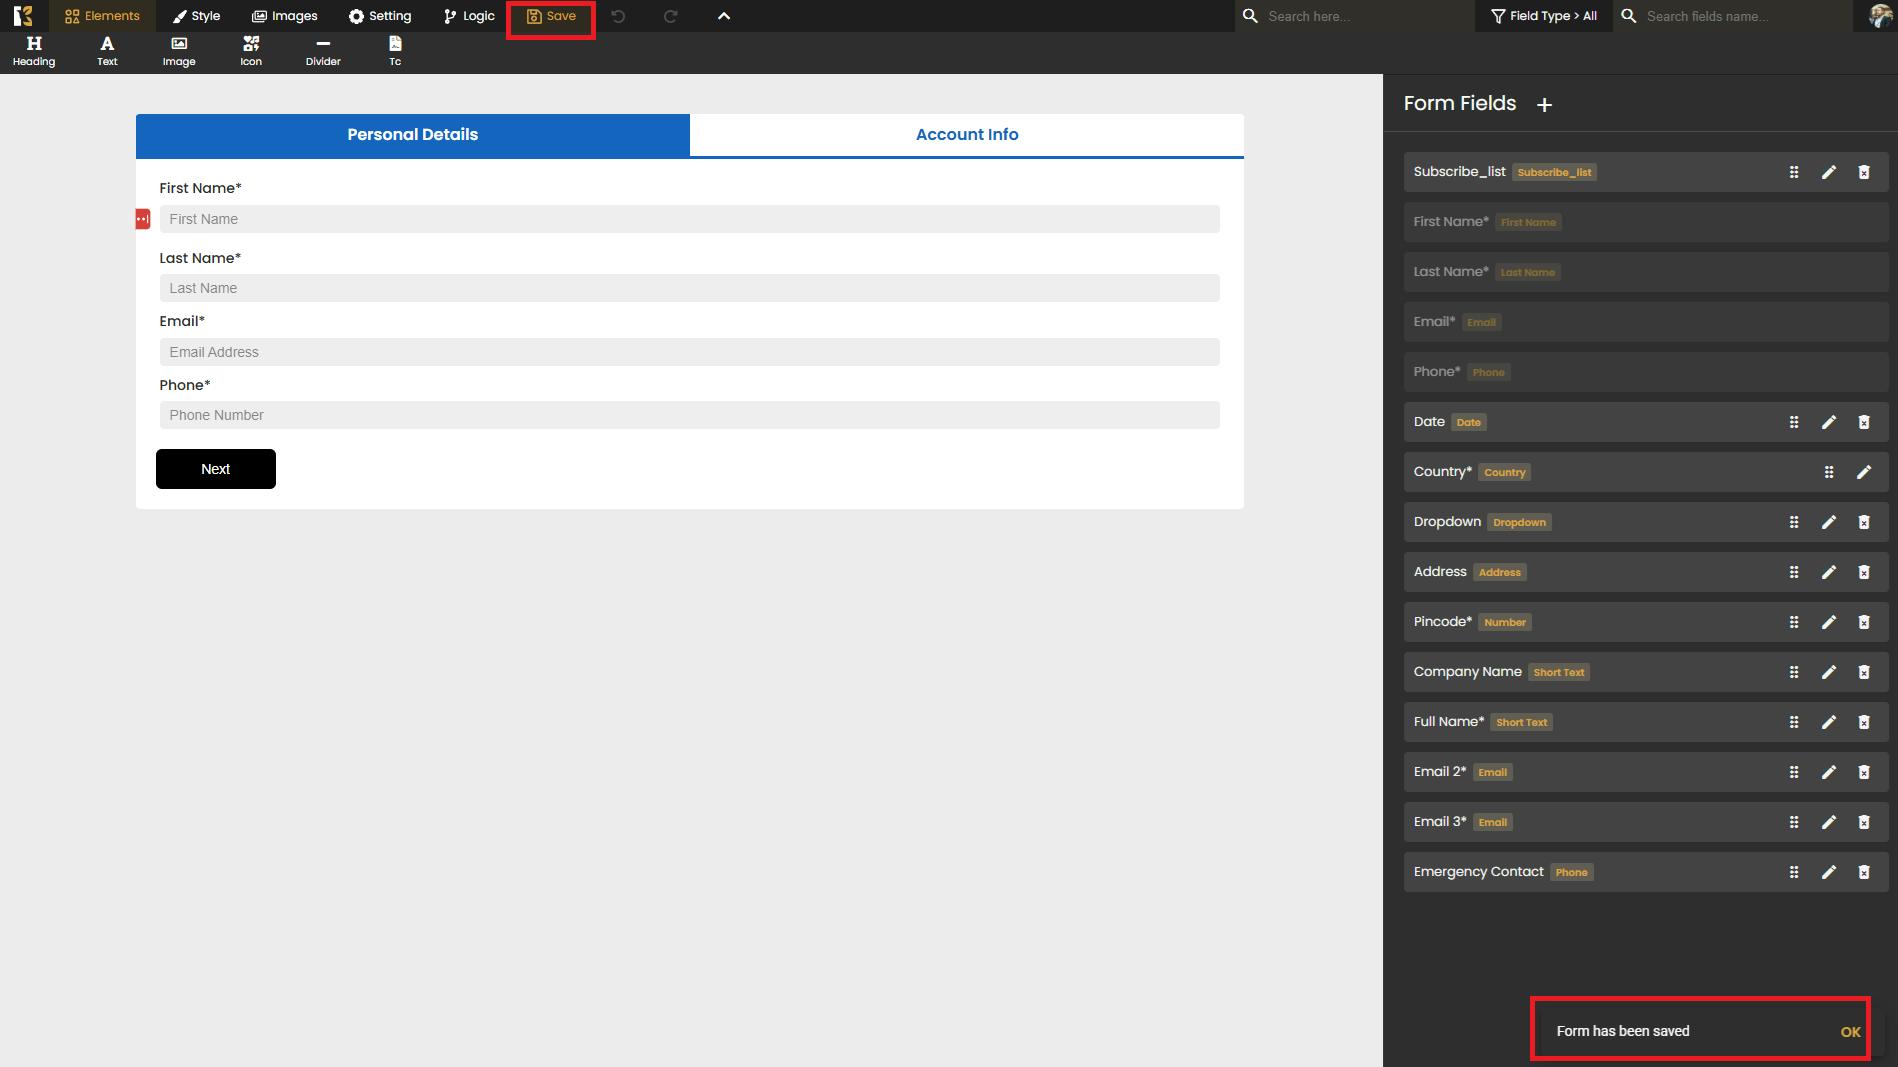
Step 6: Save Your Checkout Form
- Once all fields and design customizations are complete, click on the Save icon located at the top-right corner.
- The system will save your checkout form and redirect you back to the Checkout Dashboard.
Step 7: Verify the Created Form
- On the Checkout Dashboard, you can now see your newly created form listed along with other forms.
- From here, you can preview, edit, or integrate the form into your product checkout process.
Pro Tips
- Always test the checkout form before going live to ensure a smooth payment experience.
- Use tags and subscriber lists effectively to segment your customers for future campaigns.
- Keep the form simple and clutter-free to reduce cart abandonment rates.
Conclusion
By following these steps, you can create, customize, and manage checkout forms easily within the Sales Hub. These forms not only streamline your payment process but also enhance your customer experience by providing a clean, branded, and intuitive checkout journey.