How to Create a Funnel in KeaBuilder
Funnels are an essential part of any successful online business, and KeaBuilder makes creating them simple, intuitive, and highly customizable. Whether you want to capture leads, sell products, or create multi-step customer journeys, KeaBuilder offers powerful tools and ready-to-use templates to help you get started quickly.
This guide will walk you through, step by step, how to create a funnel from scratch using the KeaBuilder platform.
Steps to Create a Funnel
Step 1: Access the KeaBuilder Platform
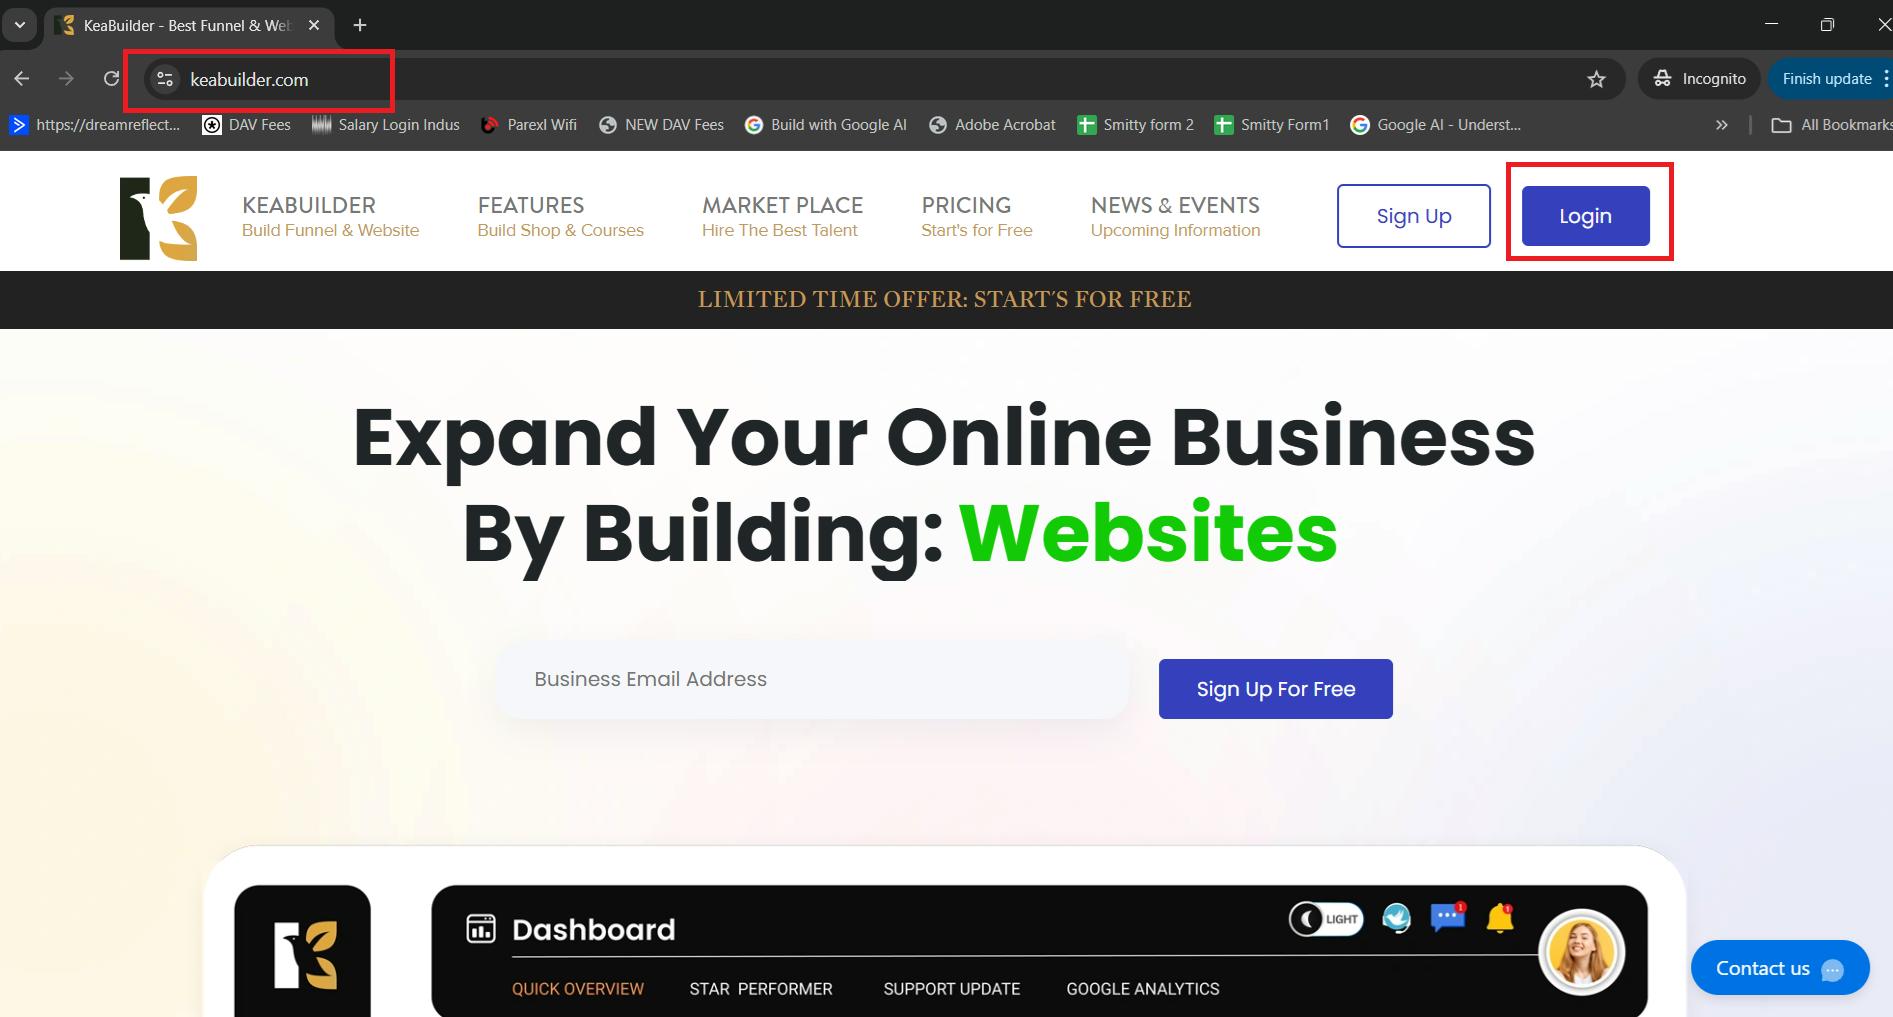
- Open your browser and go to www.keabuilder.com.
- Click on the Login button located at the top-right corner of the homepage.
Step 2: Log In to Your Account
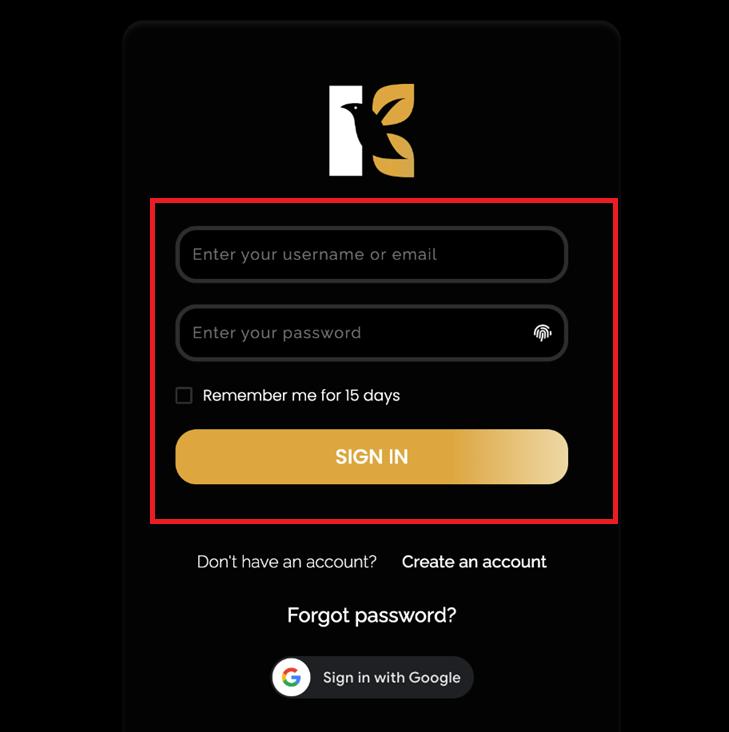
- You will be redirected to the Login Page.
- Enter your Username and Password.
- Click on the Login button to access your account.
- Once logged in, you will land on the KeaBuilder Dashboard.
Step 3: Navigate to the Funnels Section
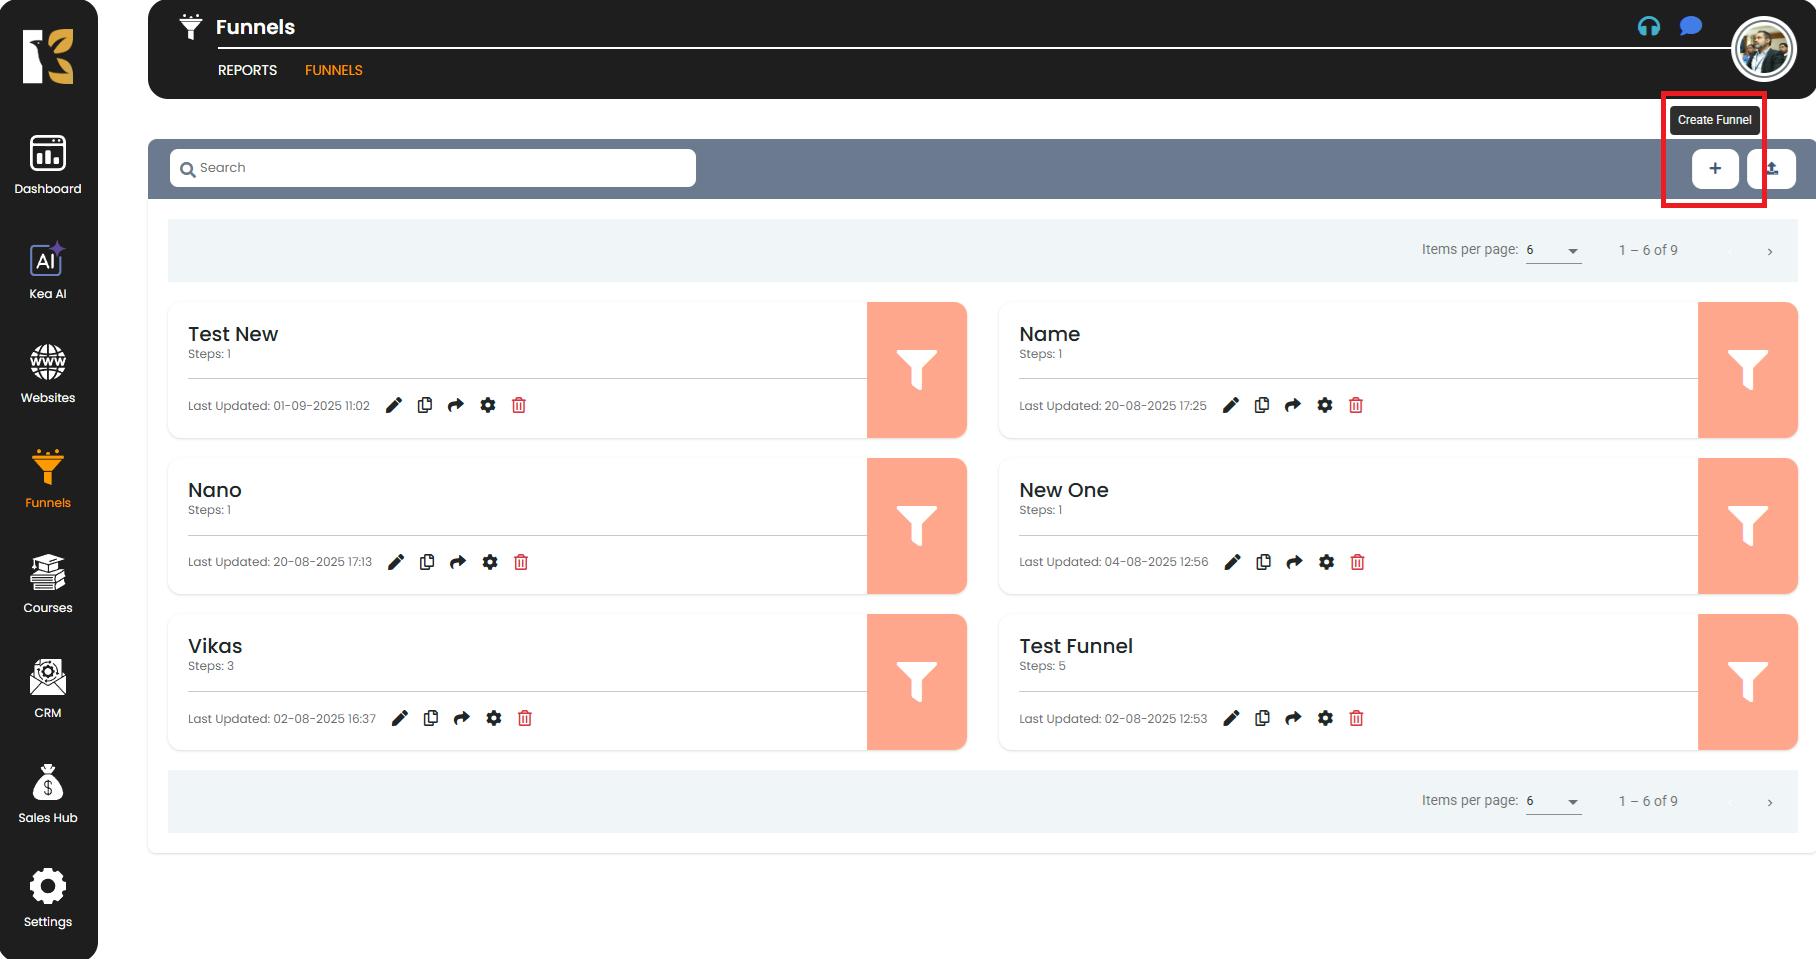
- On the Dashboard, locate the left-side navigation menu.
- Click on Funnels to open the Funnels page.
- Here, you’ll find a list of all the funnels you have created so far.
- If no funnels exist yet, don’t worry — you can create one from scratch in just a few steps.

Step 4: Start Creating a New Funnel
- On the top-right corner of the Funnels page, you’ll see a “+” button.
- Click on this “+” icon to start creating a new funnel.
Step 5: Name Your Funnel
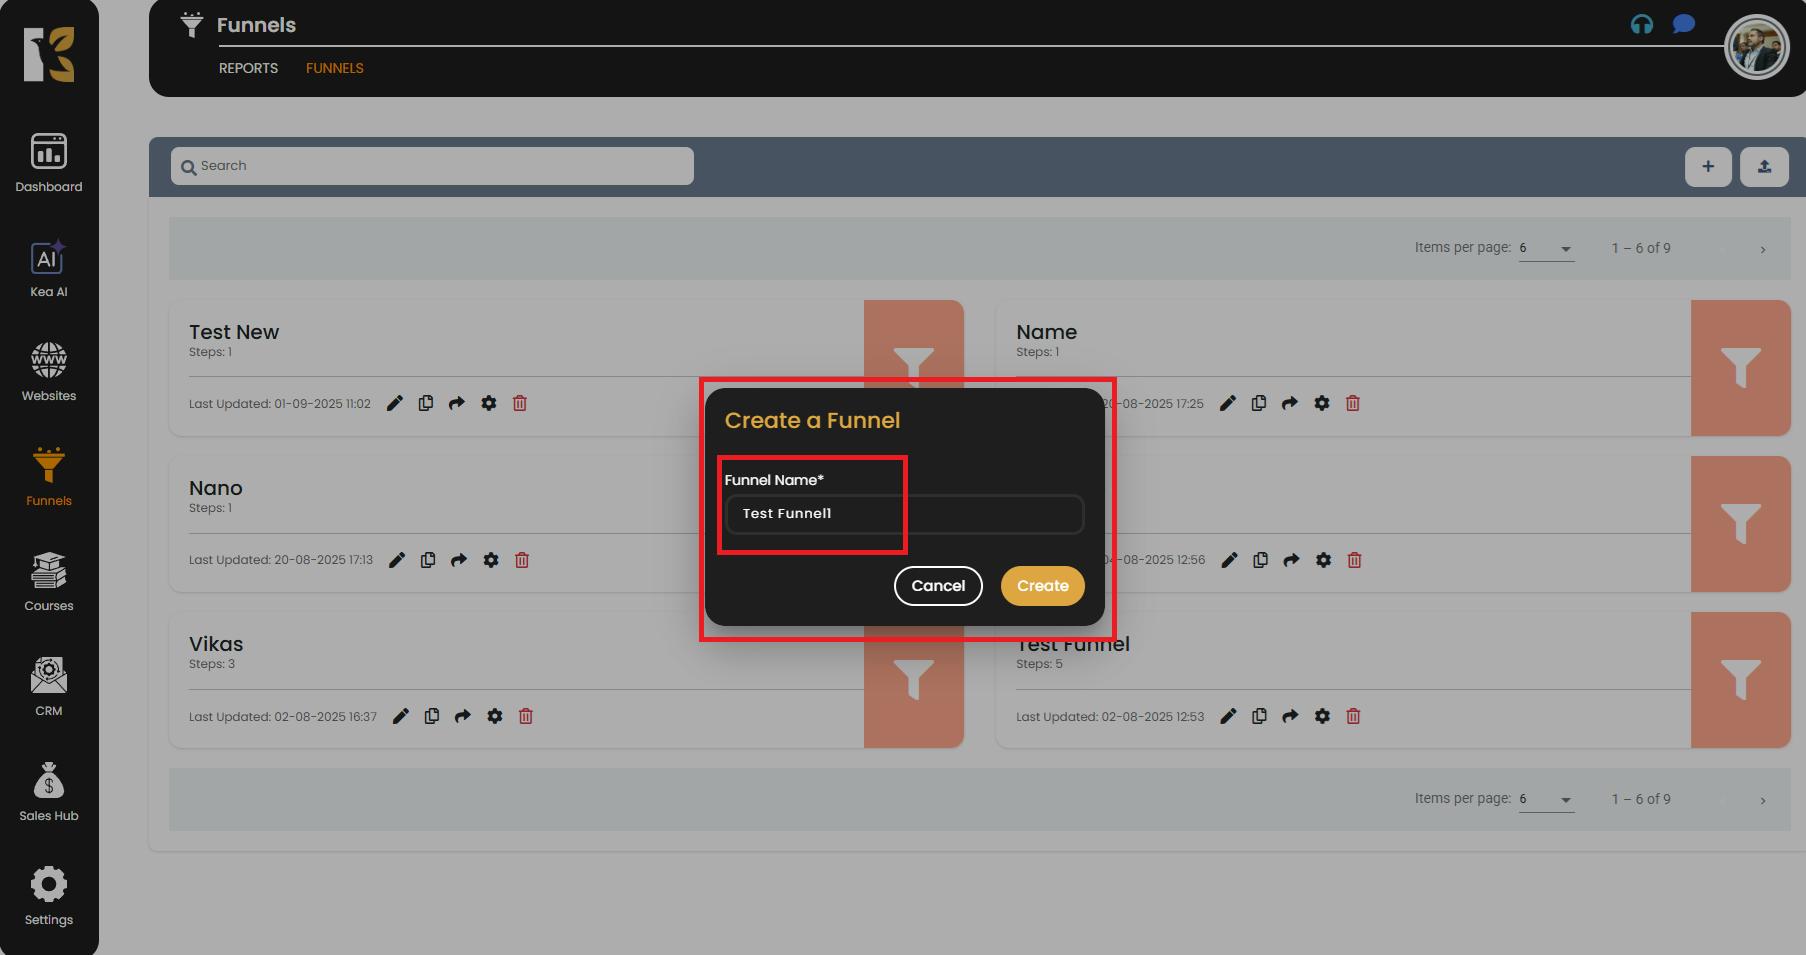
- A pop-up window will appear asking you to “Name Your Funnel”.
- Enter a meaningful and descriptive name so you can easily identify the funnel later.
- After entering the name, click on the Create button.
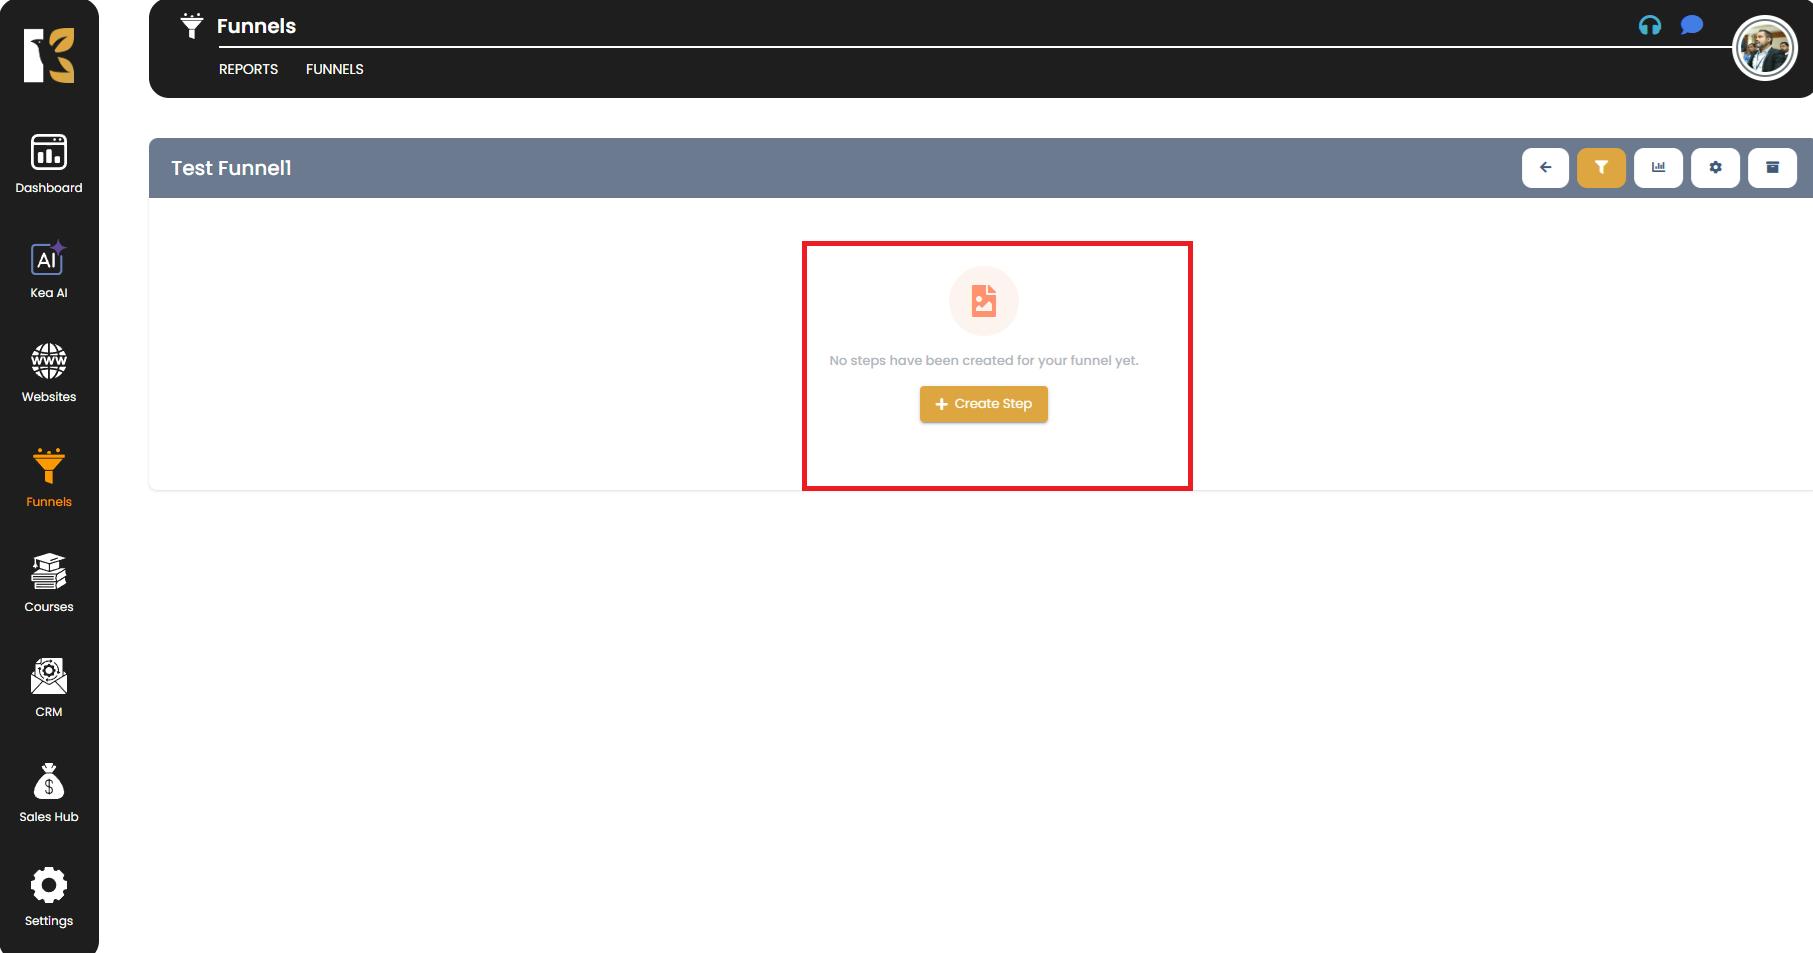
Step 6: Add Funnel Steps
- Once the funnel is created, you will be redirected to the Funnel Steps page.
- This is where you define the stages of your funnel — for example, Landing Page → Sales Page → Checkout → Thank You Page.
- To add a funnel step, click on the “+ Add Funnel Step” button.
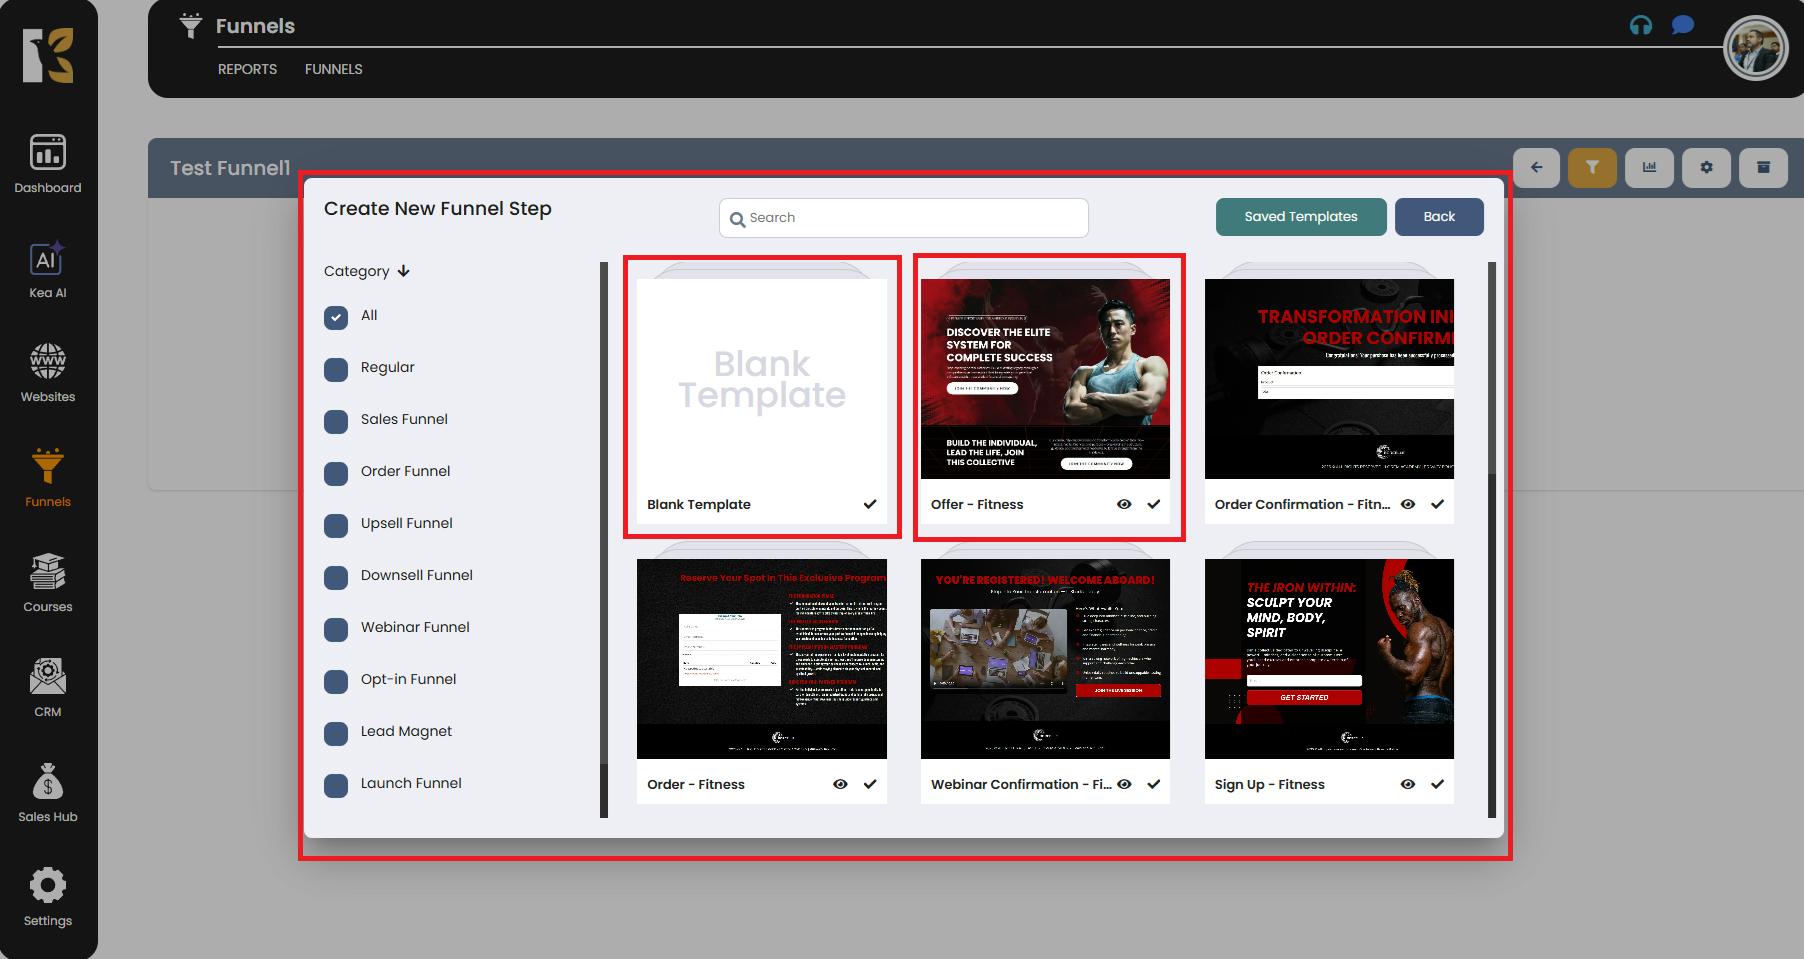
Step 7: Choose or Create a Template
- A pop-up will appear giving you two options:
- Select a Pre-Designed Template – Save time by choosing from KeaBuilder’s extensive library of professionally designed templates.
- Create From Blank – Start fresh and design your funnel step completely from scratch.
- Select the option that best suits your needs.
Step 8: Configure the Funnel Step
- If you choose the Blank Template, you’ll need to manually add a funnel step.
- Fill in the required details:
- Step Name – e.g., “Landing Page” or “Sales Page.”
- Step Type – Choose the type of page (opt-in, sales, checkout, thank-you, etc.).
- Step Thumbnail – Upload or select a thumbnail image for easy identification.
- After filling in the details, click on the Create button.

Step 9: Design Your Funnel Pages
- Once the funnel step is created, you’ll be redirected to the Funnel Builder.
- Click on the Pencil (Edit) icon to start designing your page.
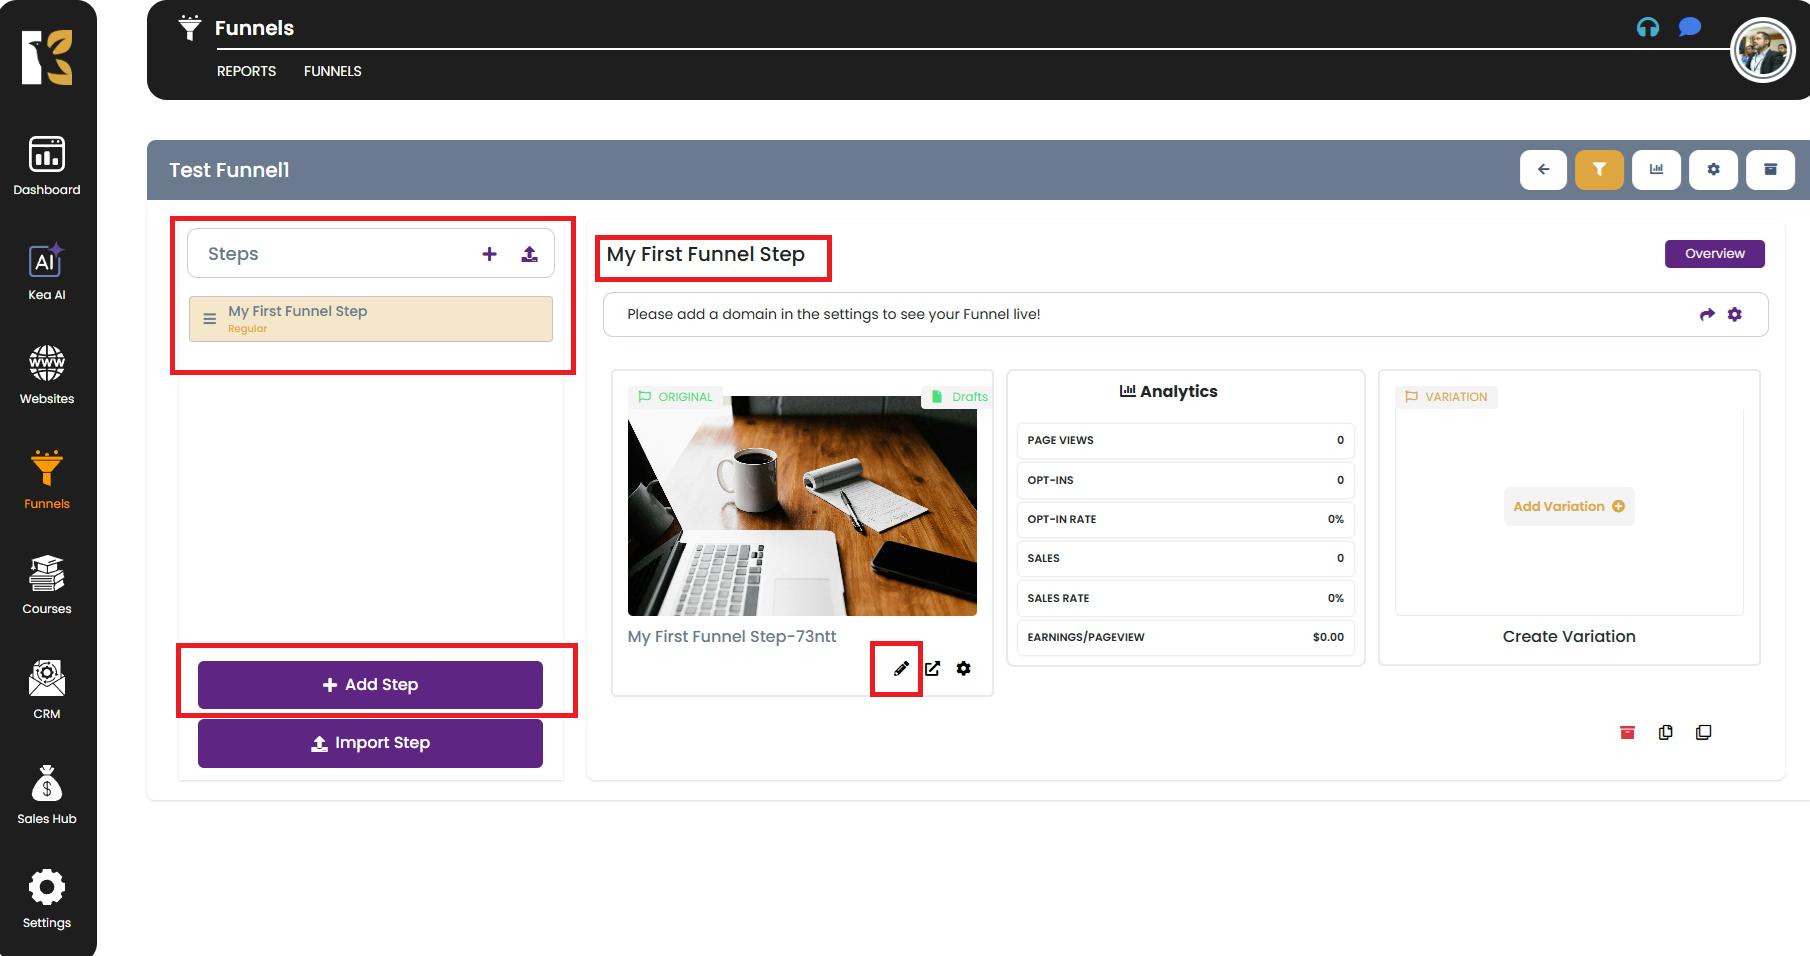
- Inside the KeaBuilder Funnel Builder, you can:
- Drag and drop elements like text, images, buttons, forms, and videos.
- Customize layouts, colors, and typography to match your brand.
- Add integrations such as payment gateways, email automation, and CRM tools.

Step 10: Save and Launch Your Funnel
- After designing your pages, click Save.
- Preview your funnel to ensure everything looks perfect.
- Once satisfied, publish your funnel and start sharing it with your audience.
Key Tips for Beginners
- Use Templates: If you’re new, start with KeaBuilder’s pre-designed templates to save time.
- Plan Your Steps: Map out your customer journey beforehand for better conversions.
- Integrate Tools: Take advantage of KeaBuilder’s seamless integrations with payment systems, CRMs, and email marketing.
- Test Before Launch: Always preview and test your funnel to ensure it works as expected.
Conclusion
Creating a funnel in KeaBuilder is fast, simple, and flexible. With its intuitive interface, drag-and-drop builder, and wide range of templates, you can create stunning, high-converting funnels without writing a single line of code.
Now that you know the process, go ahead and build your first funnel today — and start turning visitors into loyal customers!