How to Add Members in KeaBuilder
Adding members to your KeaBuilder account allows you to manage your courses, memberships, and subscribers effectively. This feature helps you store member details, assign them to specific memberships, and maintain a structured list of all your subscribers or clients. Follow the steps below to add new members with ease.
Step-by-Step Guide
Login to KeaBuilder
- Enter your credentials to log in.
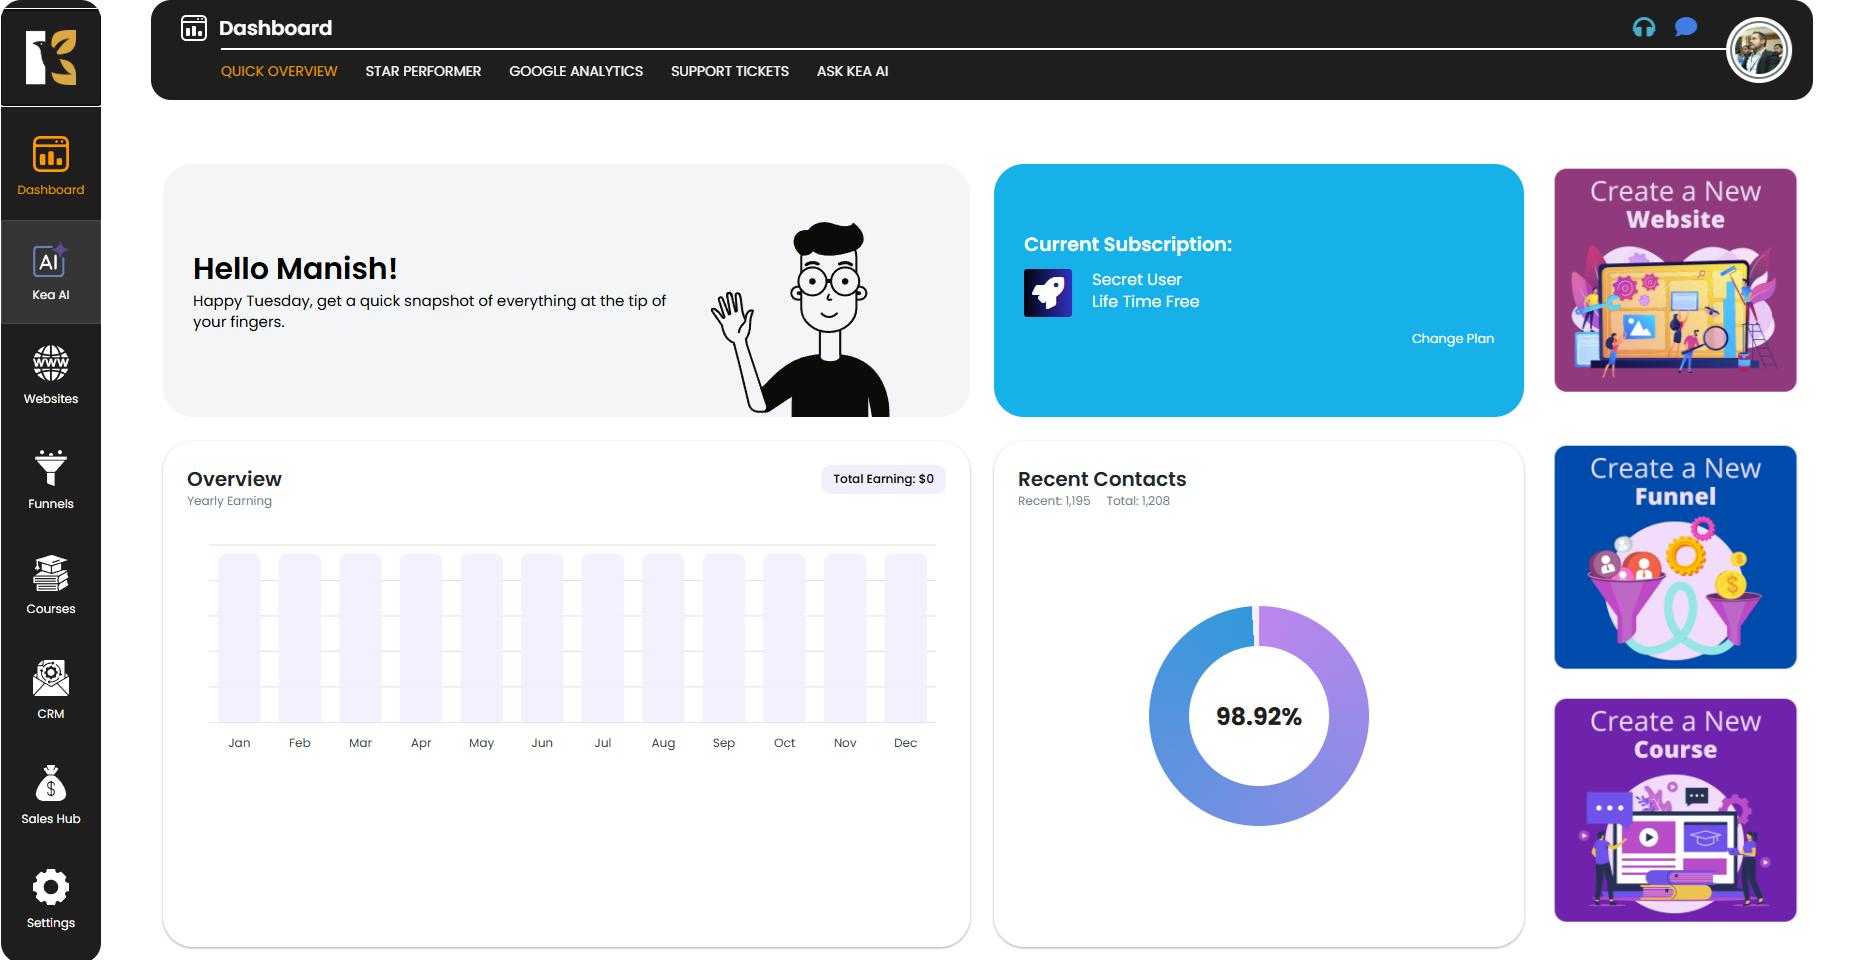
- After successful login, you’ll land on the Main Dashboard where all key modules are visible.
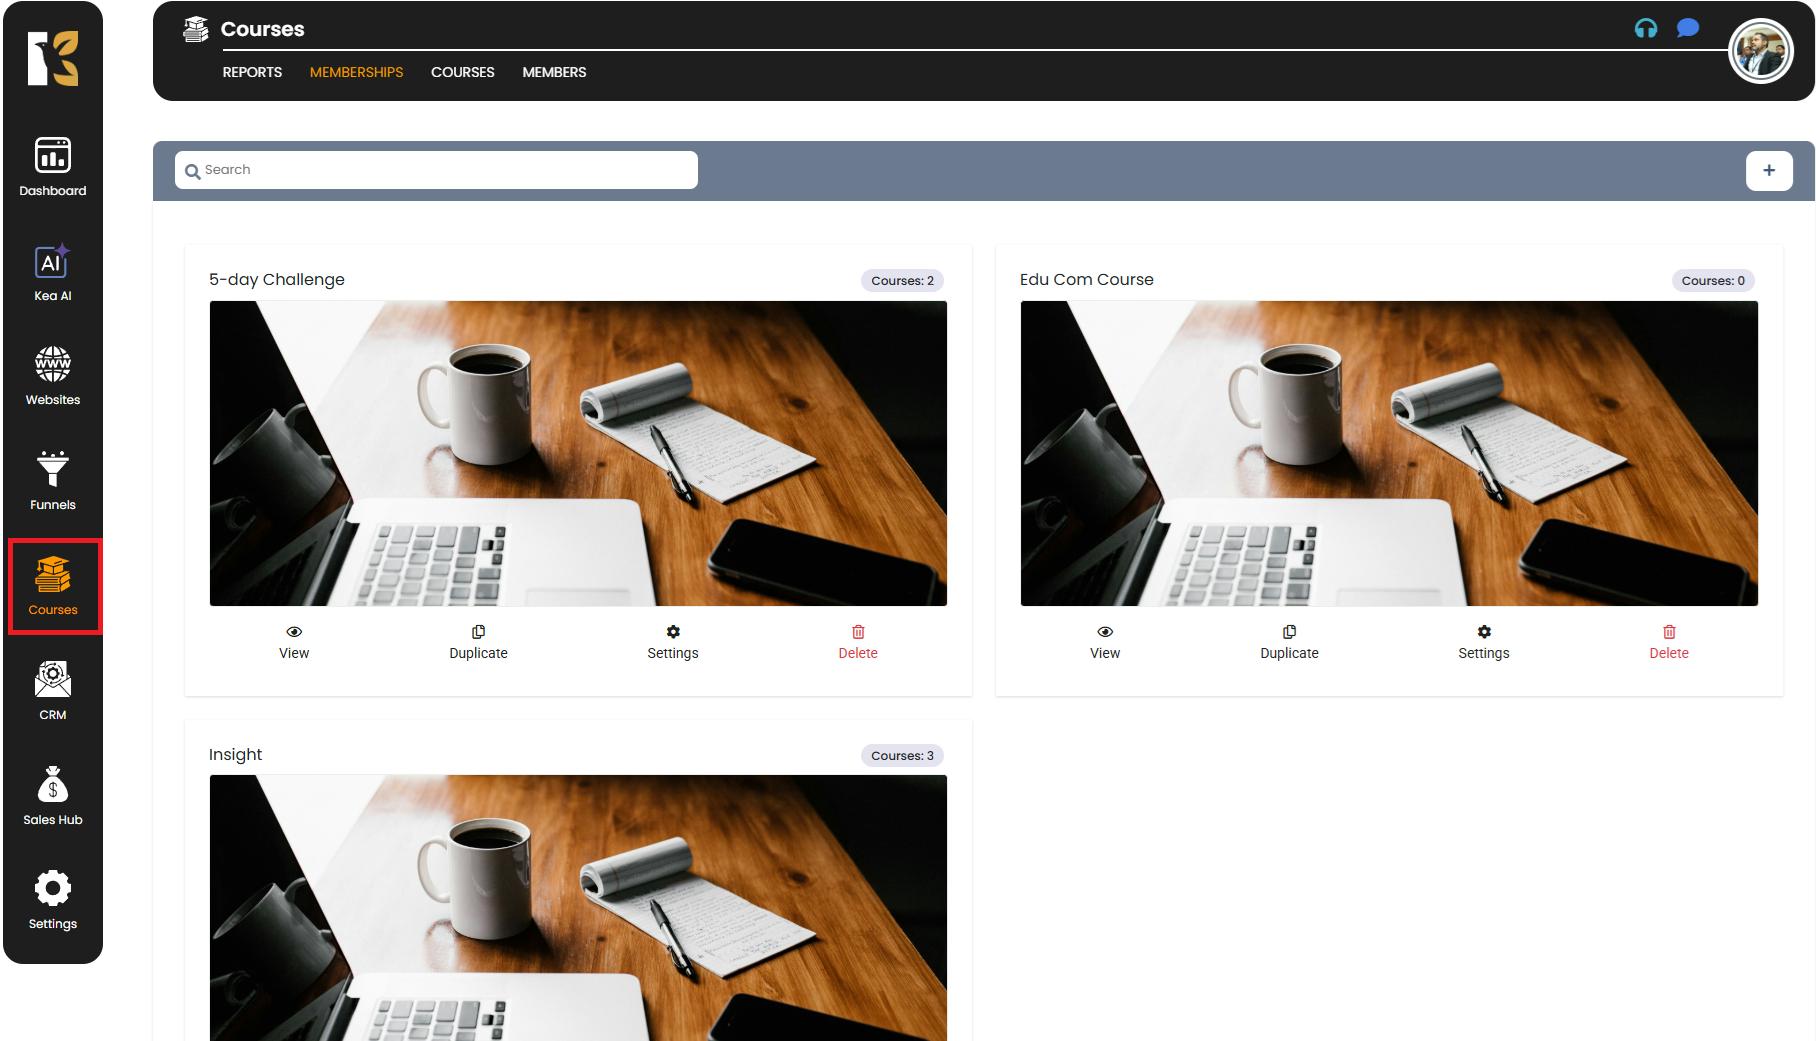
Access the Courses Section
- On the Vertical Menu (left sidebar), scroll down and click on Courses.
- This will redirect you to the Memberships Section (by default), which lists all memberships you’ve created (if any).
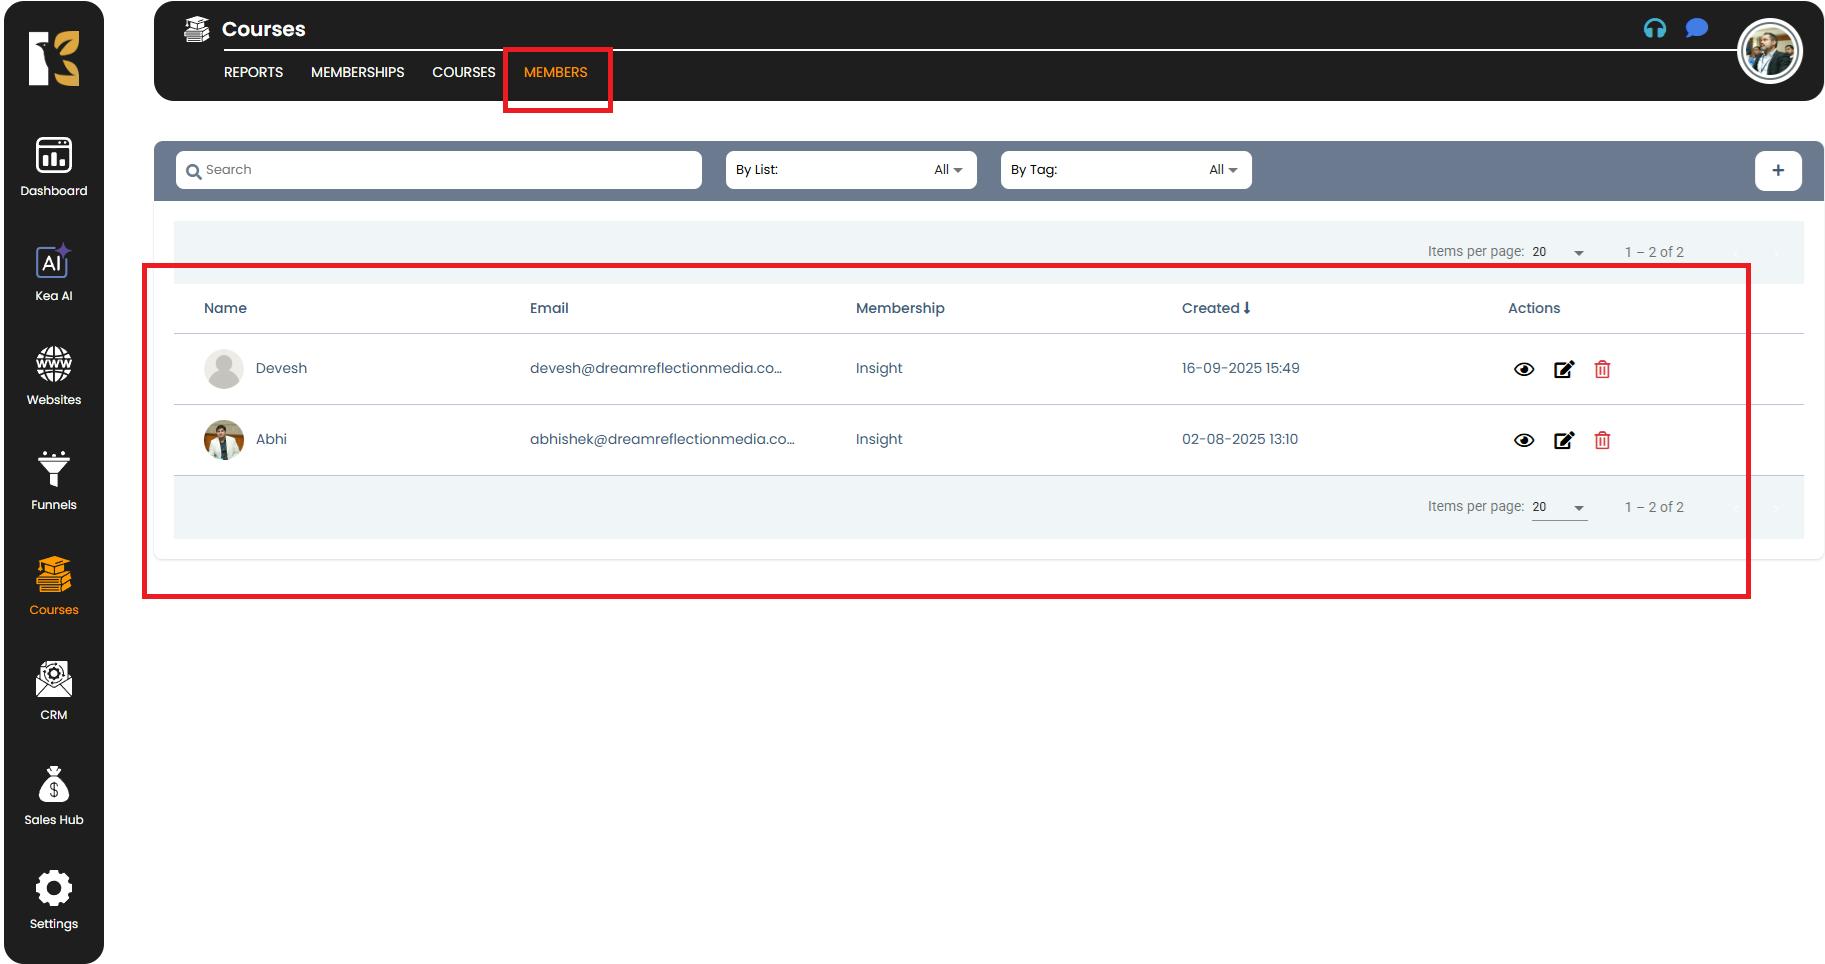
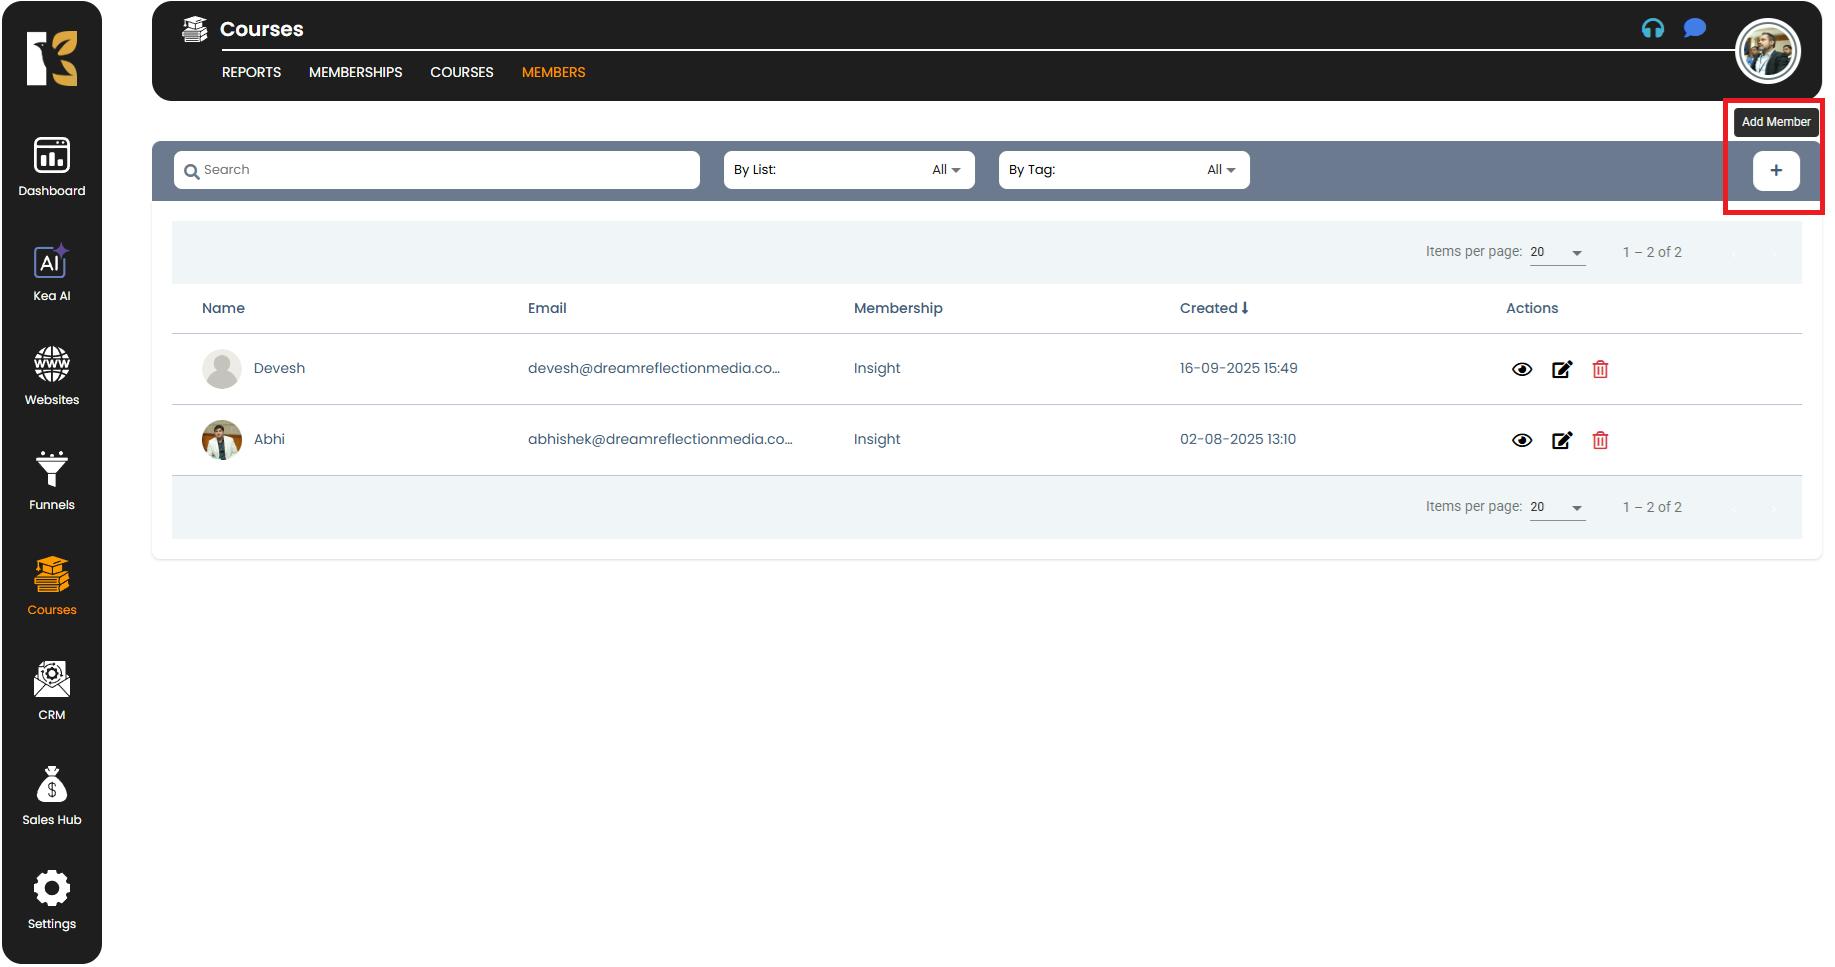
Navigate to Members
- Next to Memberships, you’ll find the Members tab.
- Click on it to go to the Members Page.
- Here you’ll see the list of all previously added members (if any).
Add a New Member
- Underneath the Horizontal Menu at the top, you’ll see the Add Member (+) icon.
- Click on it to open the Add Member Form.
Fill Out Member Details
The form will request the following information:
- First Name & Last Name – The member’s full name.
- Email Address – Required for login credentials and notifications.
- Subscribe to Membership Product – Choose the membership you want to assign to the member.
- Phone Number – Optional but useful for direct communication.
- Subscribe to List (if any) – Add them to a specific list for campaigns or updates.
- Add Tags (if any) – Organize and categorize your members easily with tags.
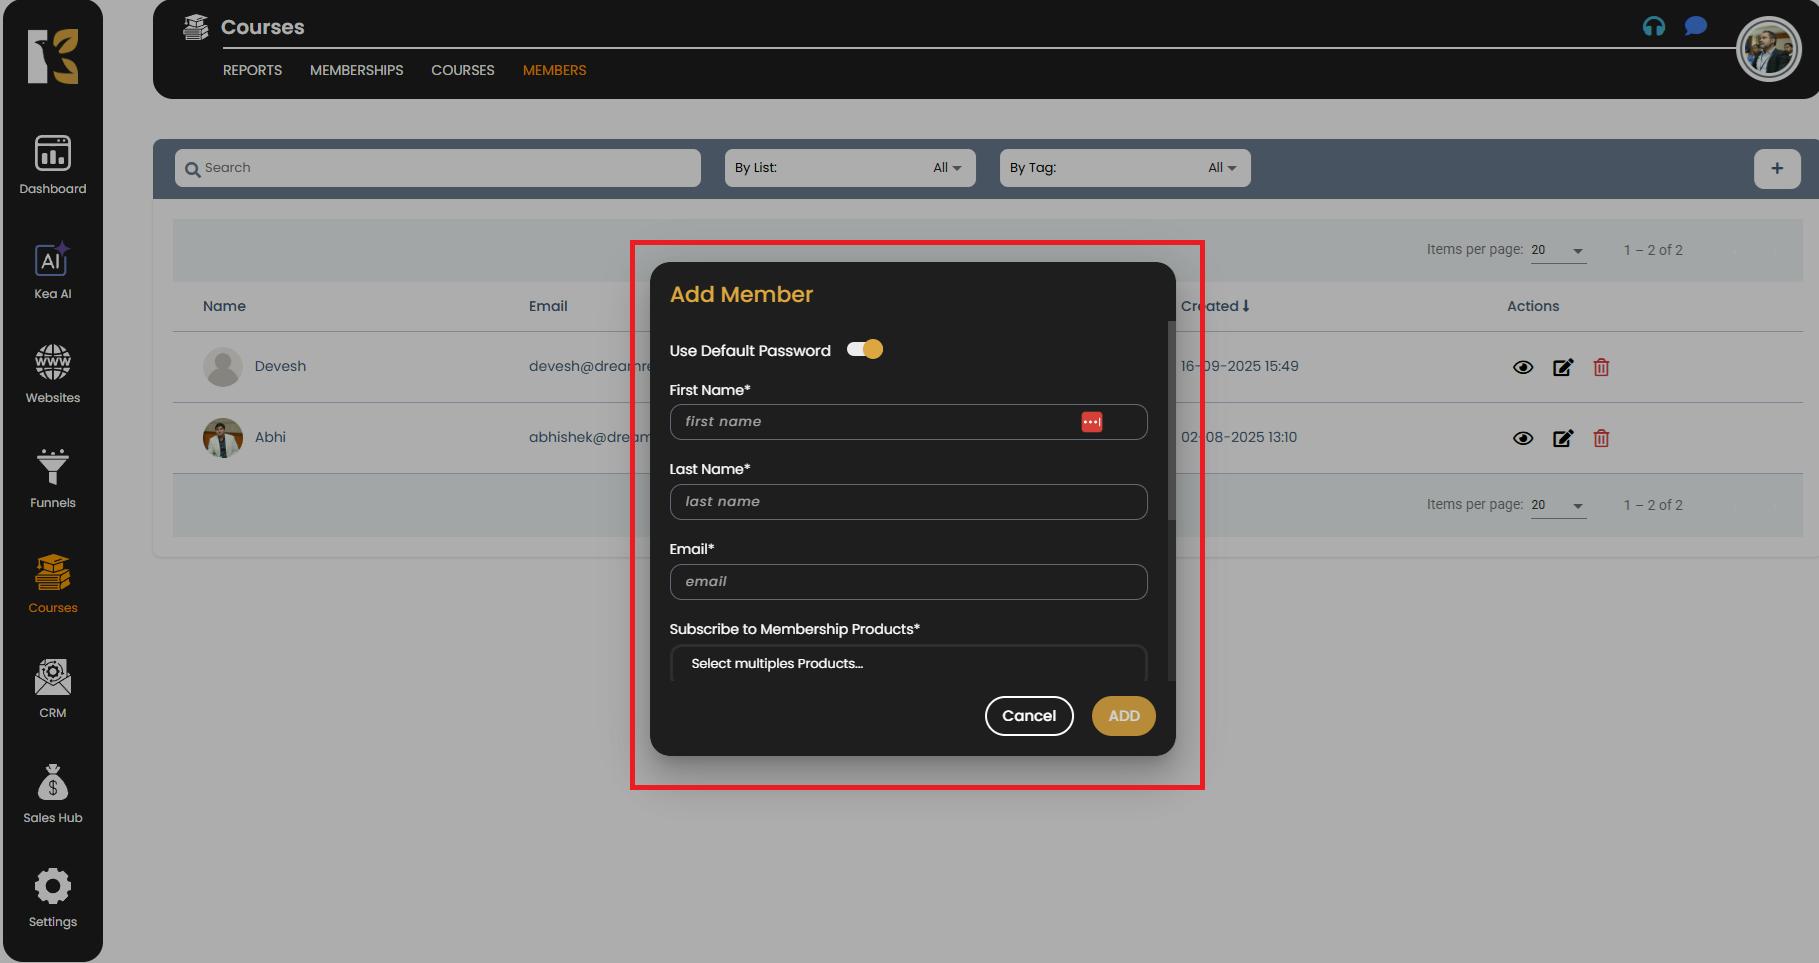
After entering the details, click Add.
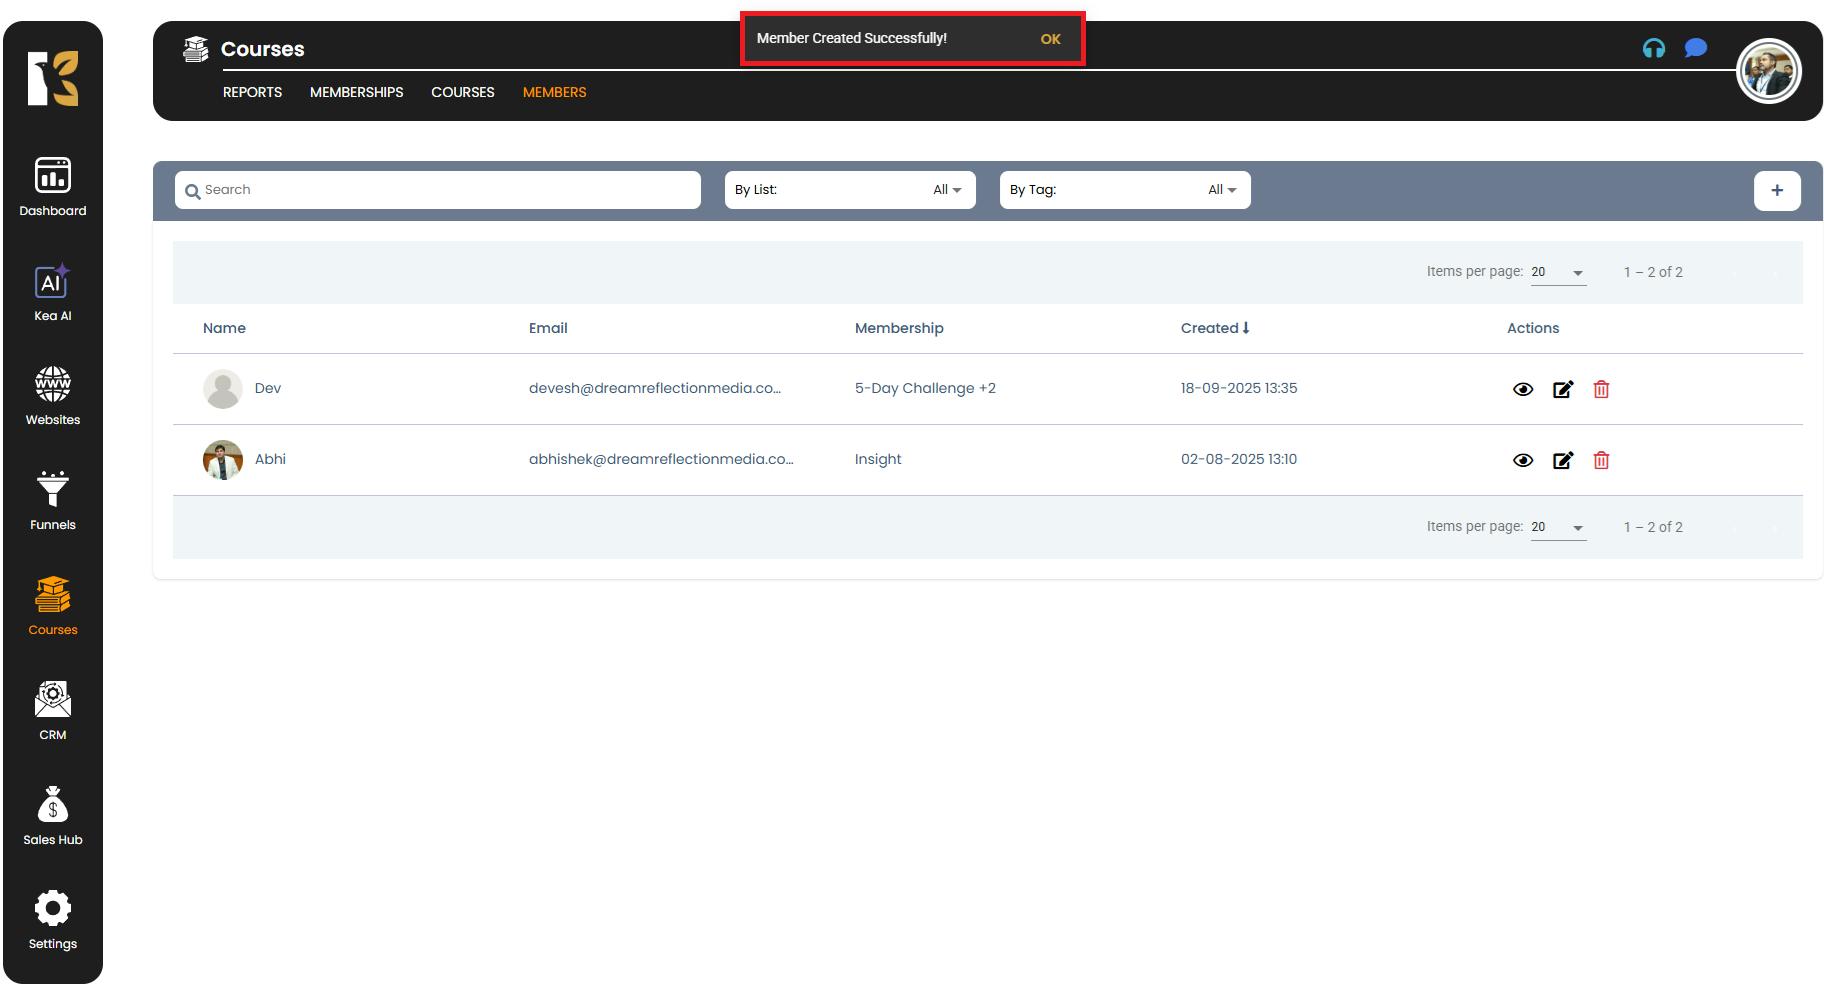
Confirmation of New Member
- Once details are submitted, a new member will be added automatically.
- The new member’s information will appear in the Members List on the page.
✅ Pro Tips for Adding Members Efficiently
- Use Tags Smartly – Tags help you segment your members for targeted emails and campaigns.
- Verify Email Addresses – Ensure the email entered is correct to avoid login issues later.
- Batch Uploads – If adding many members, consider uploading them via bulk import (if enabled in your plan).
- Keep Membership Organized – Always double-check the membership product you’re assigning to ensure correct access.
- Update Member Info Regularly – You can edit member details later if any changes occur.