How to Add Your Domain to KeaBuilder
Follow the steps below to connect your custom domain to your KeaBuilder account.
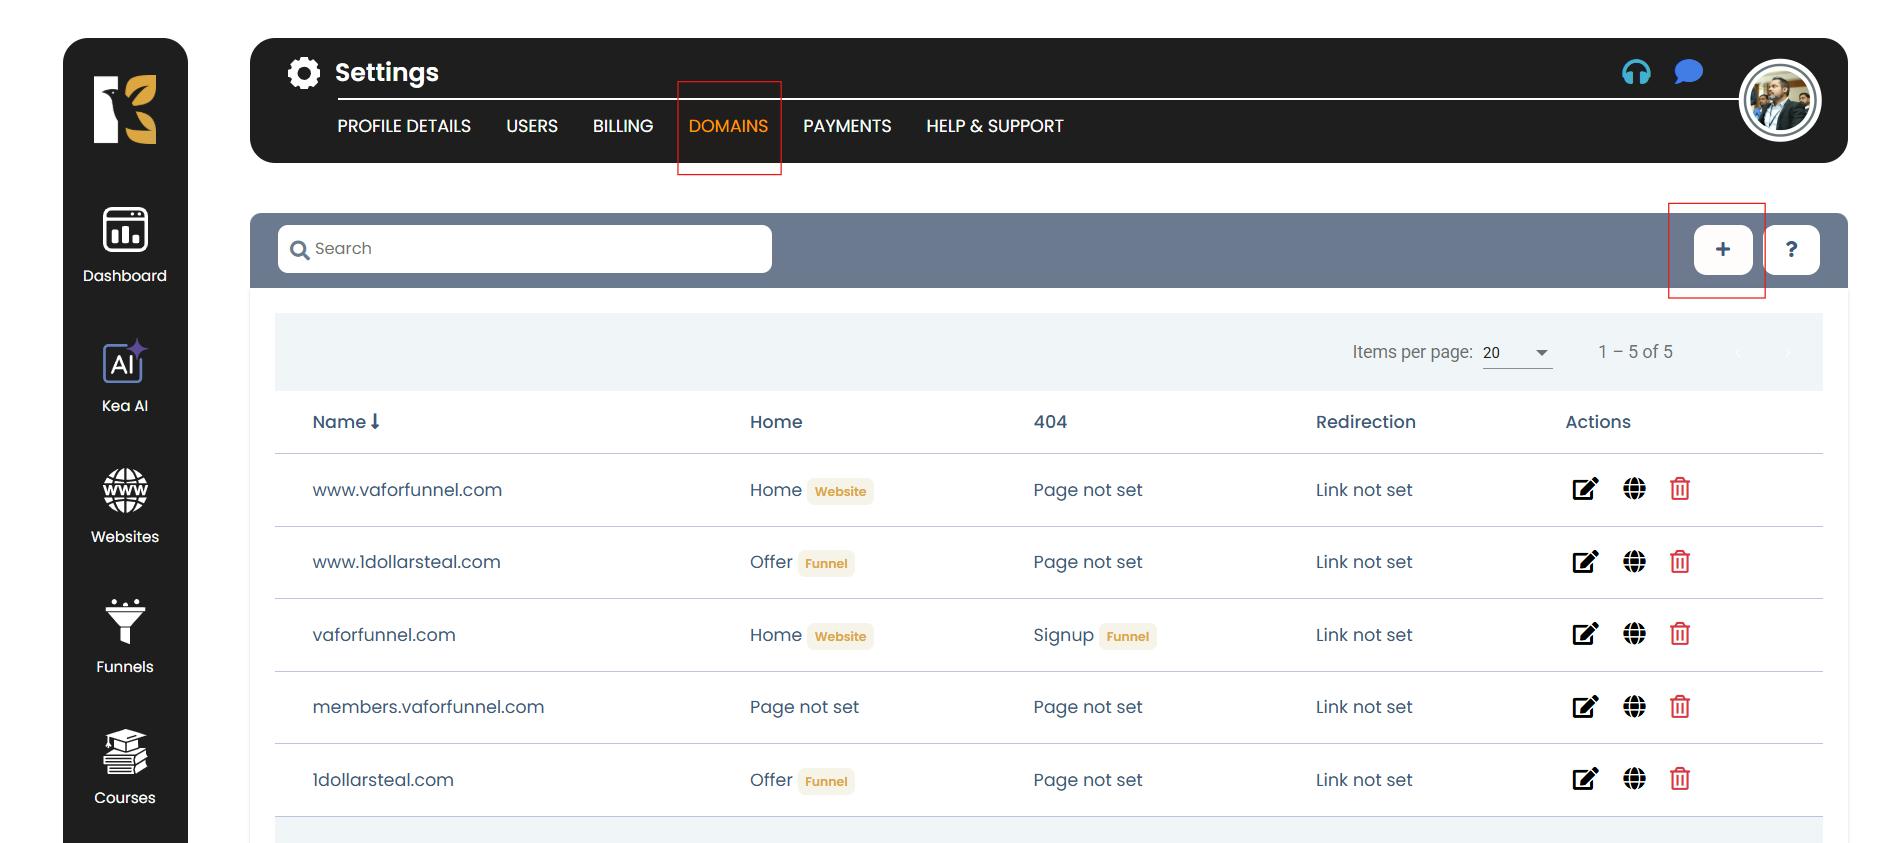
Step 1: Log in to Your Dashboard
- Sign in to your KeaBuilder Dashboard.
- Click the Settings gear icon & located at the bottom left corner.

Step 2: Open Domain Settings
- In the settings menu, click on Domains & at the top.
- Select the “+ Add Domain” & button.
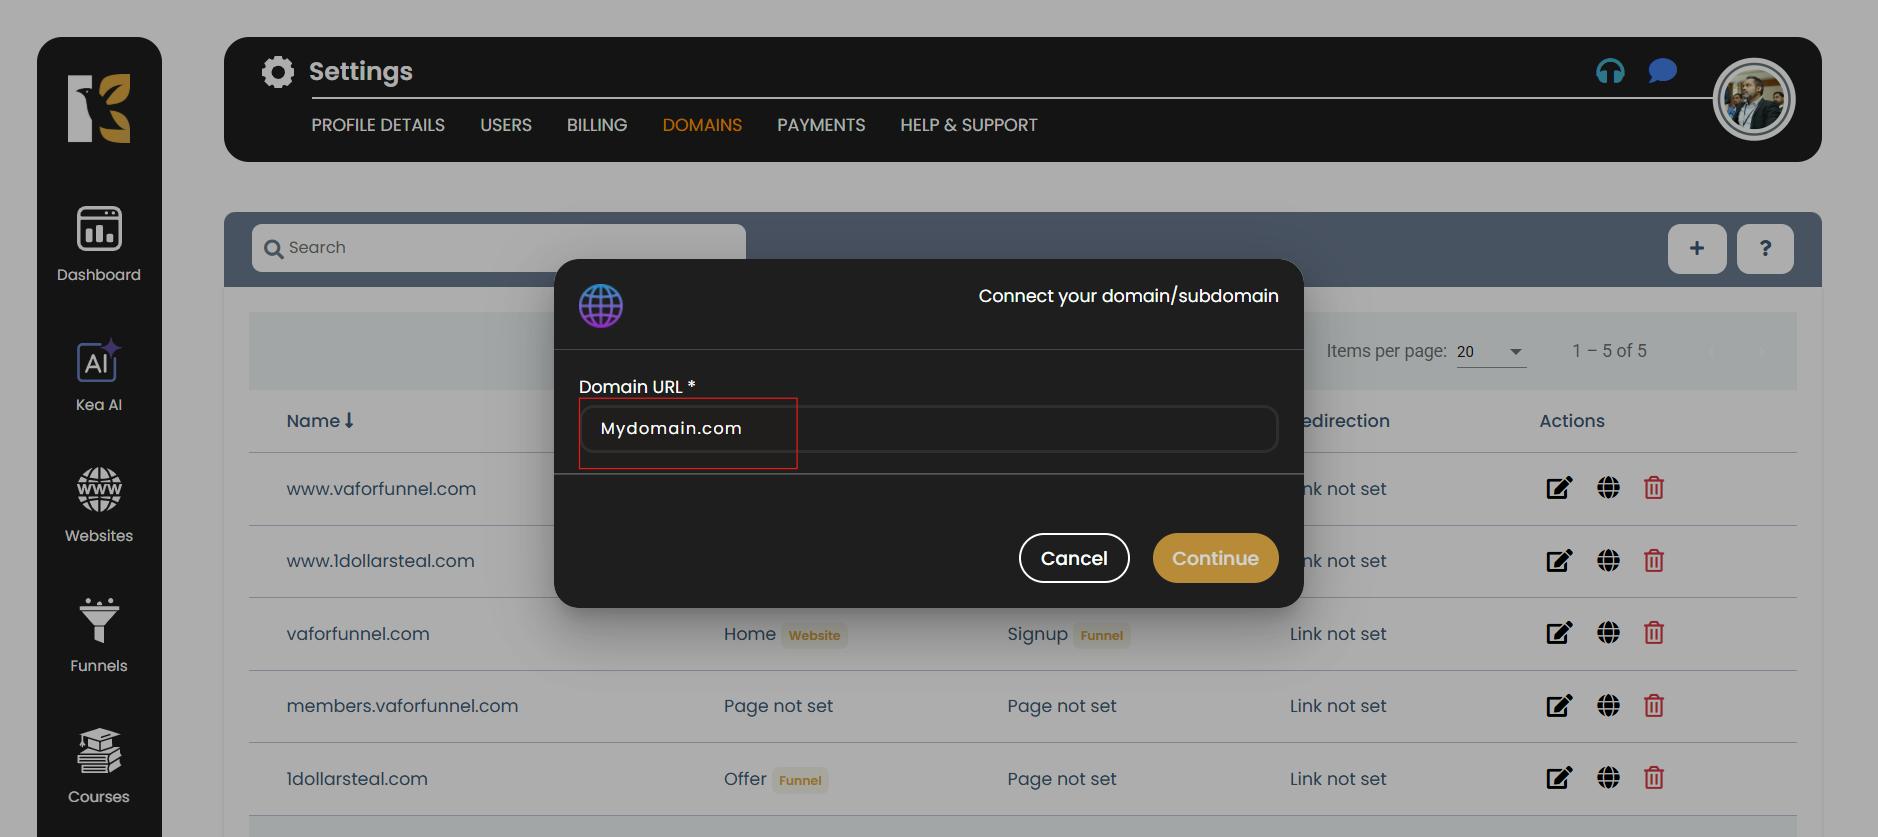
Step 3: Enter Your Domain Name
- Type your domain name without & http:// & or https://.
- Example: exampledomain.com
- Click Continue.
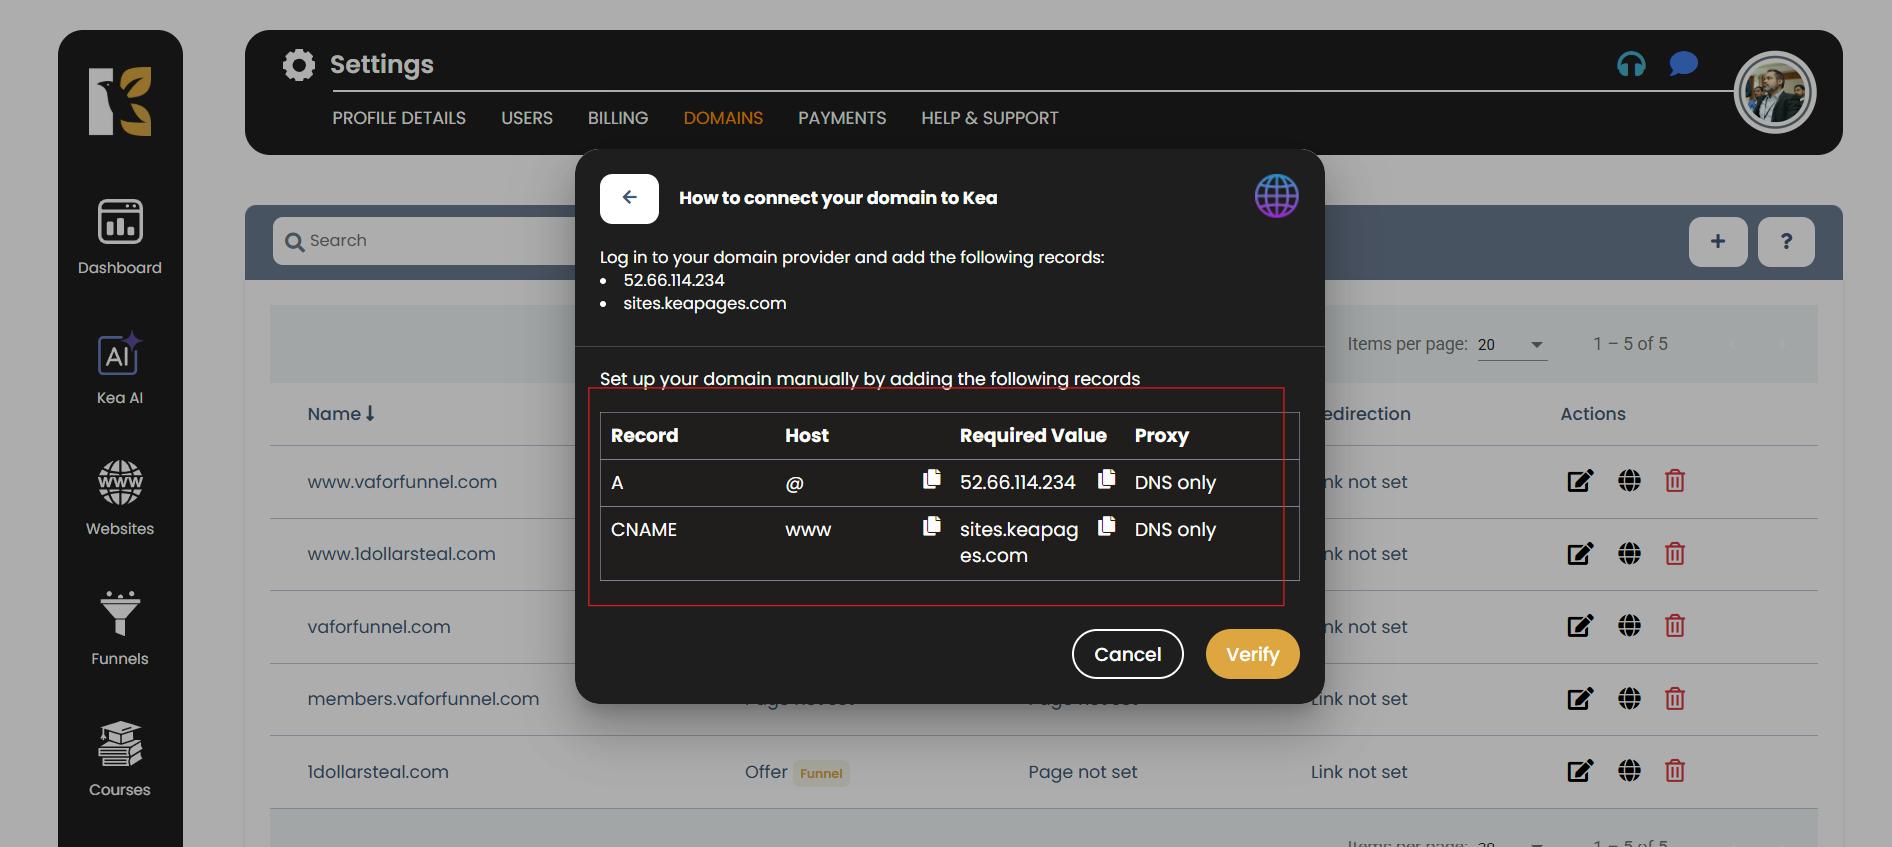
Step 4: Copy Your DNS Records
- A pop-up window will appear showing the DNS Records & you need to add.
- Copy all of these records and keep them handy.
Step 5: Update DNS with Your Domain Provider
- Log in to your domain provider account & (e.g., GoDaddy, Namecheap, Google Domains).
- Select your domain and click Manage Domain.
- Navigate to DNS Records & or Edit DNS.
- Add the DNS records you copied from KeaBuilder.
- Click Save.
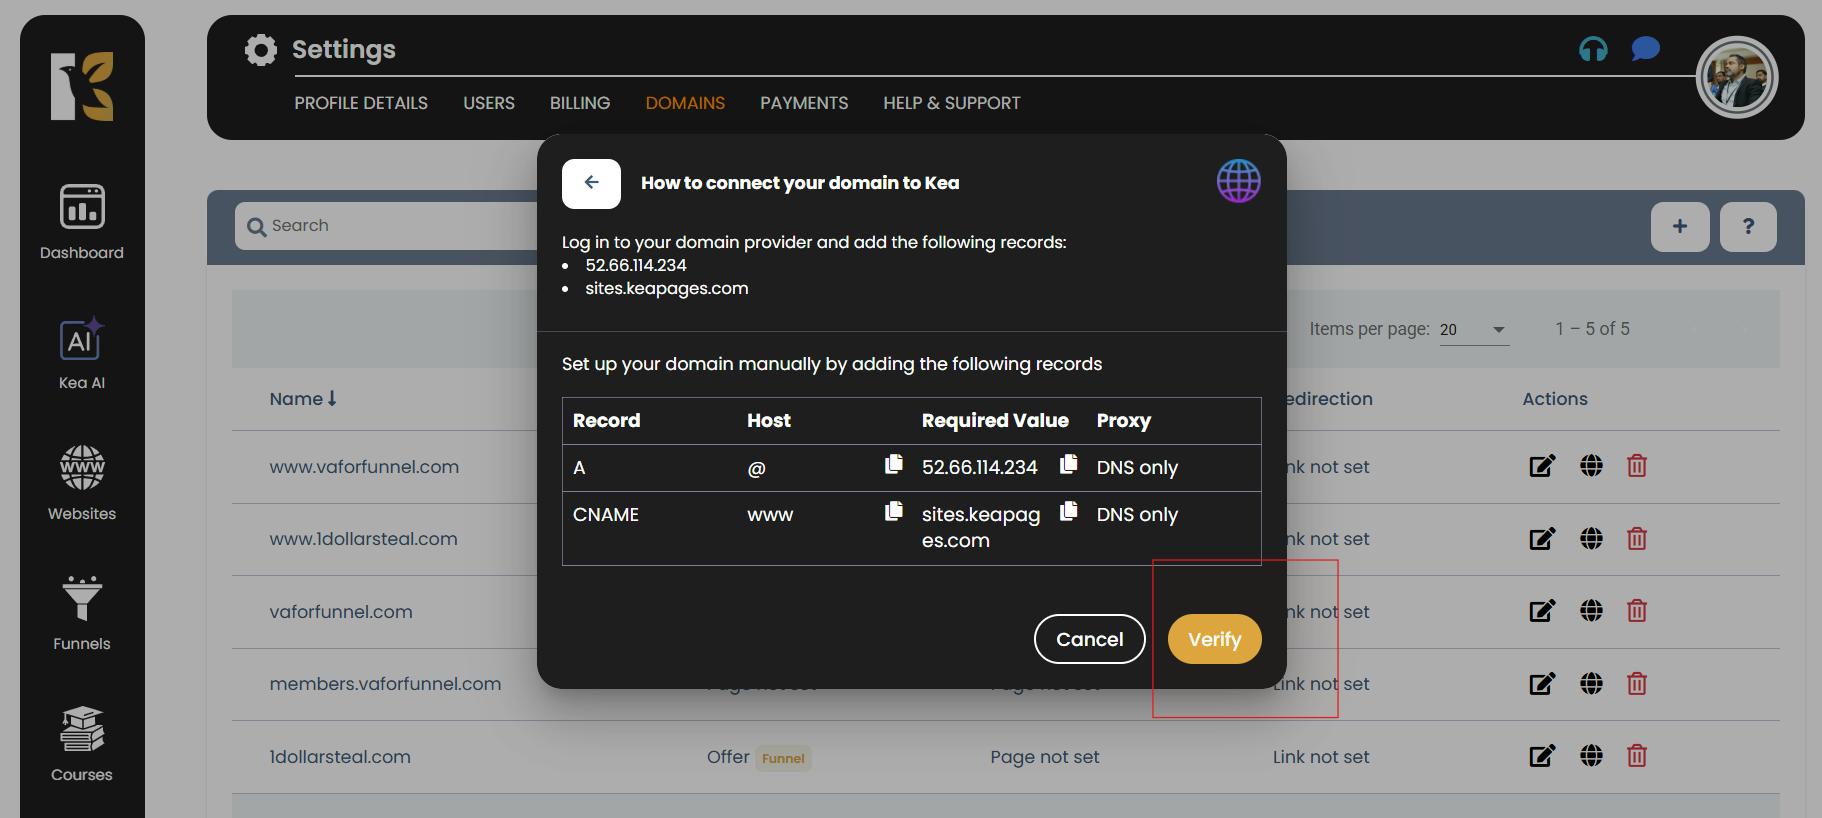
Step 6: Verify Your Domain in KeaBuilder
- Return to your KeaBuilder Dashboard.
- Click Verify & to confirm the connection.
That’s it! Your domain is now connected to KeaBuilder.
Important Note
- Domain connection may take up to 24 hours & to propagate, depending on your domain provider. Please be patient while the records update.