How to Manage Borders on a Webpage
Adding borders to your webpage elements is a great way to visually define sections, enhance content structure, and improve the overall design appeal. Borders can help draw attention to specific areas and create a more polished, organized look.
However, keep in mind that borders add to an element's overall dimensions. Always check spacing and alignment to ensure your layout remains consistent and visually balanced.
✅ Steps to Customize Page Borders in Kea Builder
- 🟢 Step 1: Access Page Settings
Navigate to the top menu bar and click on Page Settings to access the customization options for your webpage.
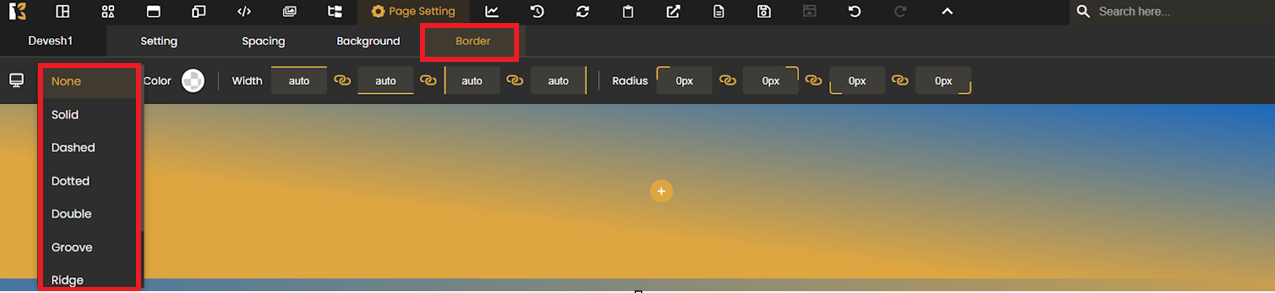
- 🎯 Step 2: Select the ‘Border’ Tab
In the horizontal slider menu within Settings, click on the “Border” option. This will open up the border customization panel.
- 📏 Step 3: Set the Border Width
Define how thick you want the border to appear by adjusting the Border Width value (in pixels).
- 🎨 Step 4: Choose a Border Style
Select your preferred border style from the dropdown. Common styles include:- Solid
- Dashed
- Dotted
- Double
- Groove
- Ridge
- Inset
- Outset
- None (to remove borders)
- 🔄 Step 5: Adjust Border Radius
Customize the Border Radius to control the roundness of the corners. A higher value creates more curved edges.
- 🖌️ Step 6: Select a Border Color
Use the color picker to choose a border color that complements your page design.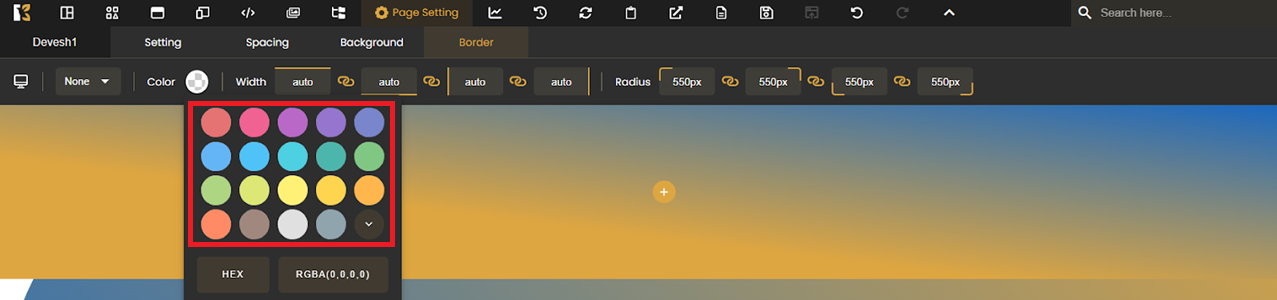
- 🔁 Apply Borders to Other Pages or Elements
You can repeat these steps to apply unique borders to:- Entire webpages
- Specific sections or rows
- Individual elements like buttons, containers, and images
💡 Pro Tips:
- Use subtle borders for a clean, modern look.
- Combine border radius with shadows for a soft, card-like design.
- Stick to your brand color palette to maintain visual consistency.
With Kea Builder, managing borders is intuitive and flexible—empowering you to structure your website with precision and visual clarity.