How to Edit a Field in CRM
Custom fields in your CRM allow you to store and organize essential data about your contacts, campaigns, and automation workflows. Over time, you may need to update or modify a field to keep your CRM structured and relevant. KeaBuilder CRM makes it easy to edit fields seamlessly.
Follow this detailed step-by-step guide:
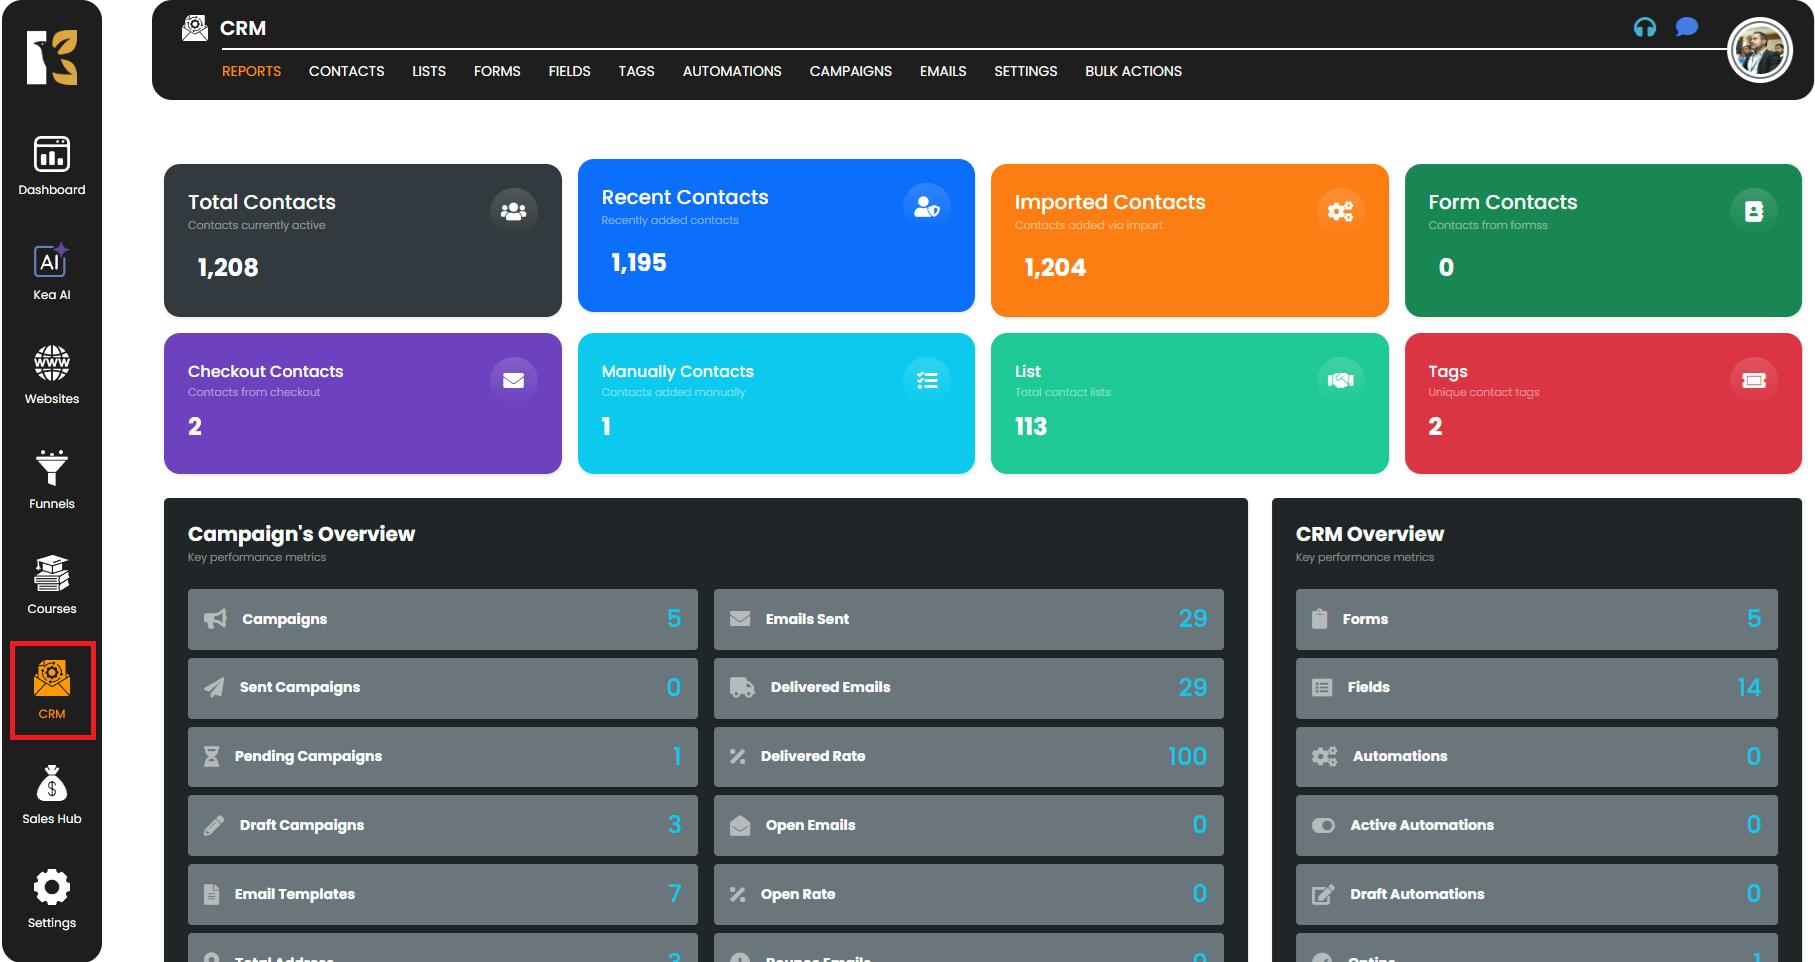
Step 1: Access the Fields Module
- From the CRM Panel, go to the left-hand side menu.
- Click on Fields to open the Fields Dashboard.
- This is where you can manage all your existing fields, create new ones, edit details, or delete unnecessary fields.
Step 2: Open the Fields Section
- In the top horizontal menu, ensure you are on the Fields tab.
- Here, you’ll see a list of all available custom fields along with details such as:
- Field Name
- Field Type (e.g., text, email, dropdown, number, etc.)
- Associated Tags
- Actions Menu for each field.
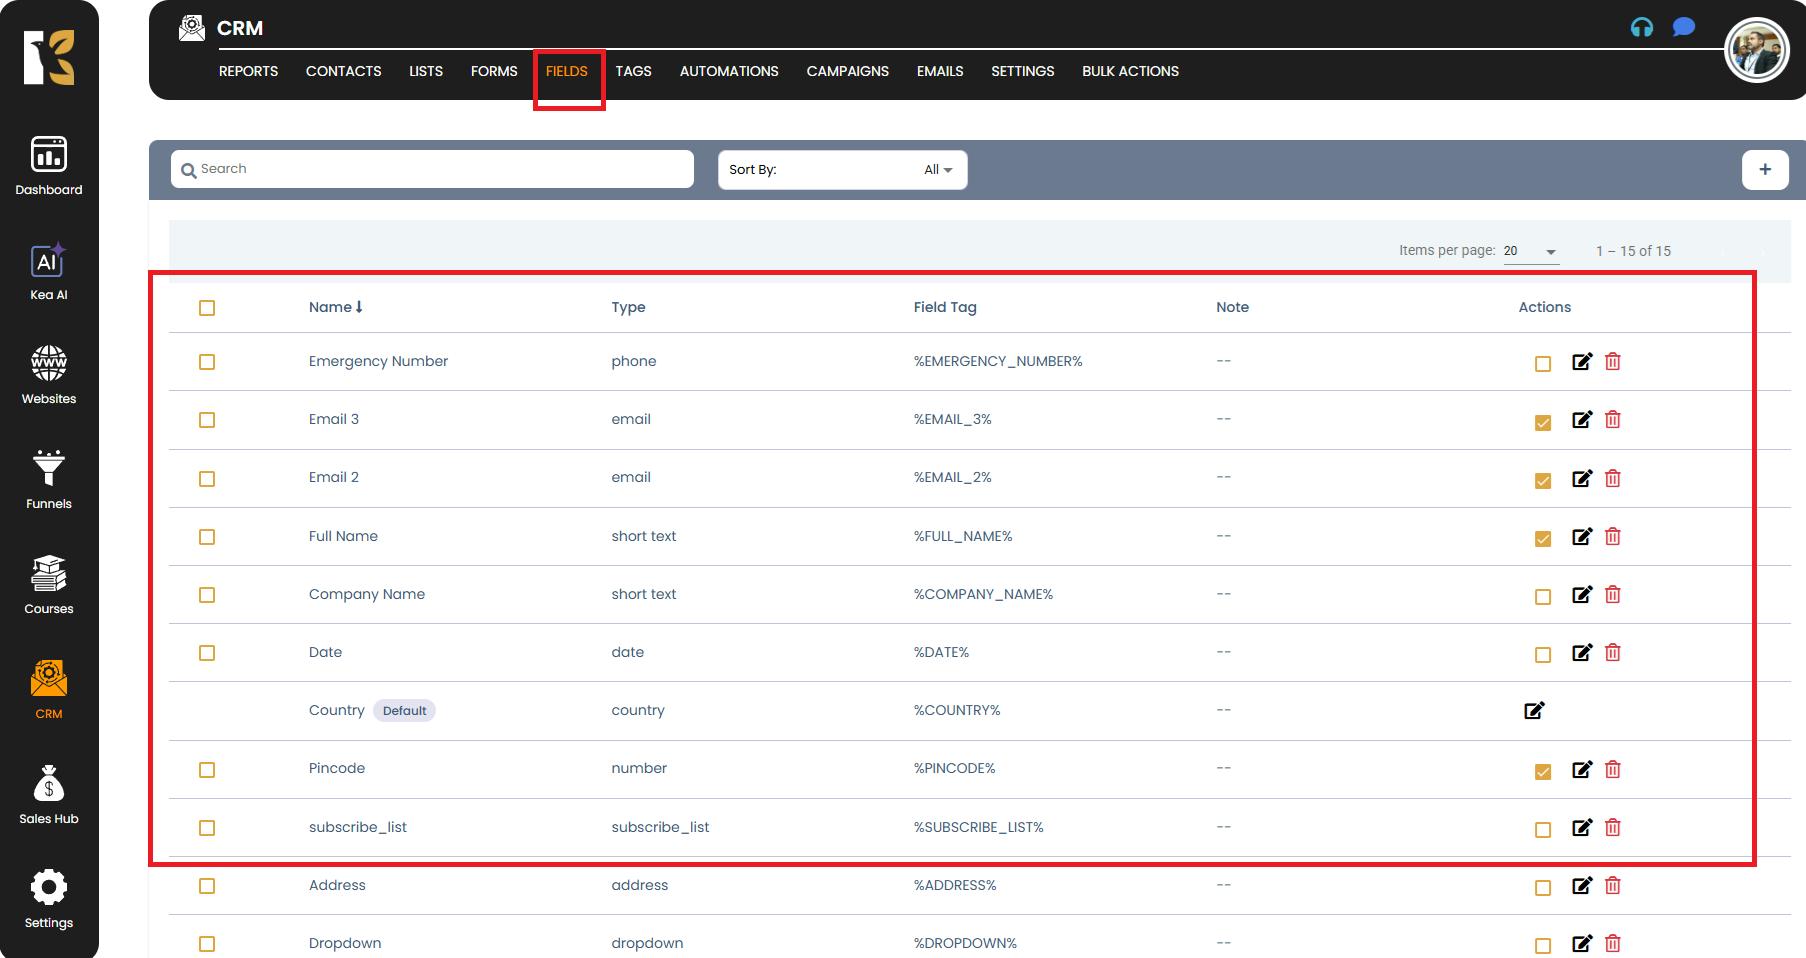
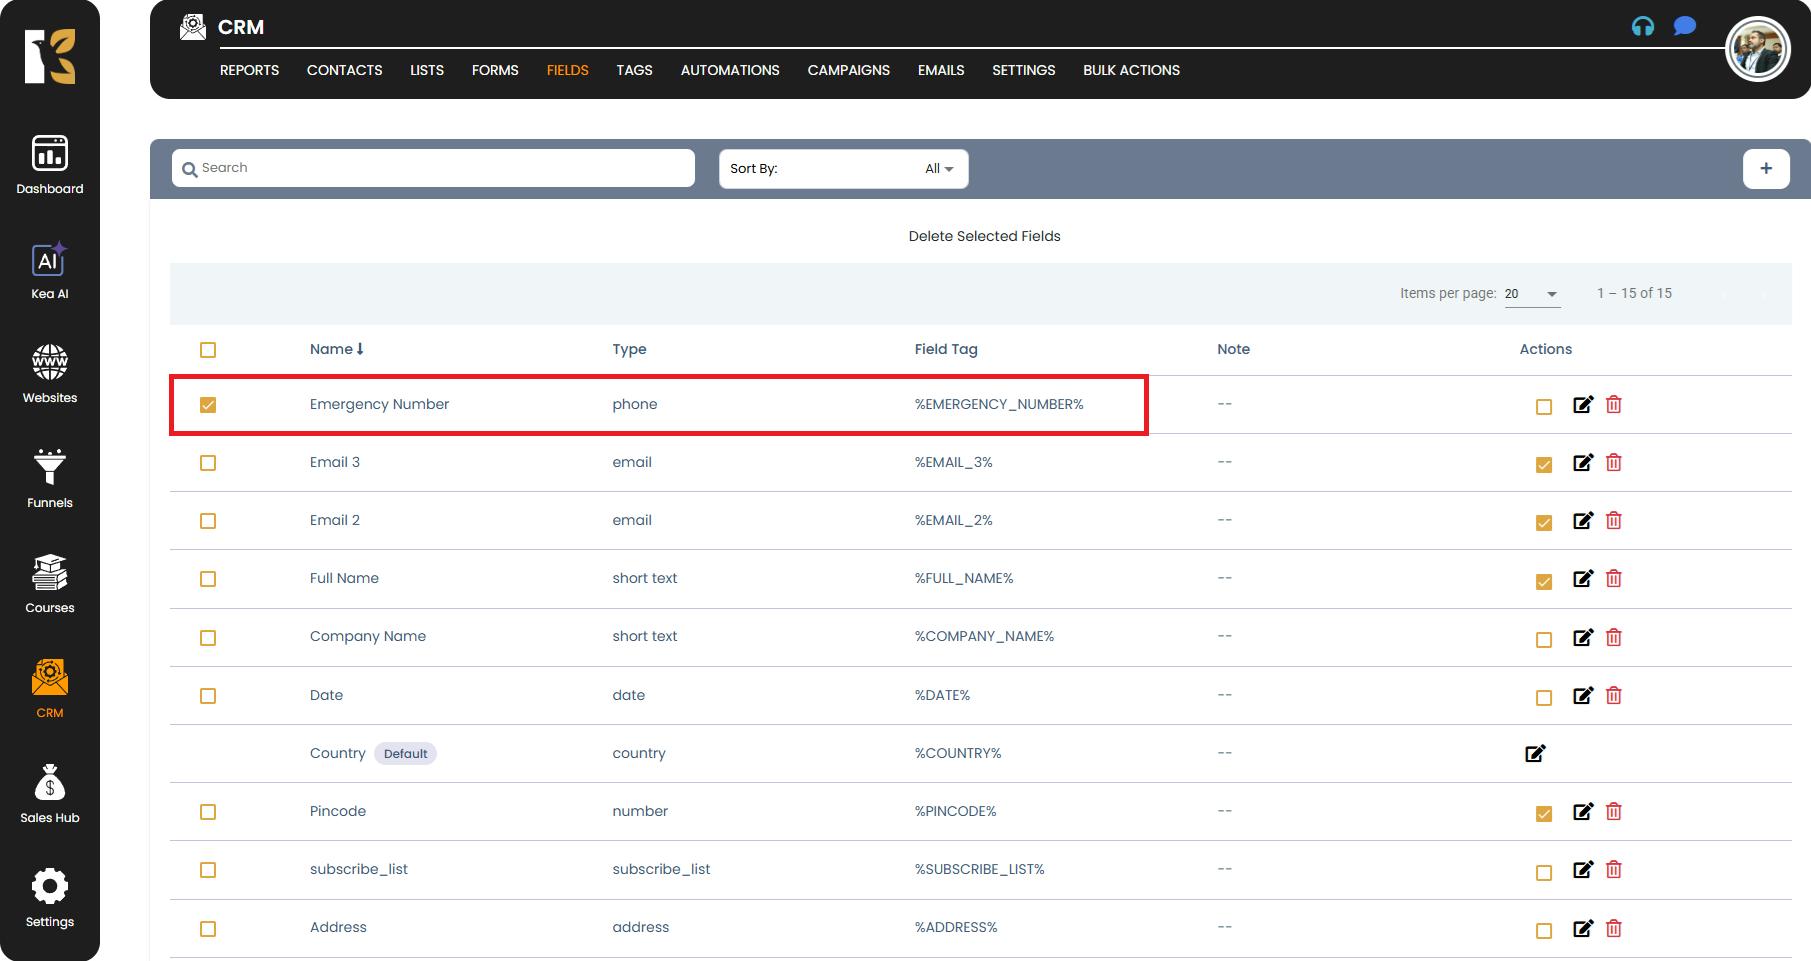
Step 3: Locate the Field You Want to Edit
- Scroll through the list to find the field you want to modify.
- If you have multiple fields, you can use the search bar (if available) to quickly locate it.
- Once you’ve found the required field, move to the Actions column on the far-right side.
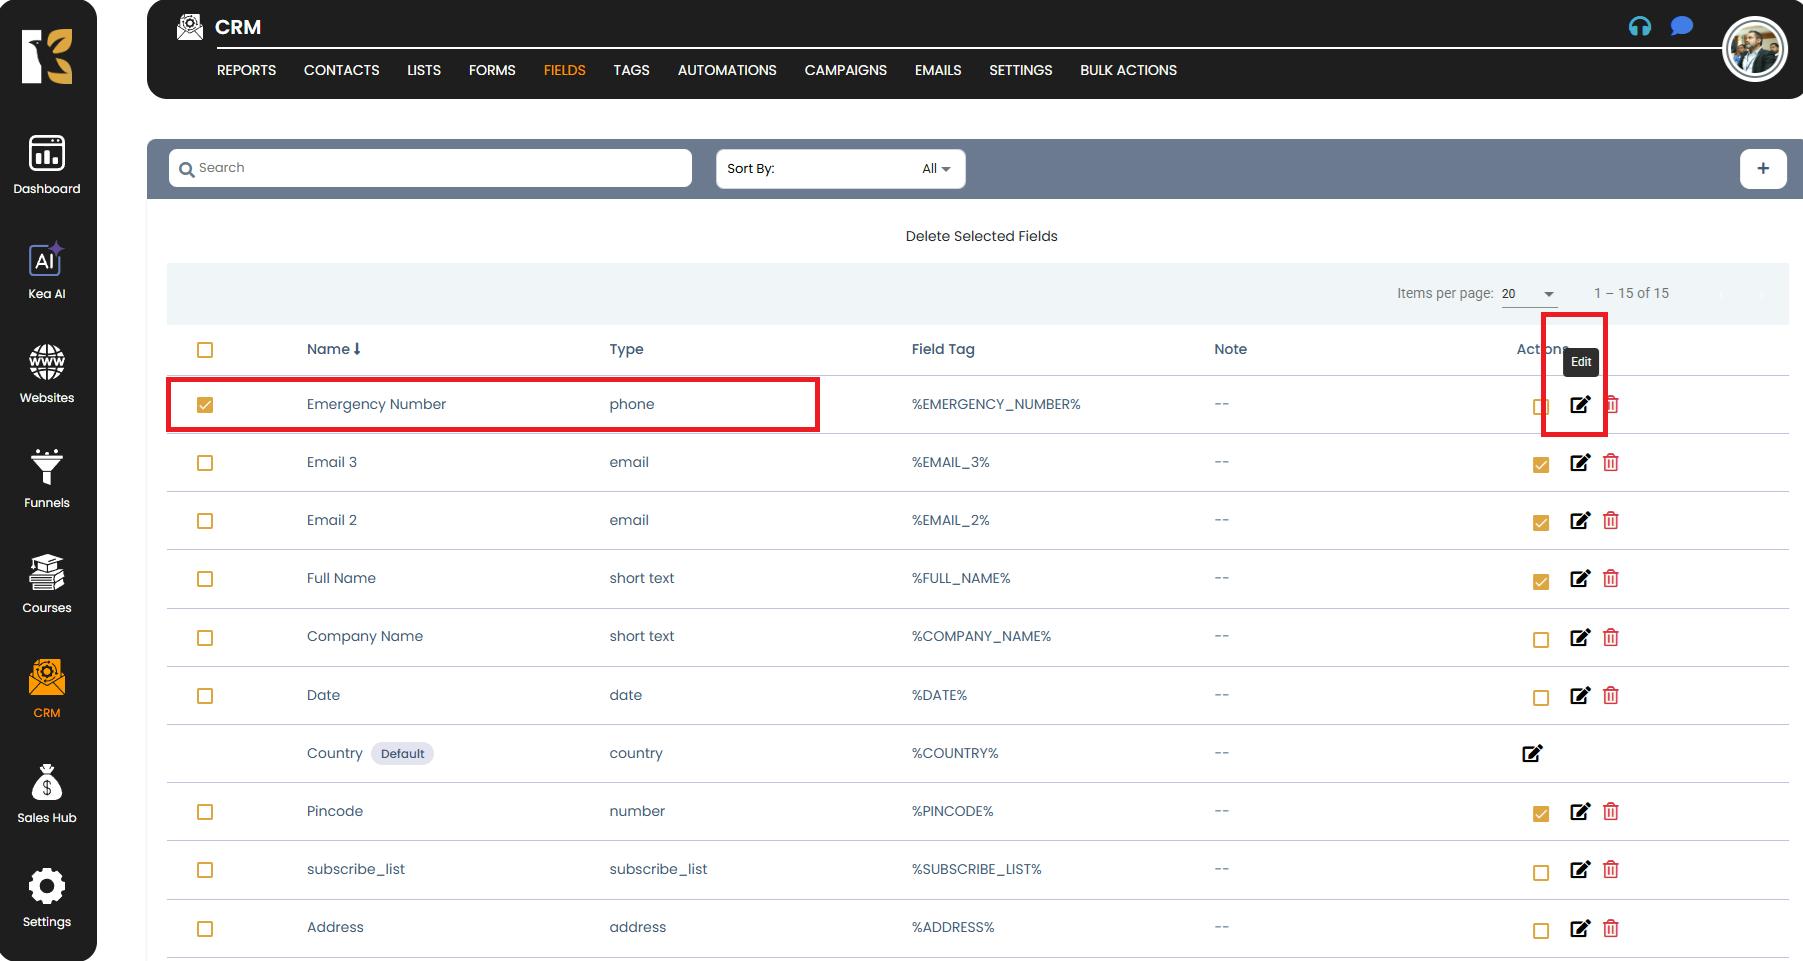
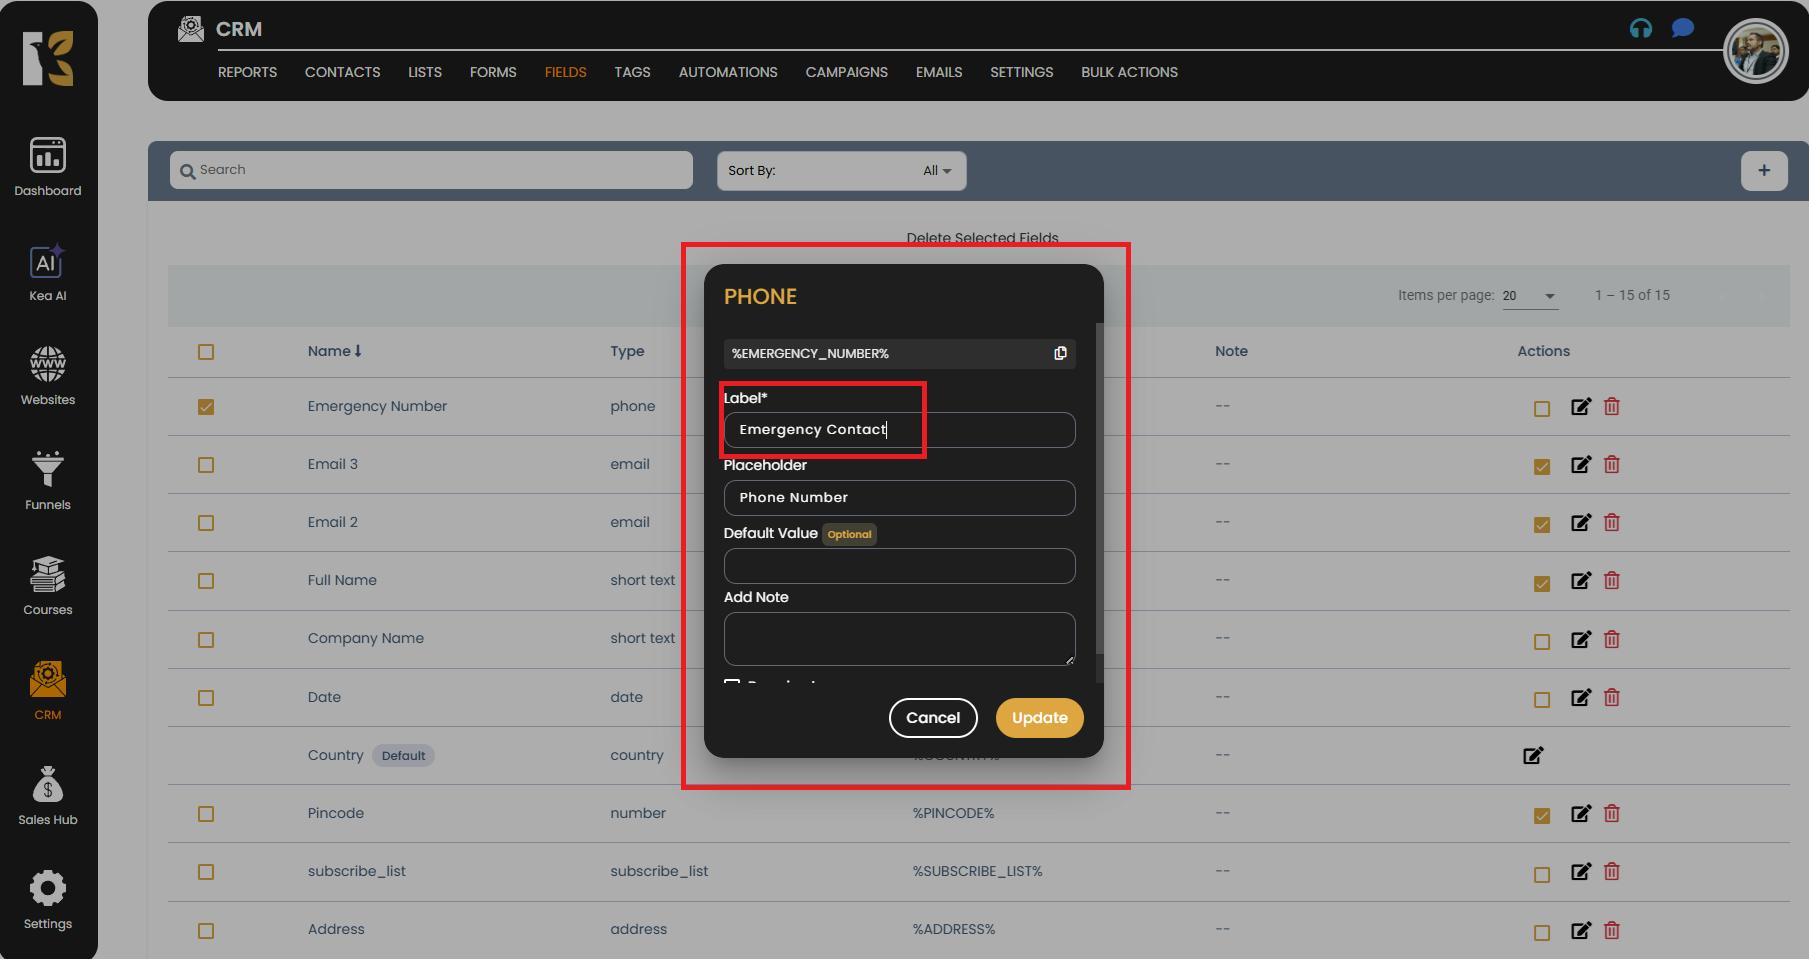
Step 4: Click on the Edit Icon
- In the Actions column, click on the Edit/Pencil icon corresponding to the selected field.
- This will open a popup editor where you can customize and update your field details.
Step 5: Make the Necessary Changes
Inside the Edit Field popup, you can modify the following details depending on your needs:
- Field Name → Change the label of the field if needed.
- Field Type → Update the field type (e.g., from Short Text to Dropdown, if applicable).
- Field Tag → Adjust or create a unique identifier for better integration with campaigns or automations.
- Tag Notes → Add or edit notes to describe the purpose of this field.
- Default Values → (If applicable) Add default pre-filled values for your field.
💡 Tip: If the field is already being used in automation workflows or forms, make sure your updates won’t affect any existing setups.
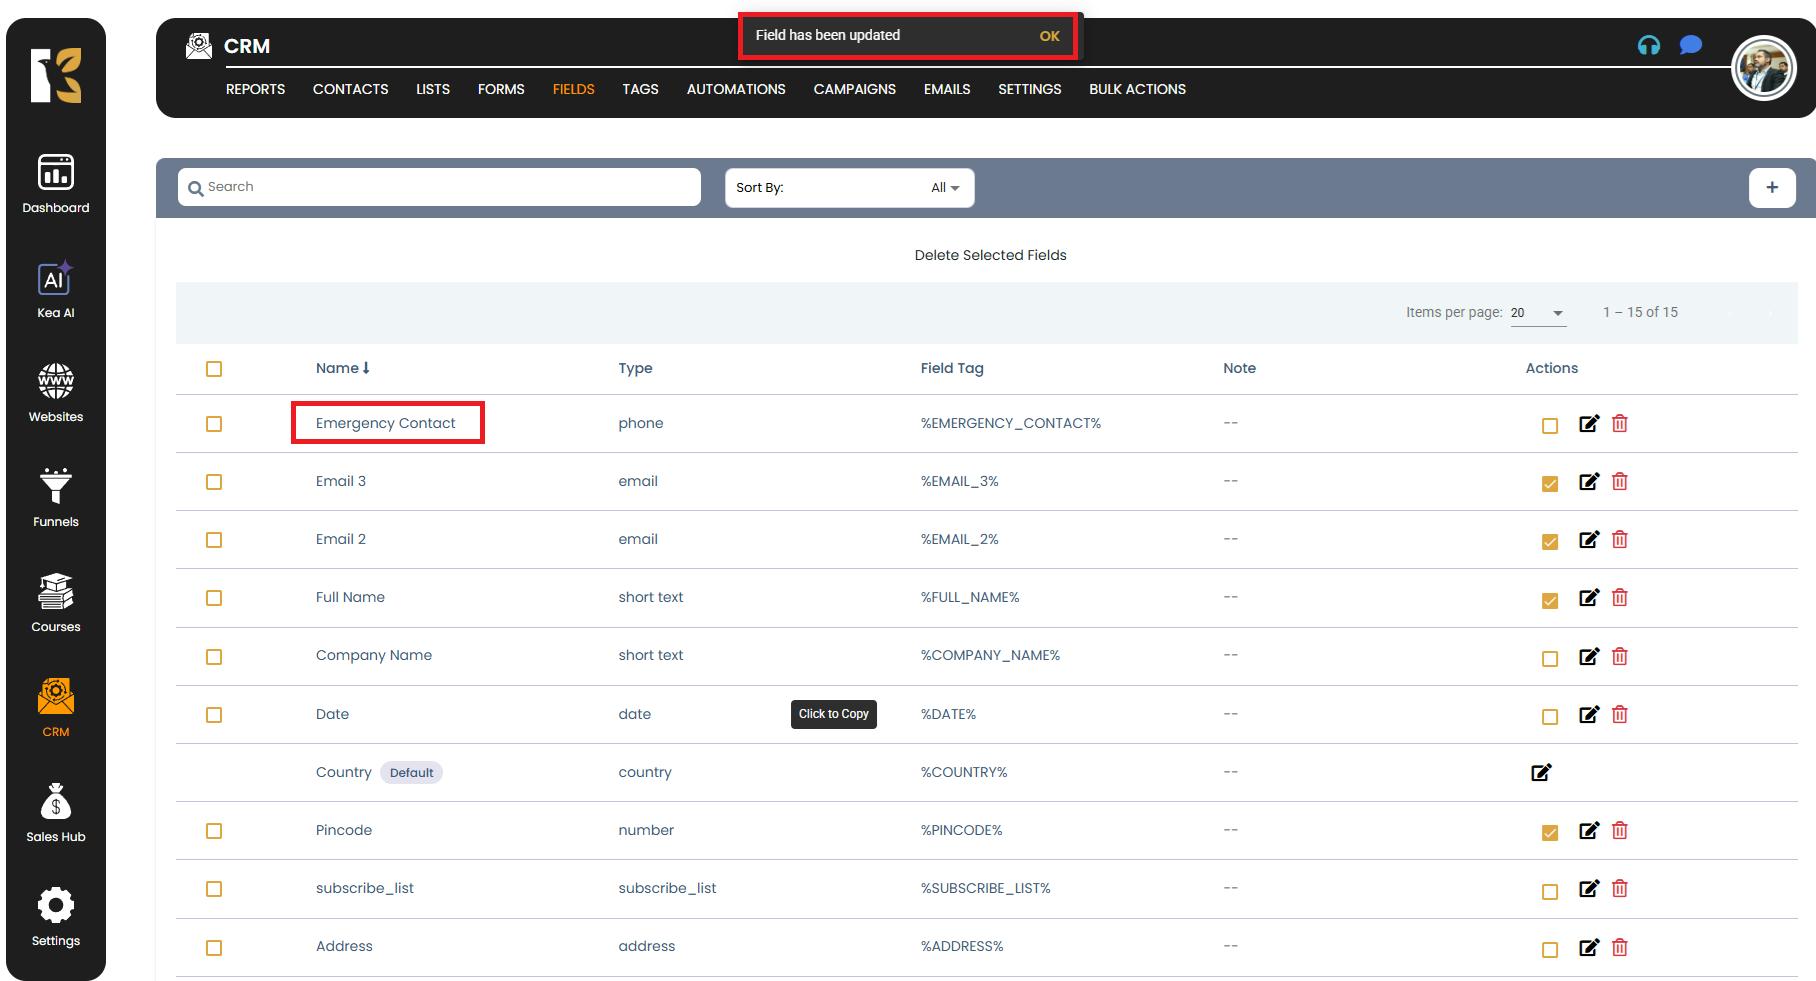
Step 6: Save Your Changes
- Once you’ve made all the required changes, click the Update or Save button.
- The system will automatically refresh the Fields Dashboard to reflect your updates.
- You can now verify that the edited field appears correctly.
Step 7: Verify Changes Across CRM
After updating the field, review its integration in other CRM areas:
- Forms → Ensure updated field names/types are reflected correctly.
- Contact Profiles → Confirm that stored data is displayed accurately.
- Automation Workflows → Check that no active workflows are disrupted.
Important Notes
- Real-time Updates: Once a field is edited, changes are immediately reflected across all linked forms, contacts, and automations.
- Impact on Existing Data: Editing field types (e.g., changing a text field to a dropdown) may affect how existing data is stored or displayed. Review carefully before confirming.
- Best Practice: If you’re unsure about significant edits, export your CRM data first for backup.
Pro Tip
Regularly review and update your CRM fields to:
- Maintain a clean and structured database.
- Ensure your forms and automations stay aligned with your business goals.
- Eliminate confusion when your team accesses stored data.