How to Add a New SMTP in KeaBuilder
Adding an SMTP (Simple Mail Transfer Protocol) allows you to send emails directly from your CRM. With KeaBuilder, you can easily integrate your email provider or add a new SMTP server for smooth email delivery.
Step-by-Step Guide
Login to KeaBuilder
- Start by logging in to your KeaBuilder account.
- Once logged in, you’ll land on the Main Dashboard.
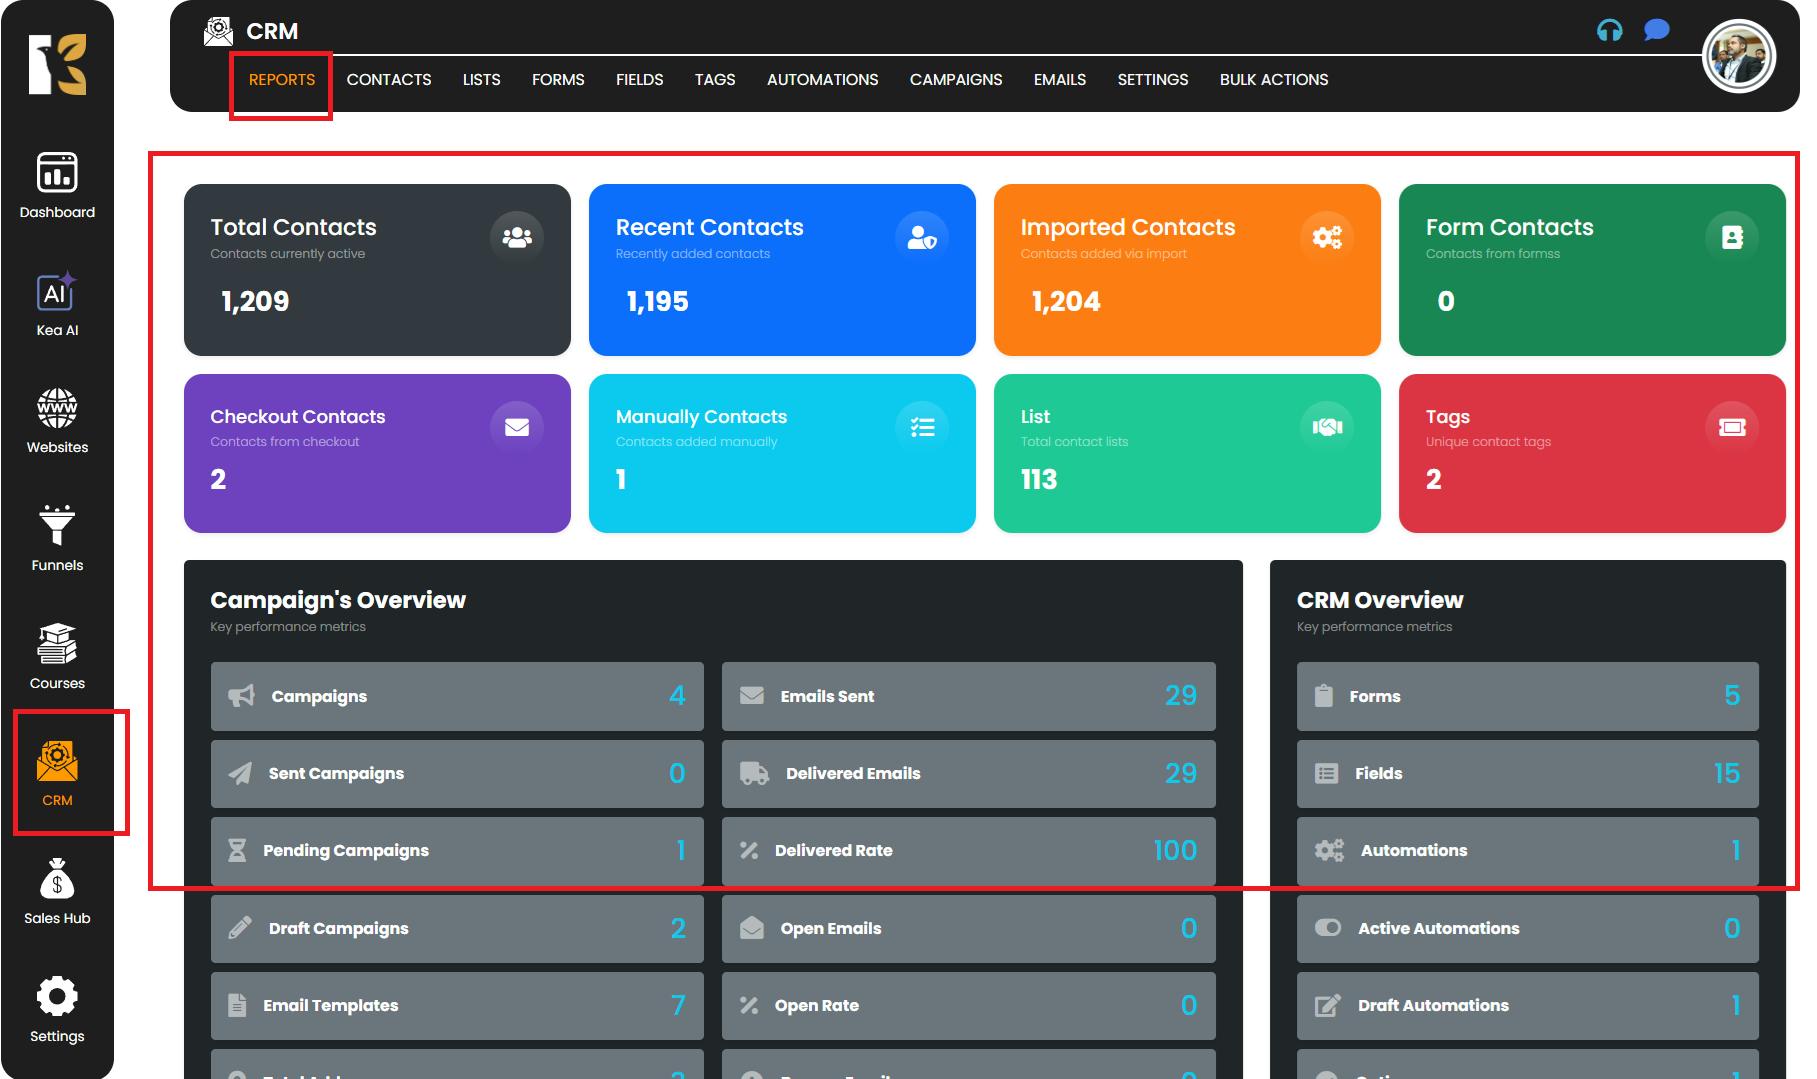
Access the CRM Dashboard
- From the Vertical Menu on the left-hand side, scroll down to CRM’s.
- Click on it to be redirected to the CRM Dashboard, where you can view overall reports related to your CRM.
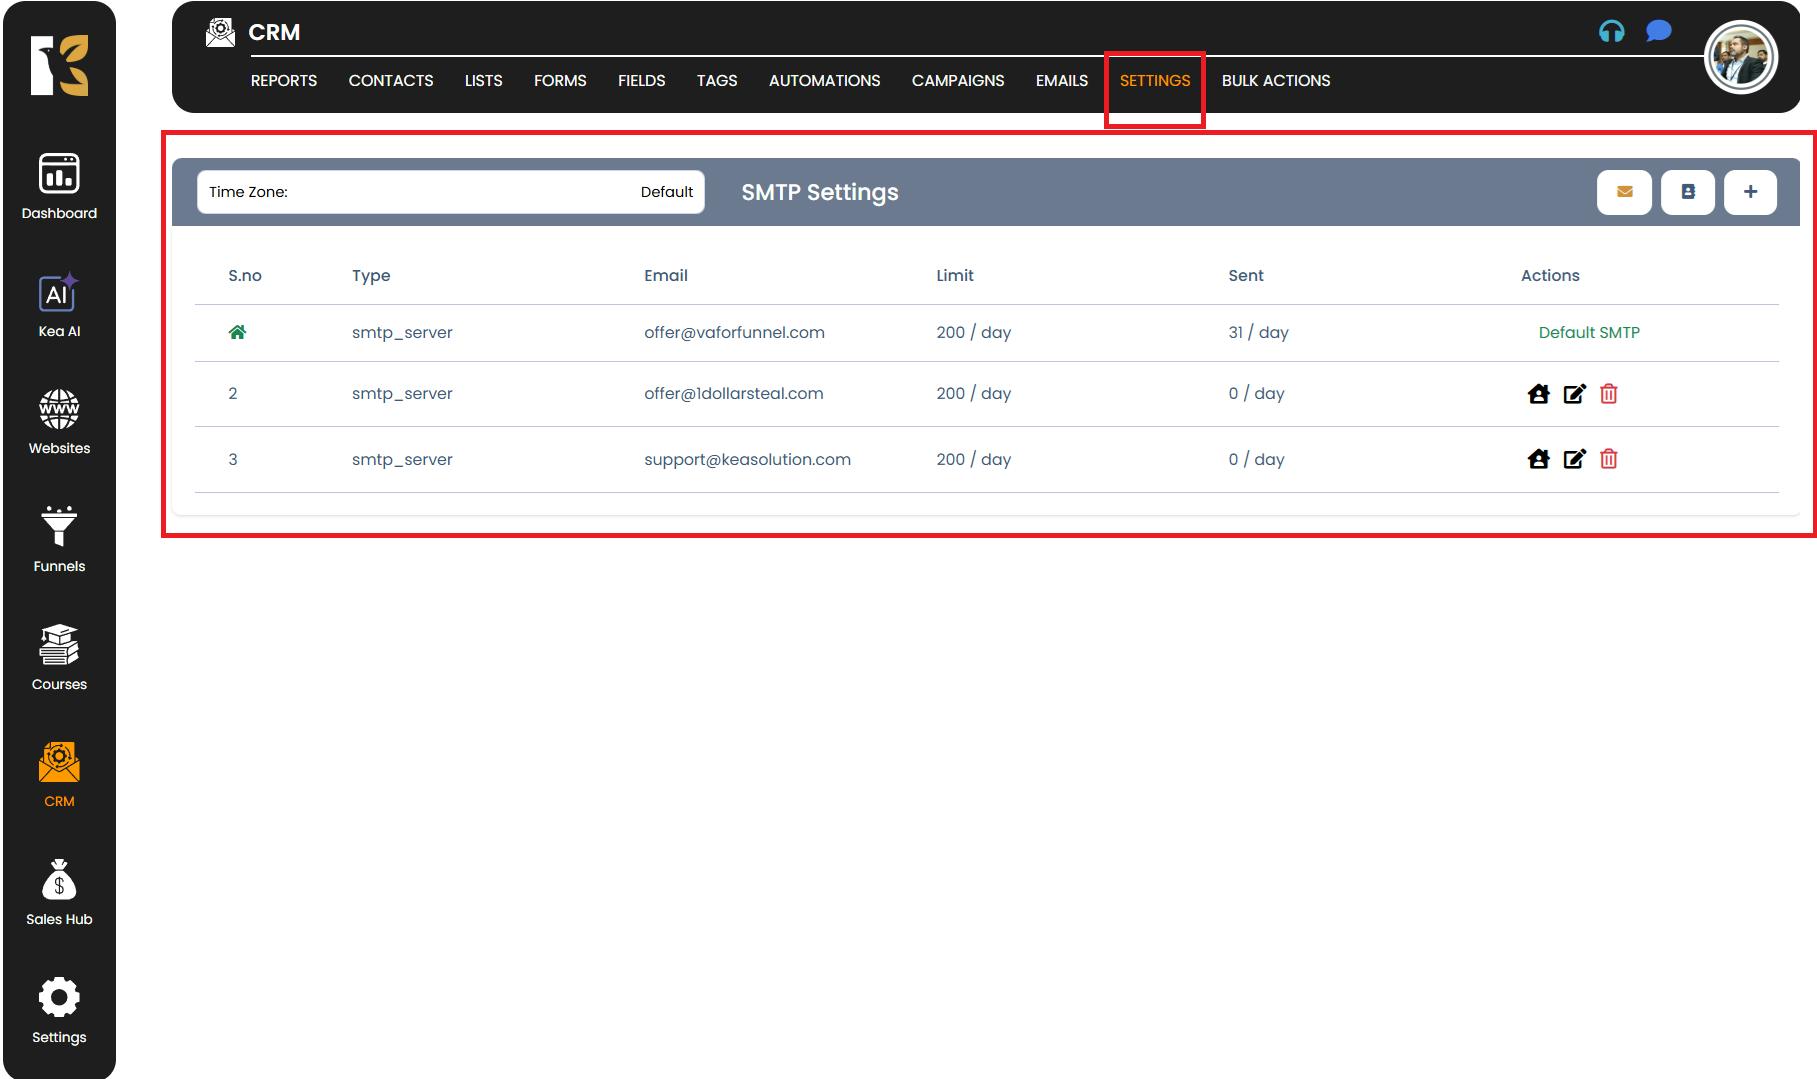
Open SMTP Settings
- In the Horizontal Menu at the top, find Reports.
- Next to it, click on Settings.
- You’ll be redirected to the SMTP Settings Page, where you’ll see a list of SMTP servers you’ve already connected (if any).
Add a New SMTP
- Below the Horizontal Menu, on the extreme right, click on the “+” (Add) button.
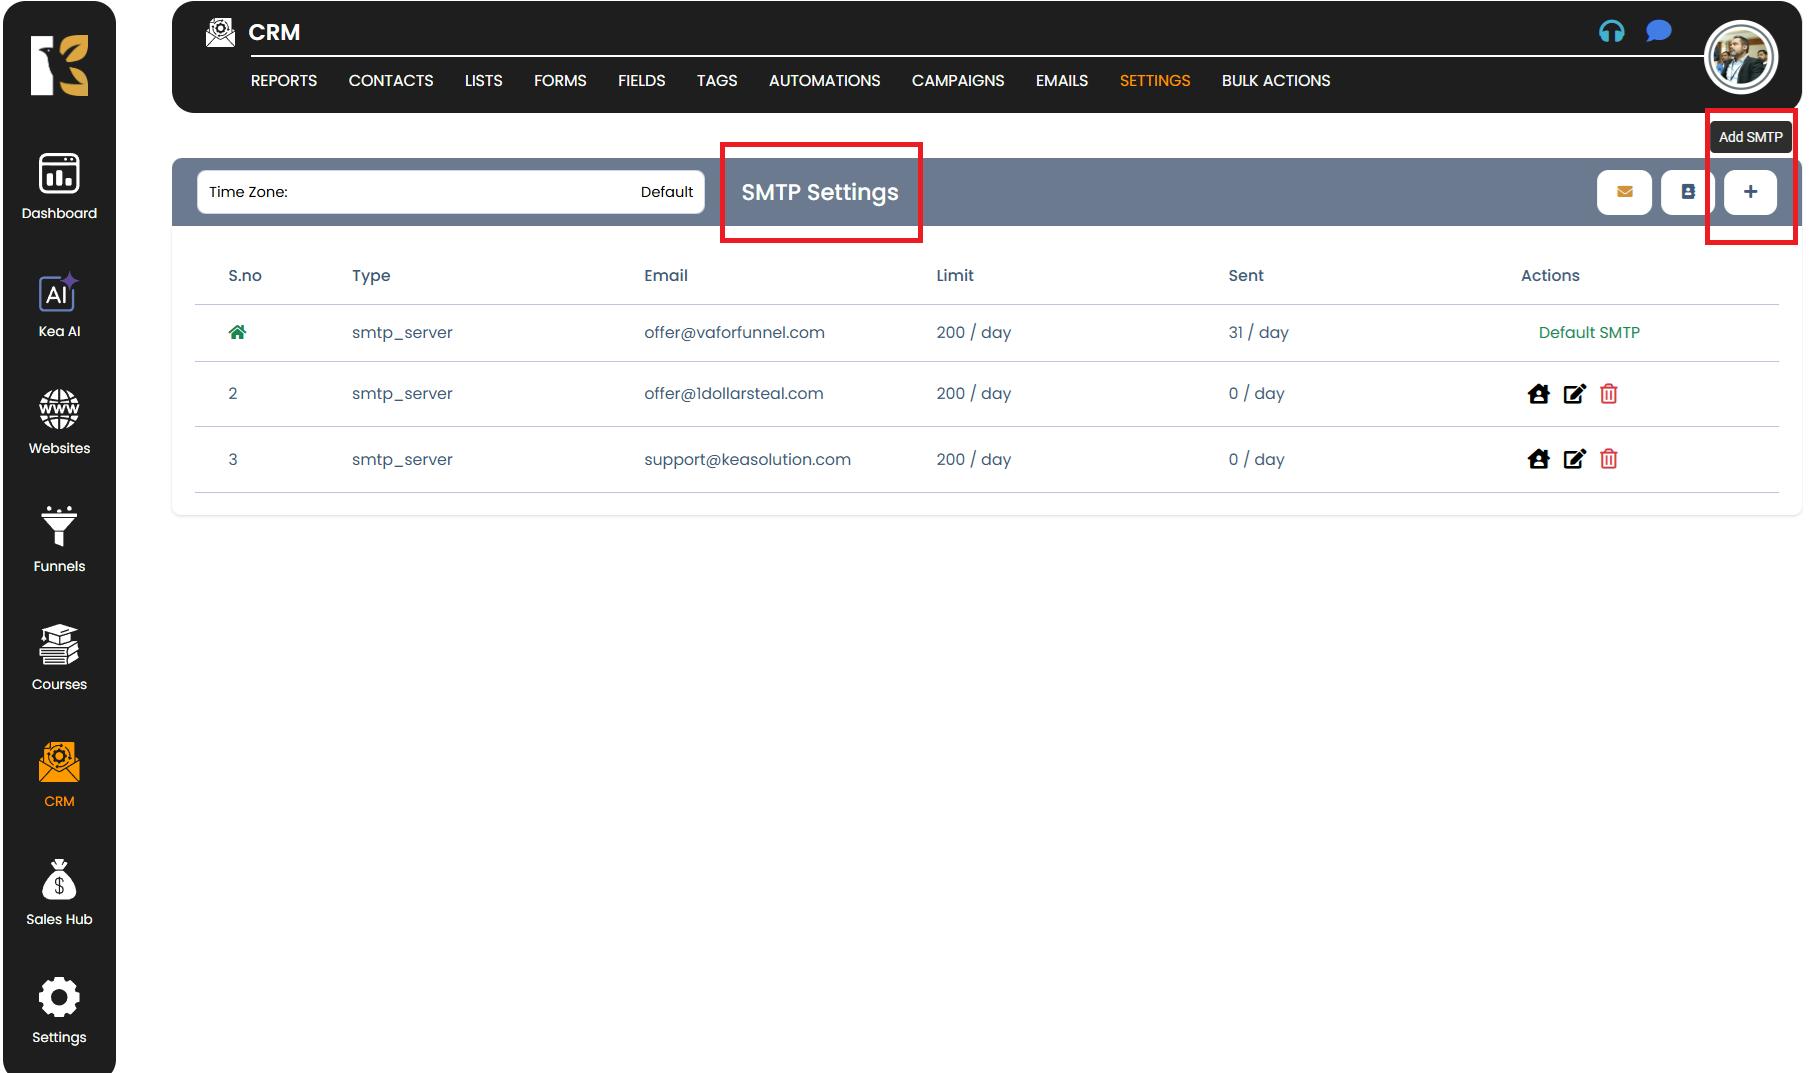
- A pop-up window will appear prompting you to enter SMTP details:
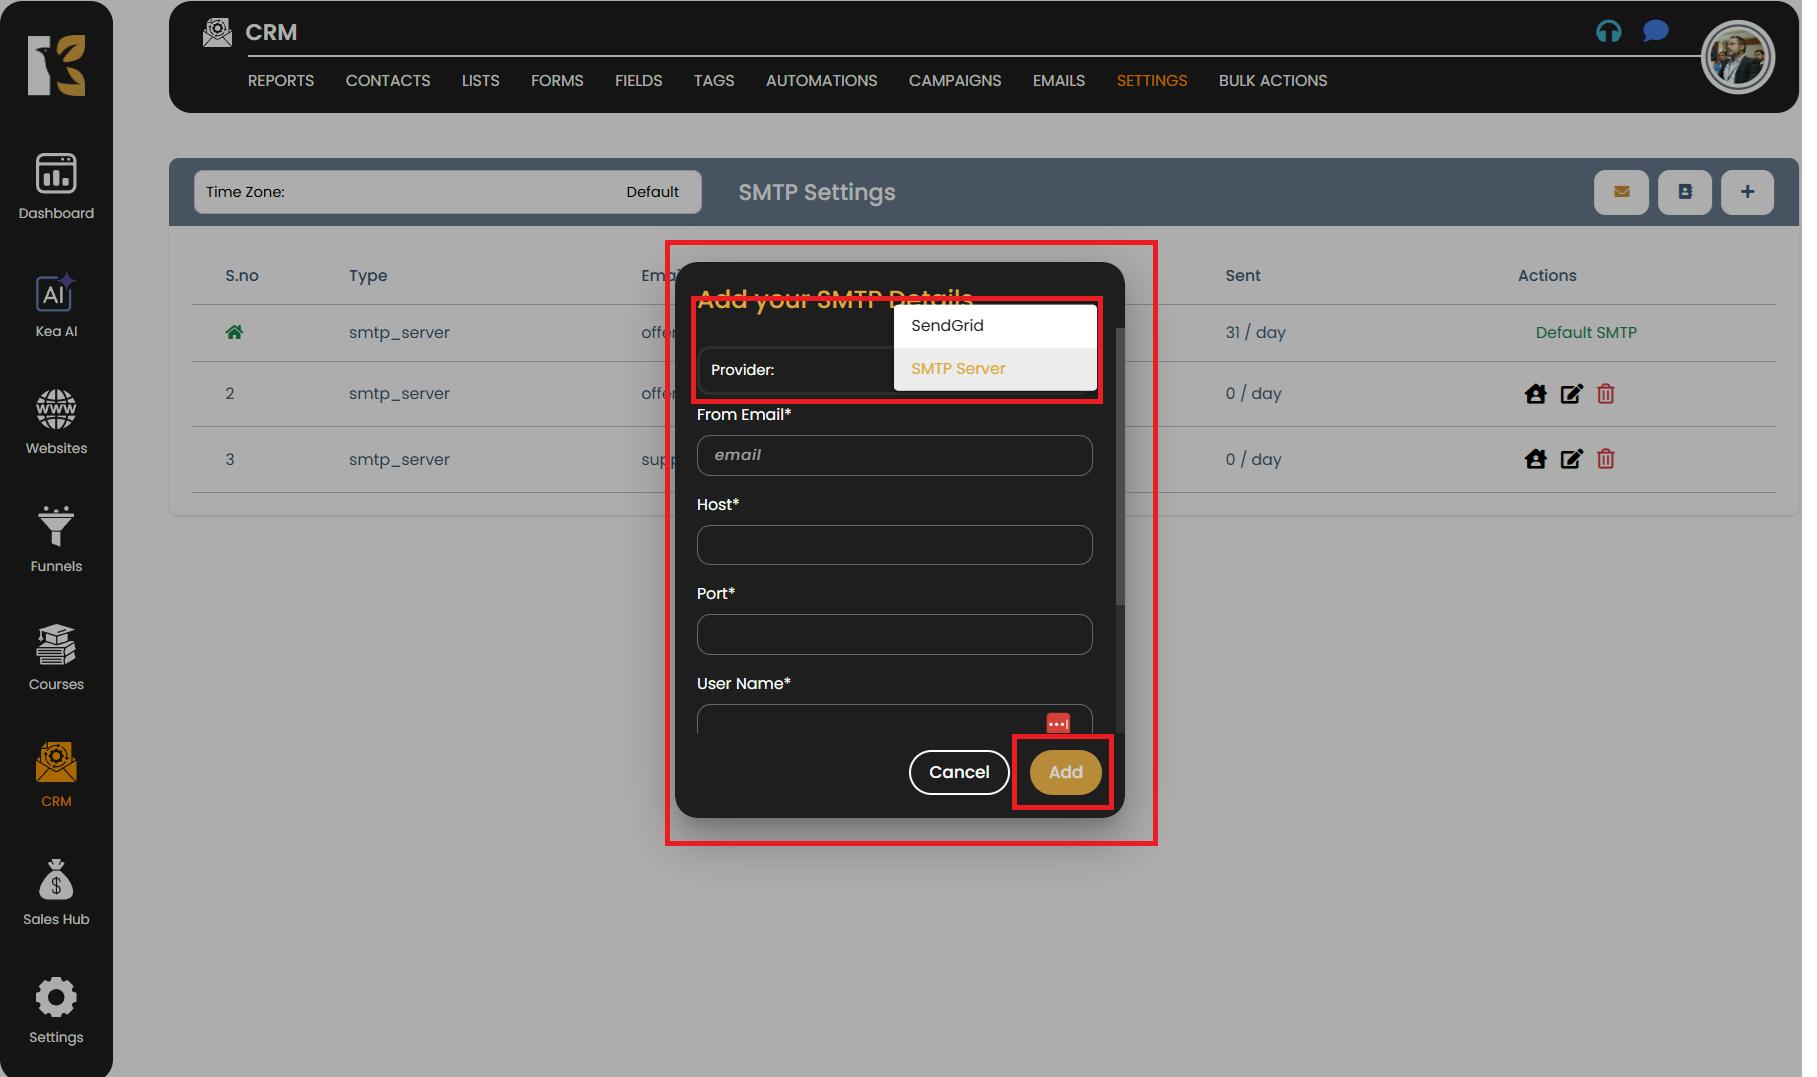
First-Time SMTP Setup:
Fill in the following fields:
- Provider Name
- From Email
- Host
- Port
- Username
- Password
If You’ve Already Integrated Your SMTP:
You can select your existing SMTP provider from the Provider Name dropdown and then enter:
- From Email
- API Key
- Tick the checkbox if you want to set this SMTP as your default one.
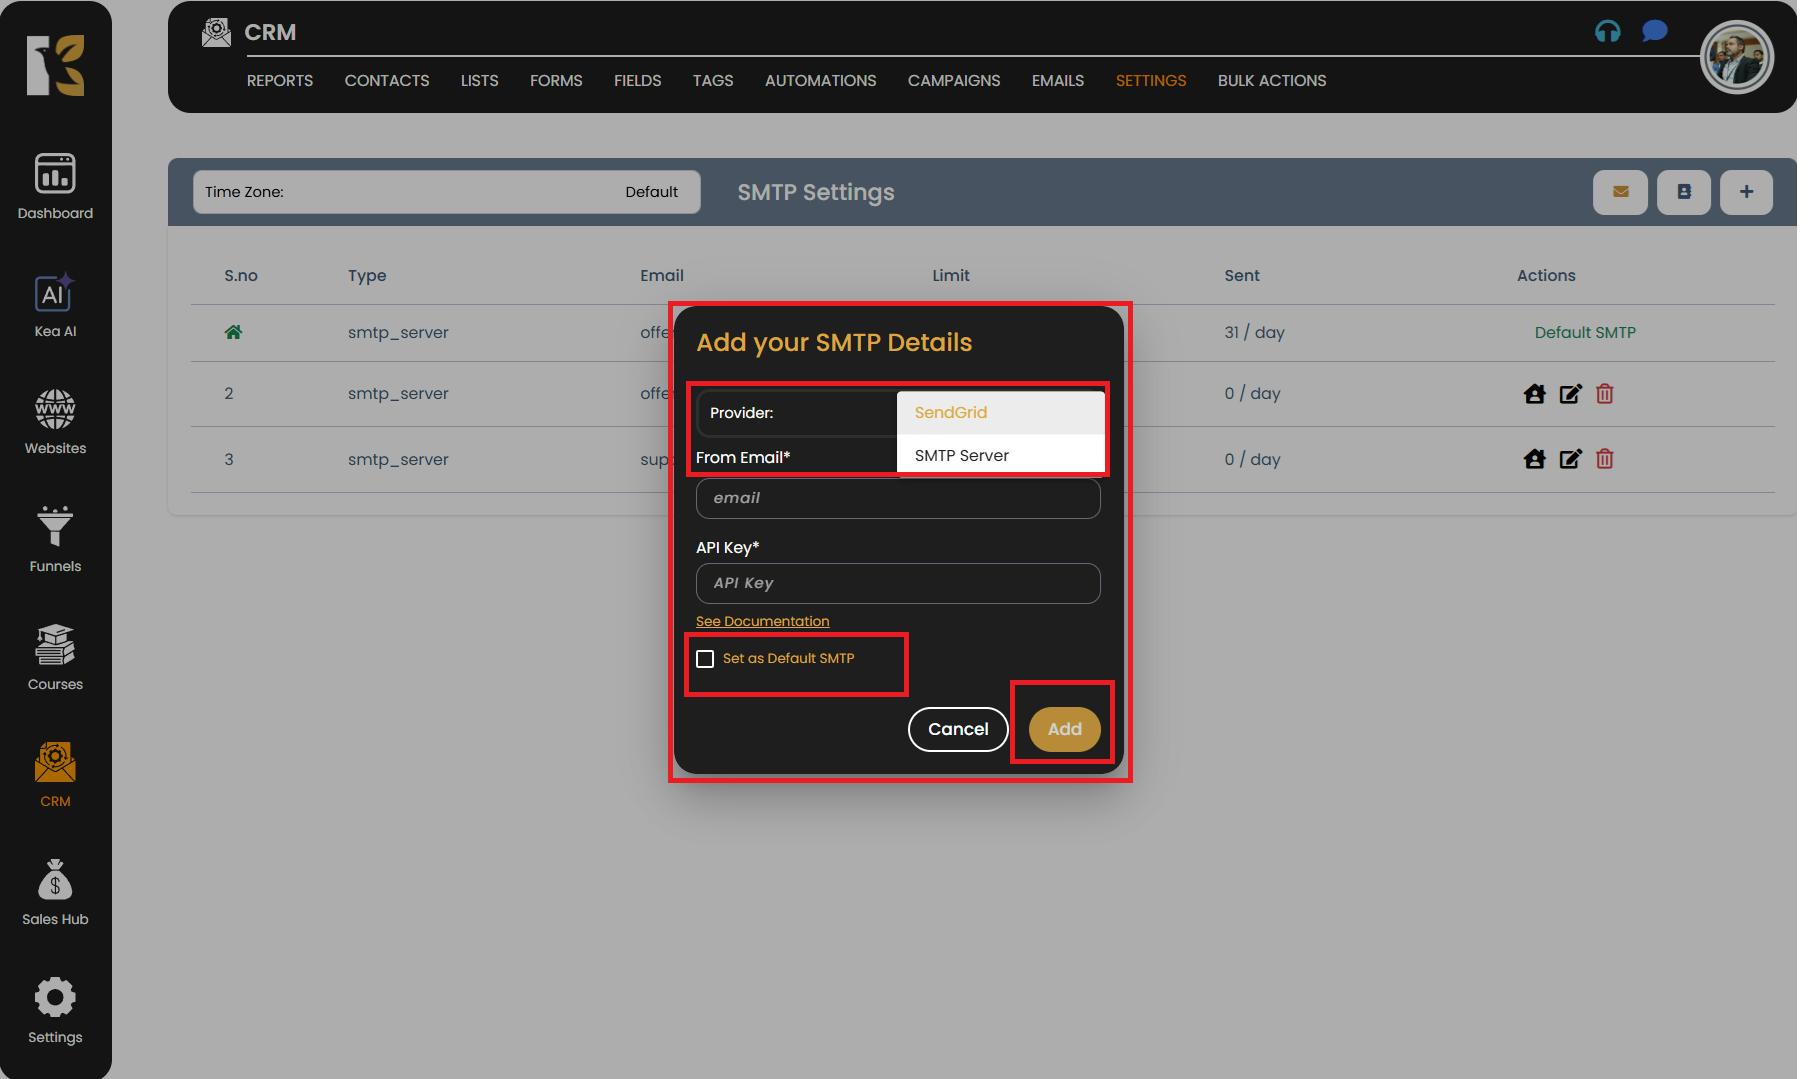
Save the SMTP Settings
- After filling in the required fields, click on the Add button.
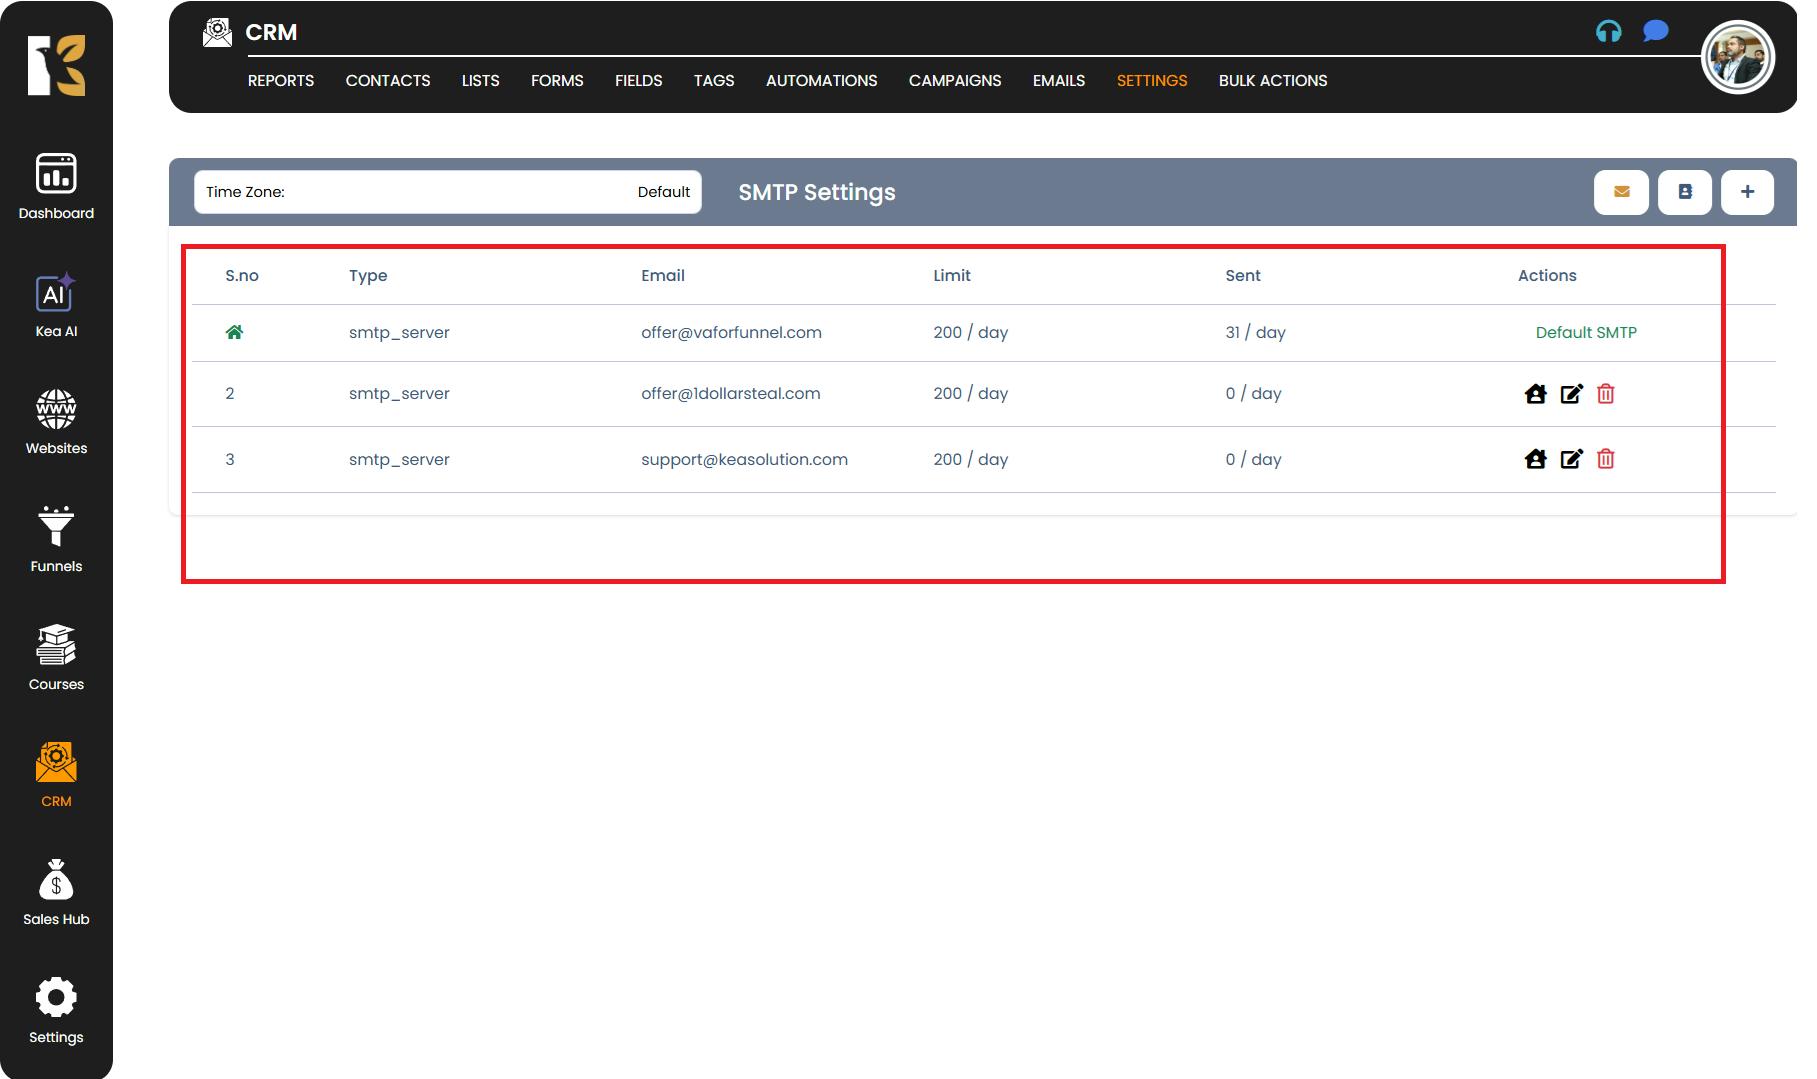
- Your SMTP settings will now be saved and will appear on the SMTP Dashboard.
Pro Tips for SMTP Setup
- Always double-check your Host, Port, and Credentials for accuracy.
- Use a dedicated email provider (like SendGrid, Amazon SES, or Mailgun) for better deliverability.
- If you’re unsure of the SMTP details, check with your email provider’s documentation.
- Mark your most frequently used SMTP as default to save time when sending campaigns.